| Hinweis |
|---|
Tunnelblick steht im Konflikt mit anderen VPN-Programmen. Es empfiehlt sich daher, dass Network-Connect vom Juniper-VPN zunächst deinstalliert wirdIn manchen Fällen kann es helfen, bei Problemen mit dem OpenVPN-Installer der HHU stattdessen die aktuellste Client-Version des Herstellers zu installieren. |
| Hinweis | ||
|---|---|---|
| ||
Tunnelblick conflicts with other VPN programs. It is therefore recommended that Network-Connect from the Juniper VPN be uninstalled first. |
Tunnelblick Installation
In some cases when the HHU OpenVPN installer causes problems it may be helpful to install the actual client version instead. |
Schritt 1:
GehenLaden Sie
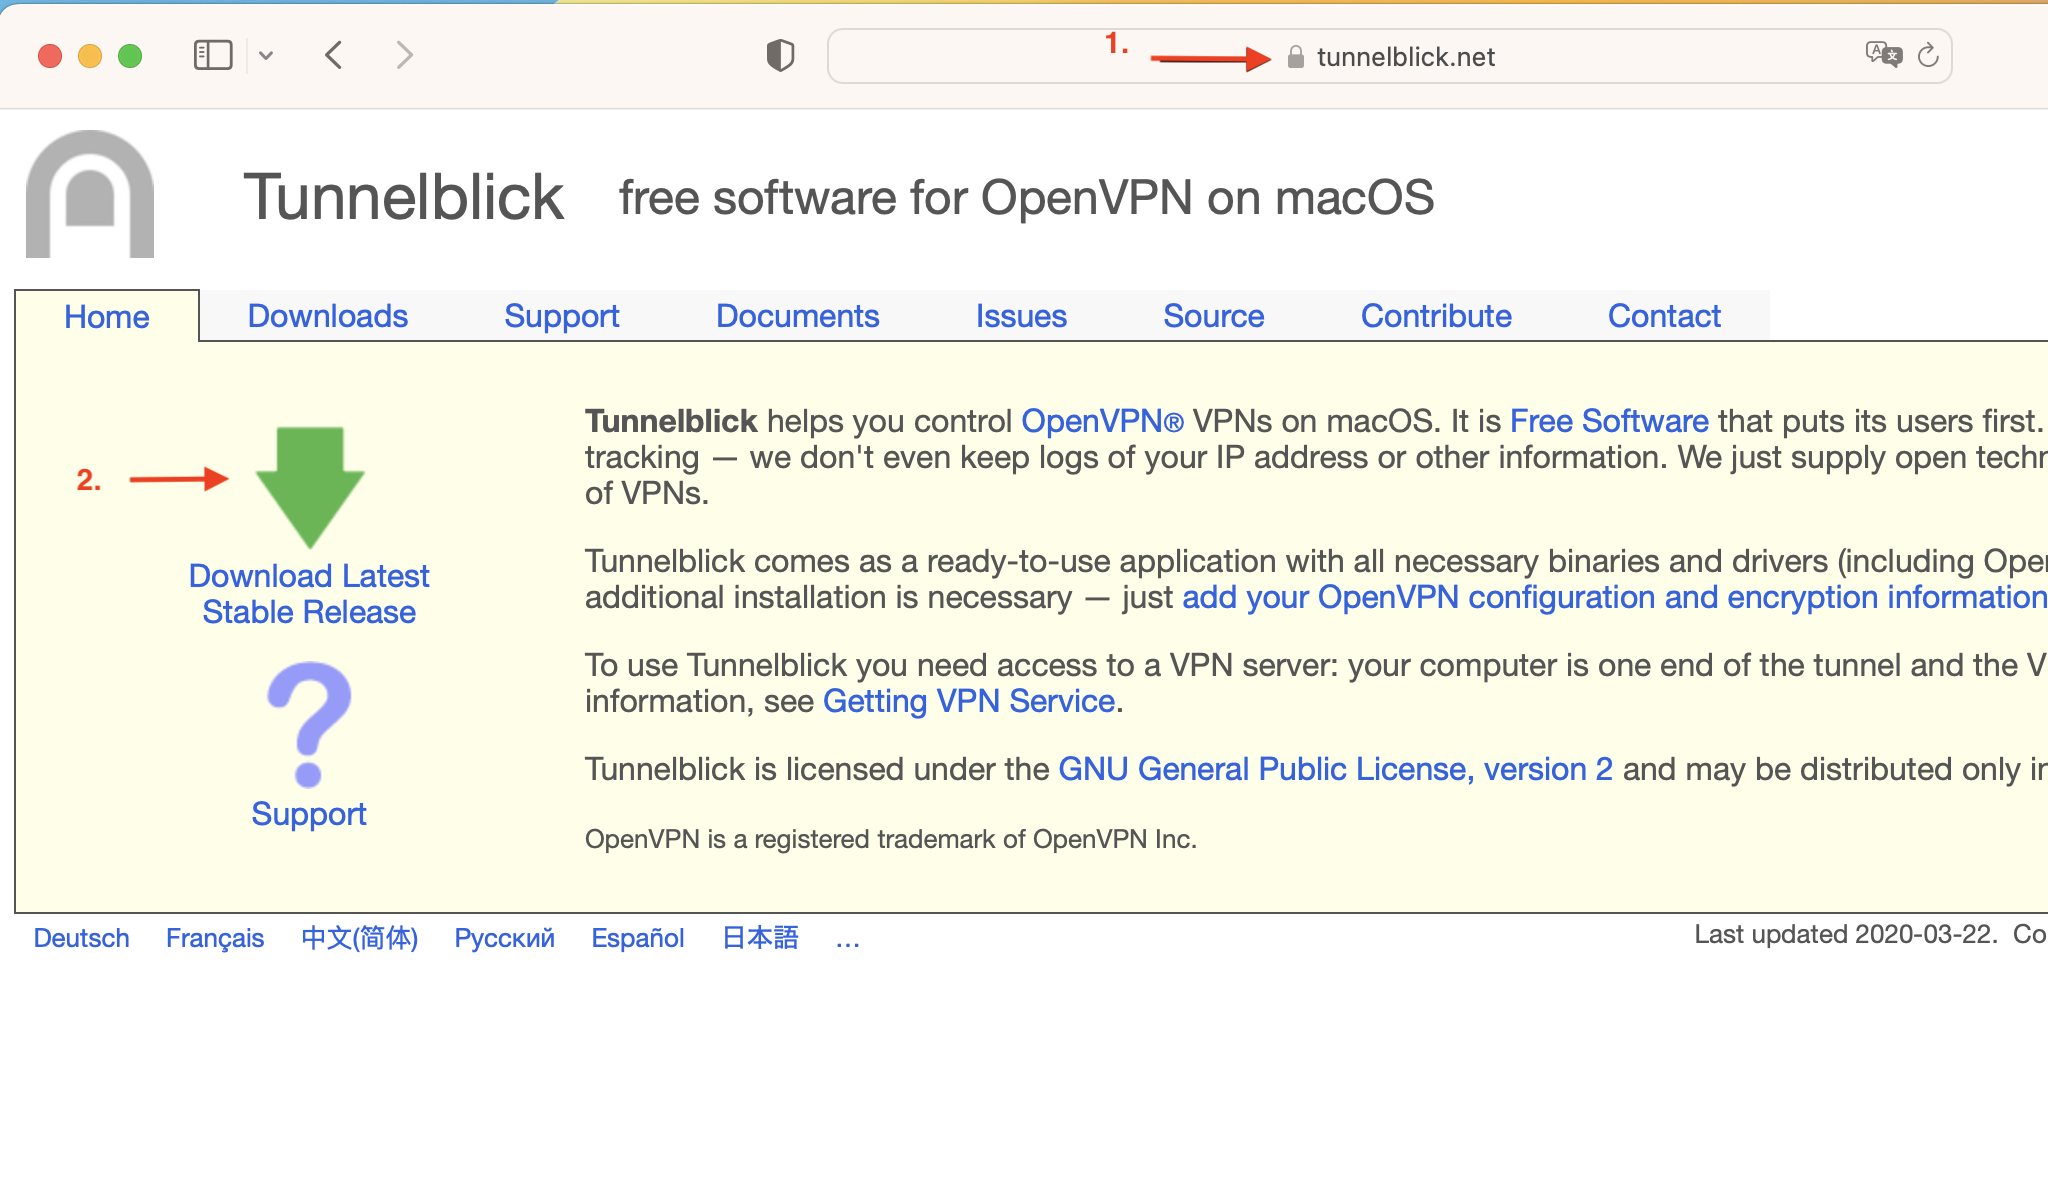
auf die Seite "tunnelblick.net" (1.) und laden Sie sich die letzte Version von Tunnelblick über den grünen Pfeil (2.) runter.Step 1: Go to the page "tunnelblick.net" (1.) and download the latest version of Tunnelblick via the green arrow (2.).
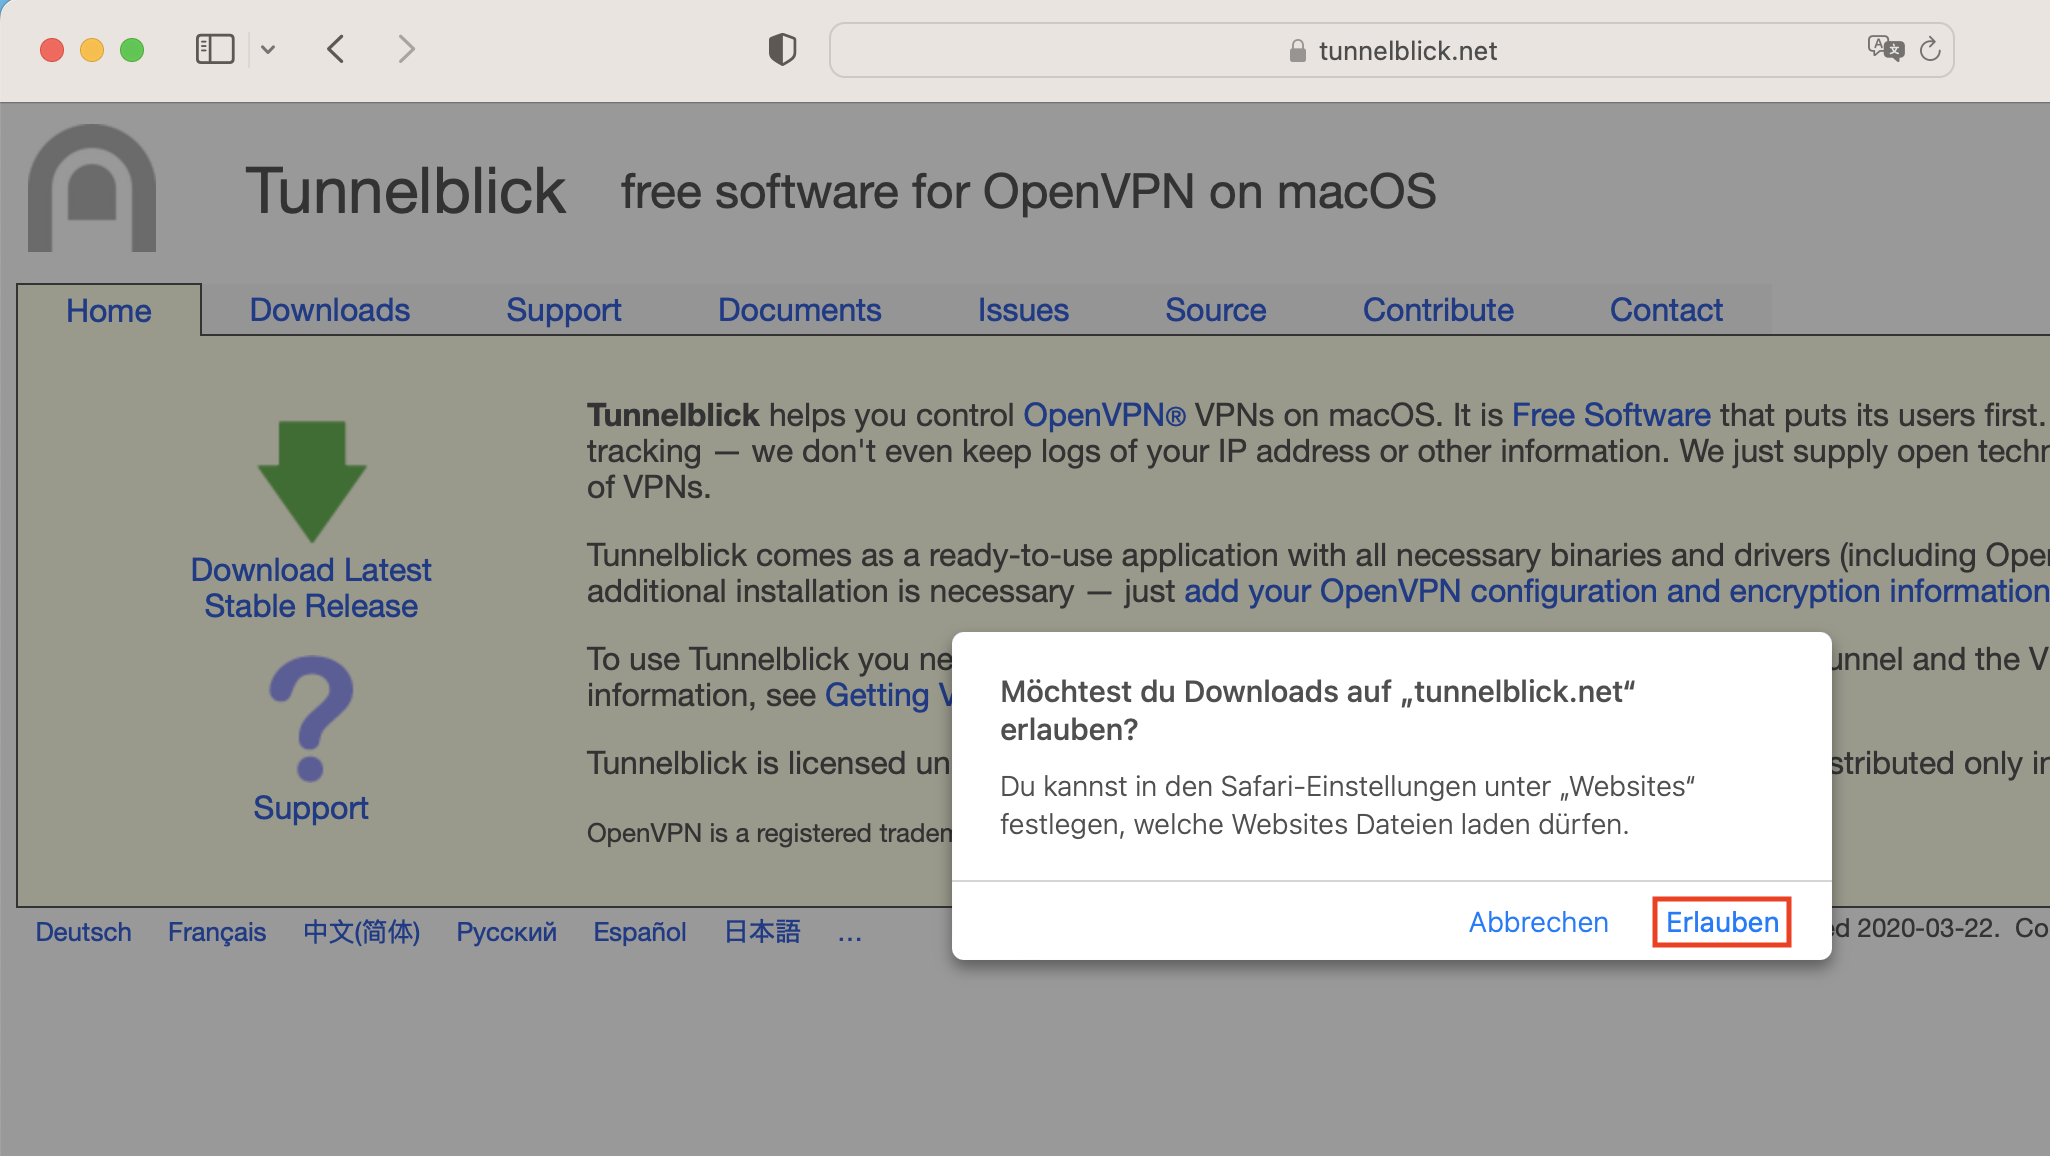
Schritt 2: Klicken Sie auf "Erlauben" um den Download durchzuführen.
Step 2: Click "Allow" to perform the download.

Schritt 3: Gehen Sie auf die Downloads über den Pfeil (1.) oben rechts im Bildschirm und klicken Sie auf die runter geladene Datei "Tunnelblick" (2.), um diese zu öffnen.
Step 3: Go to the downloads via the arrow (1.) at the top right of the screen and click on the downloaded file "Tunnelblick" (2.) to open it.
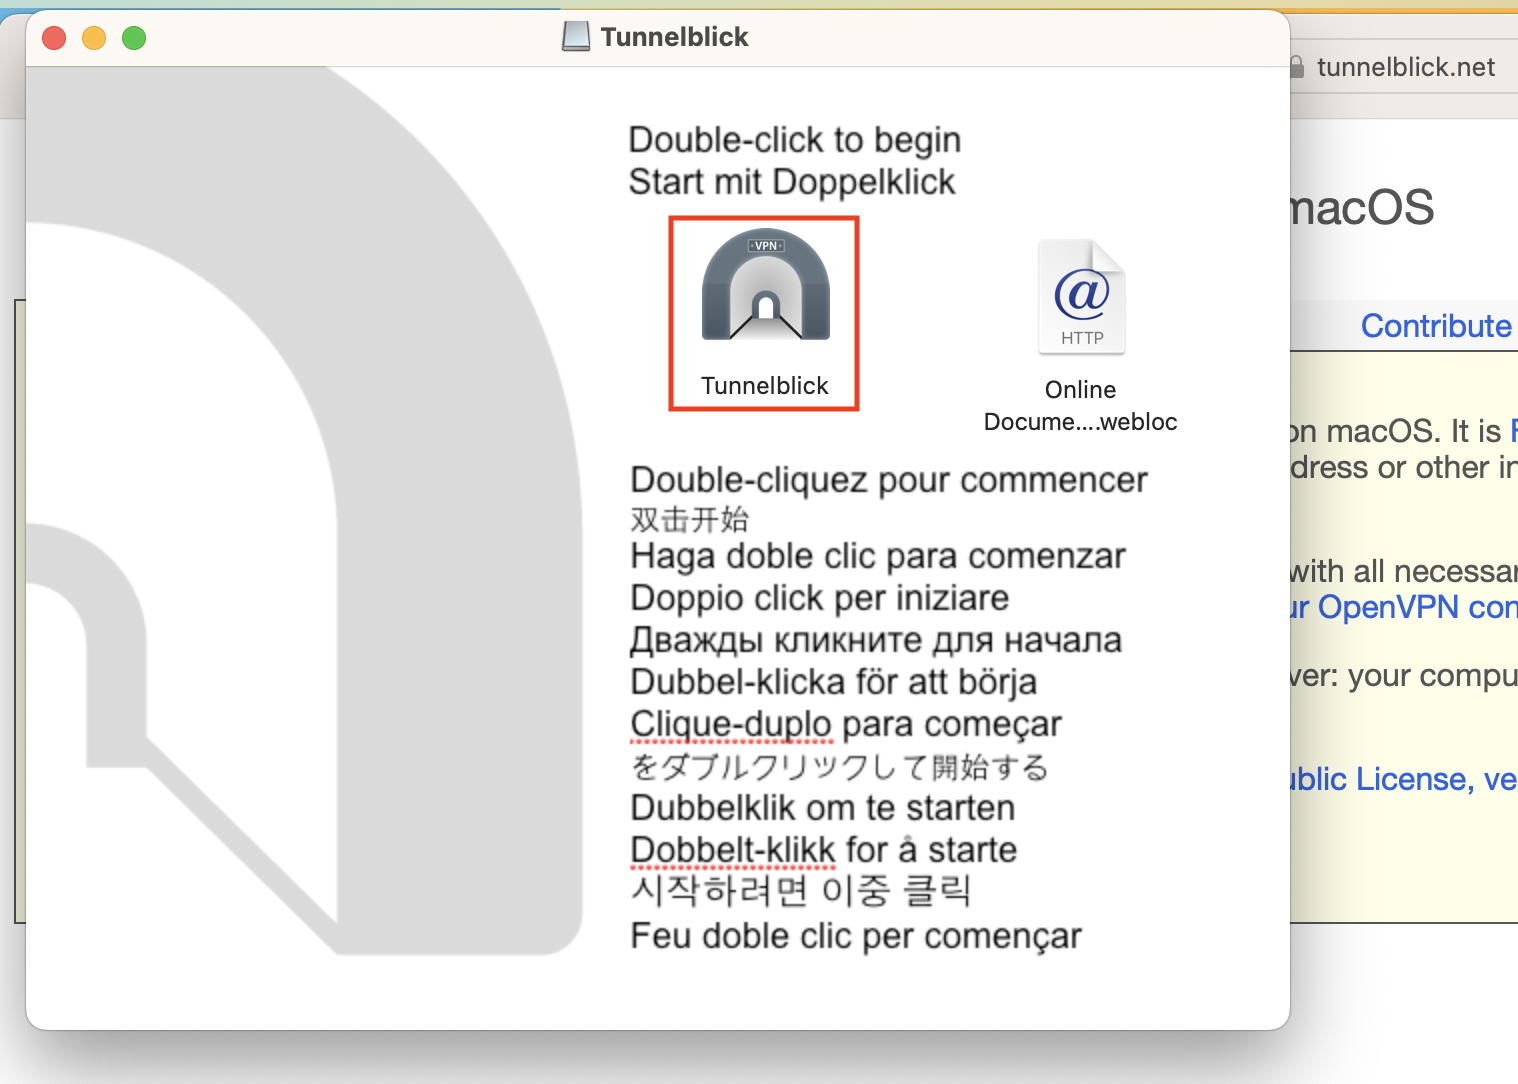
Schritt 4: Klicken Sie auf "Tunnelblick" um die Software zu installieren.
Step 4: Click on "Tunnelblick" to install the software.
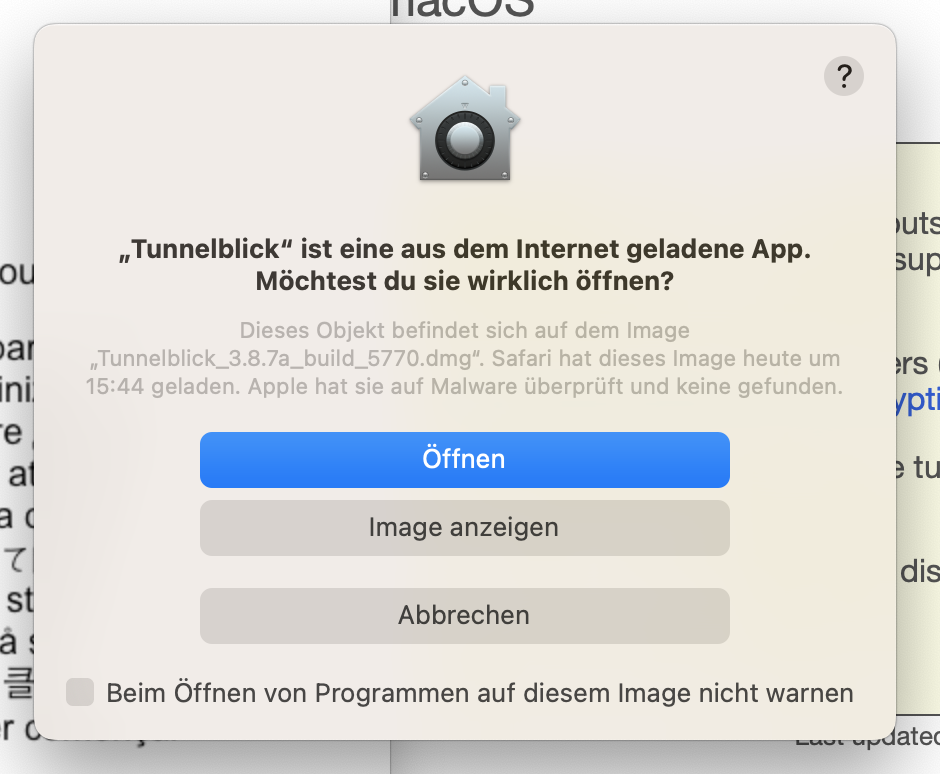
Schritt 5: Klicken Sie auf "Öffnen", um die Installation zu starten.
Step 5: Click "Open" to start the installation.

Schritt 6: Sie können die Konfiguration wie ausgewählt beibehalten und mit "Weiter" fortfahren.
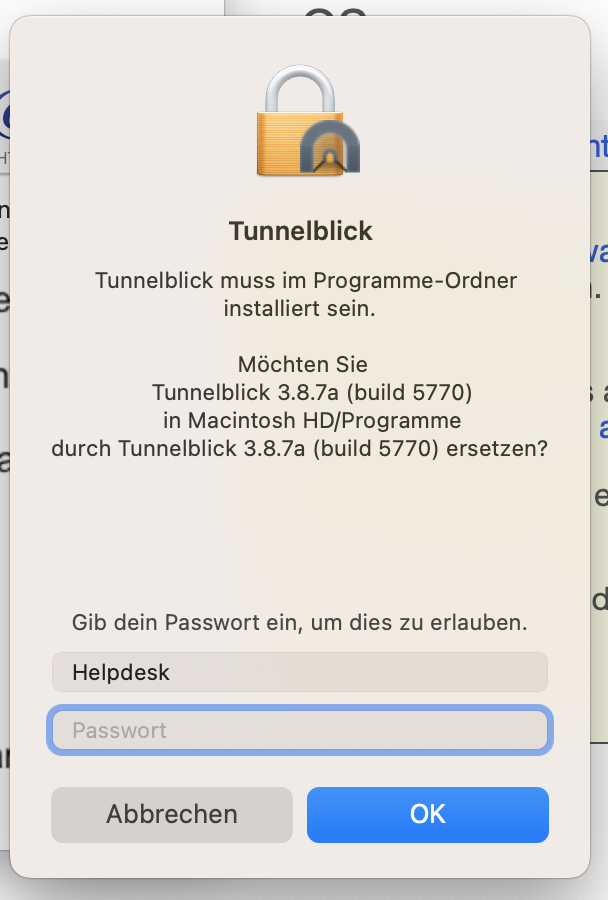
Schritt 7: Geben Sie anschließend das Passwort Ihres Macs ein.
Die Installation wird durchgeführt..
Step 6: You can keep the configuration as selected and continue with "Next".
Step 7: Then enter the password of your Mac.
The installation is performed..
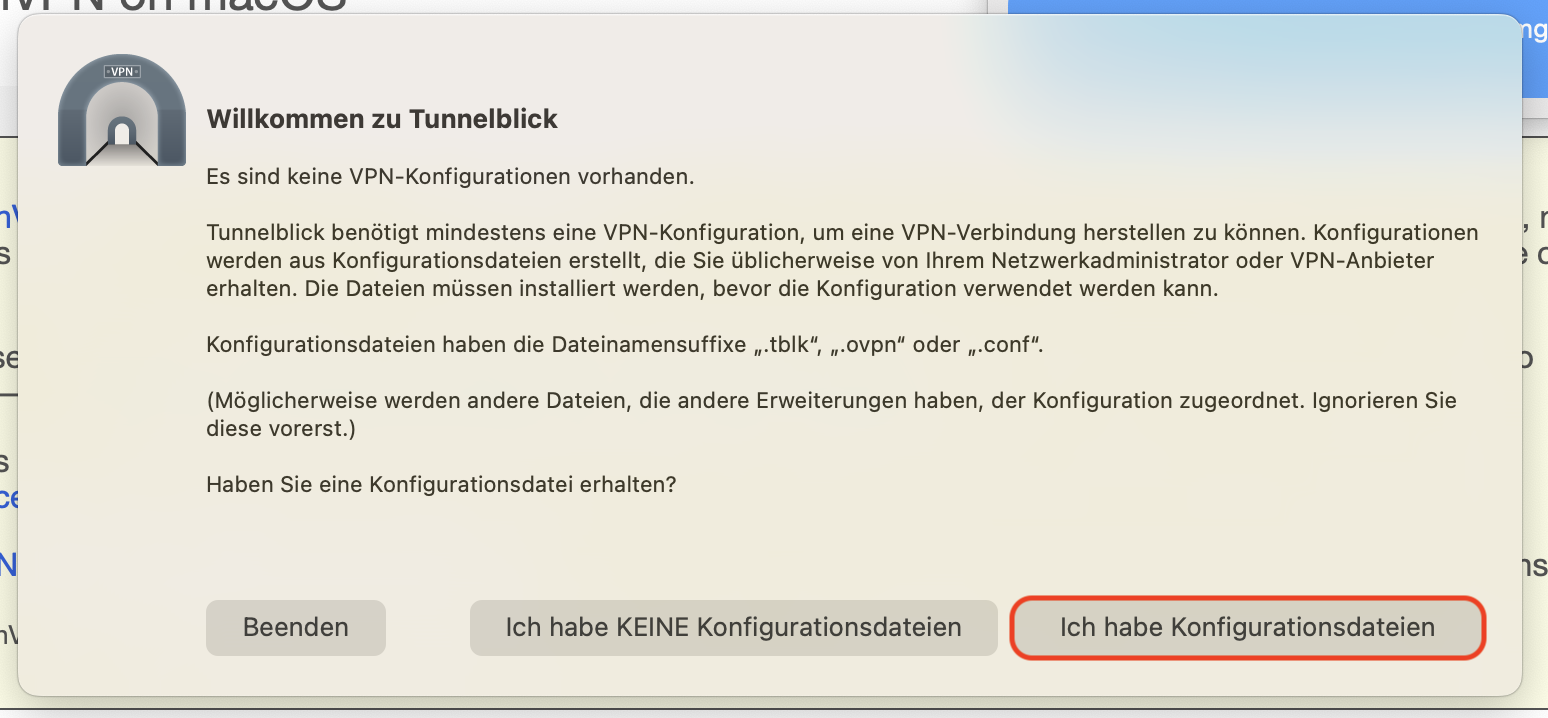
Schritt 8: Nach der Installation werden Sie gefragt, ob Sie eine Konfigurationsdatei haben. Klicken Sie auf "Ich habe Konfigurationsdateien".
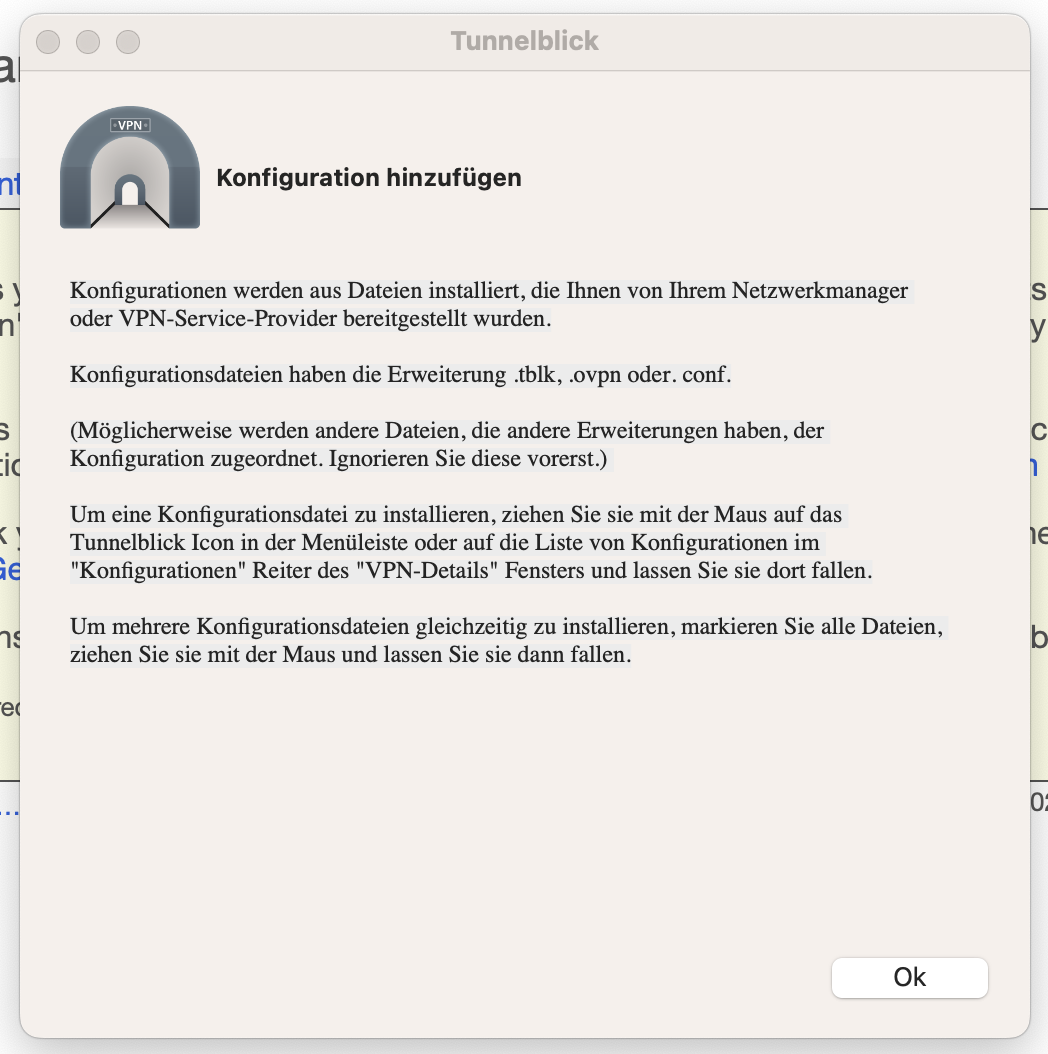
Im nächsten Fenster klicken Sie dann auf "Ok".
Step 8: After installation, you will be asked if you have a configuration file. Click on "I have configuration files".
Then click "Ok" in the next window.
Konfigurationsdatei herunterladen & installieren
Download & install configuration file
die für Ihr Betriebssystem notwendige Installer-Datei herunter: https://openvpn.net/client-connect-vpn-for-mac-os/
Step 1: Download the installer file necessary for your operating system: https://openvpn.net/client-connect-vpn-for-mac-os/
Schritt 2: Installieren Sie den OpenVPN Connect Client.
Step 2: Install the OpenVPN Connect Client.
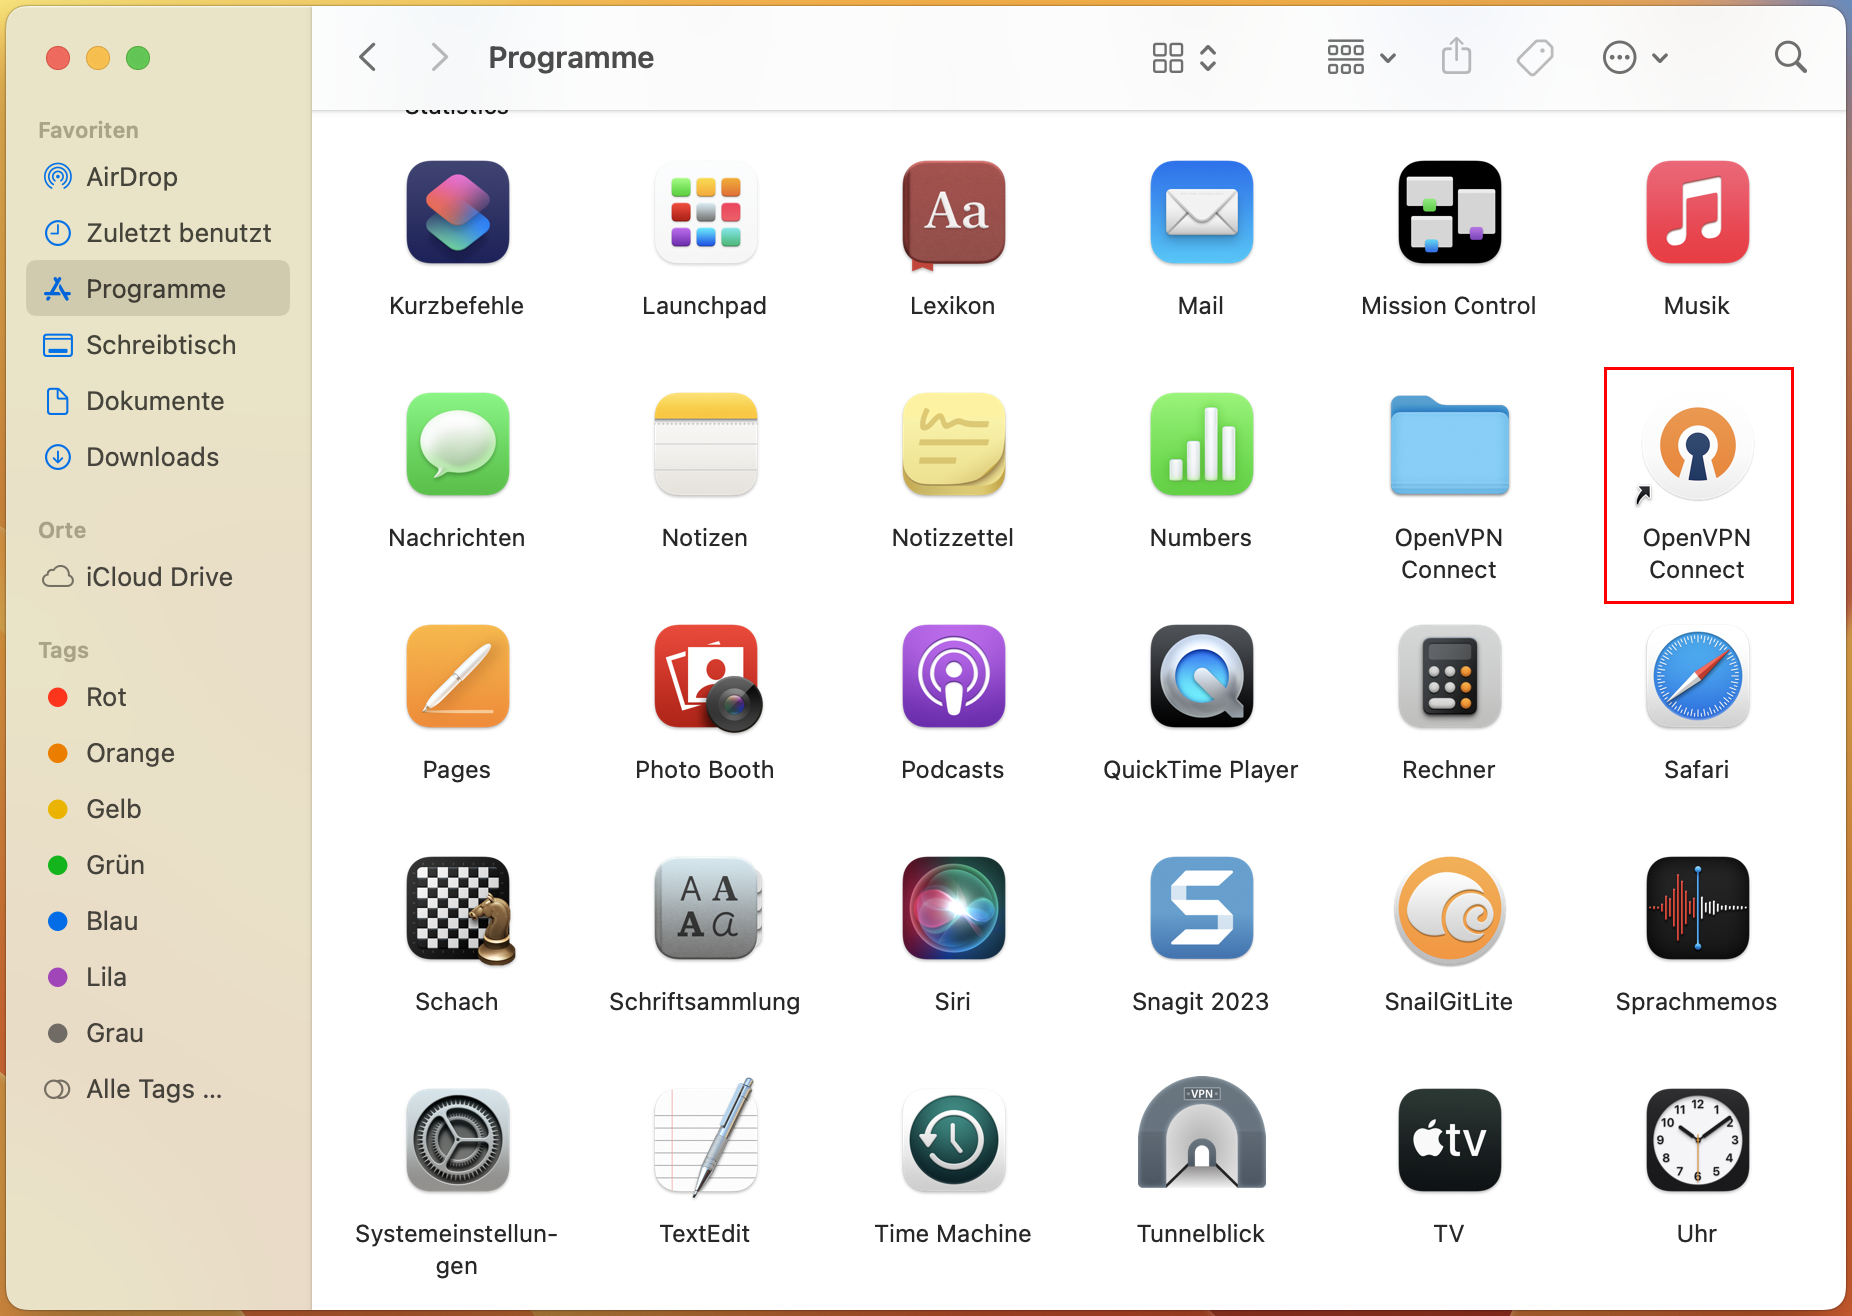
Schritt 3: Starten Sie OpenVPN Connect im "Programme"-Bereich des Finders.
Step 3: OpenVPN
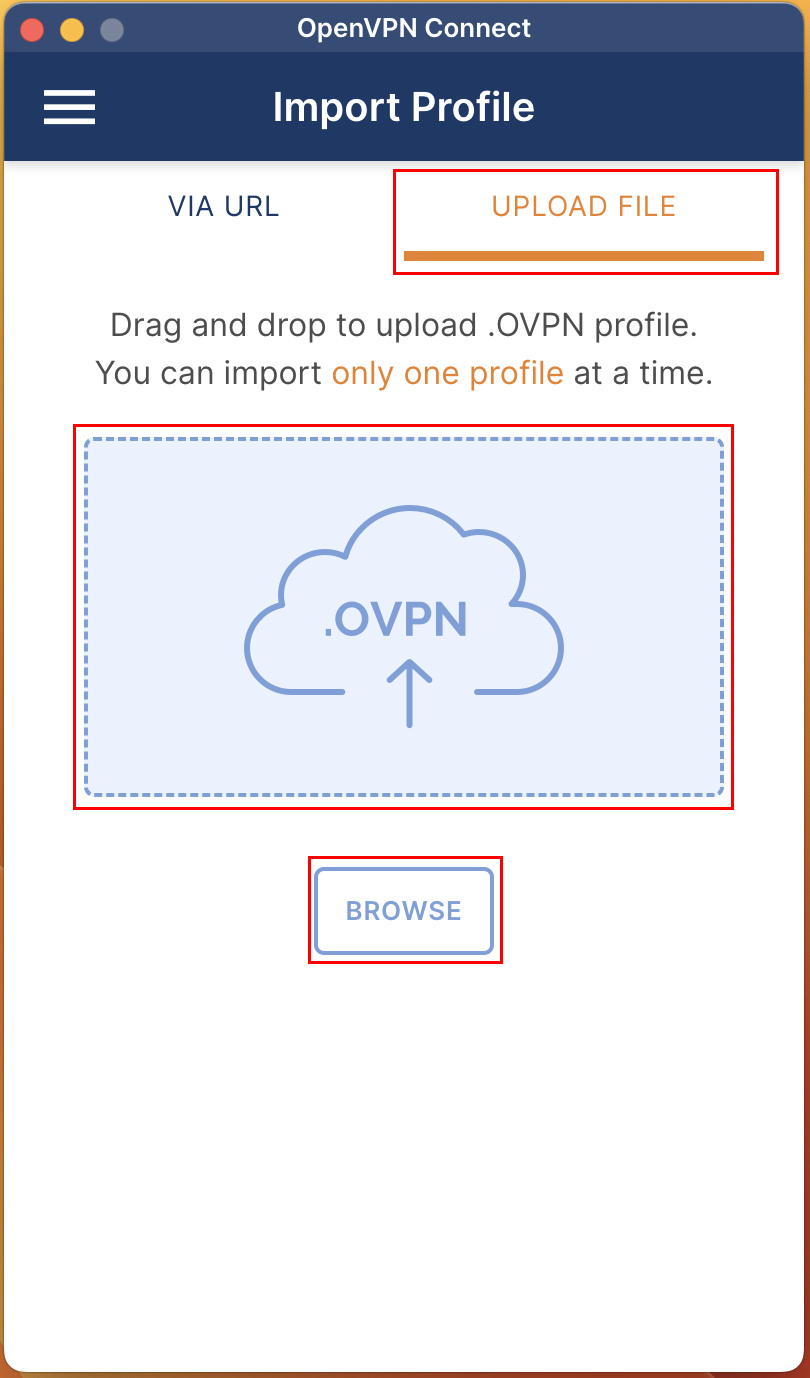
Schritt 4: Es öffnet sich nun ein Fenster von OpenVPN Connect. Klicken Sie hier (1) auf Upload File. Ziehen Sie nun die HHU-VPN.ovpn-Datei (Download von der Seite vpn.hhu.de) in (2) das graue Feld .ovpn oder laden Sie die Datei über (3) Browse hoch.
Step 4: A window of OpenVPN Connect will now open. Click here (1) on Upload File. Now drag the HHU-VPN.ovpn file (download from the page vpn.hhu.de) into (2) the gray field .ovpn or upload the file via (3) Browse.
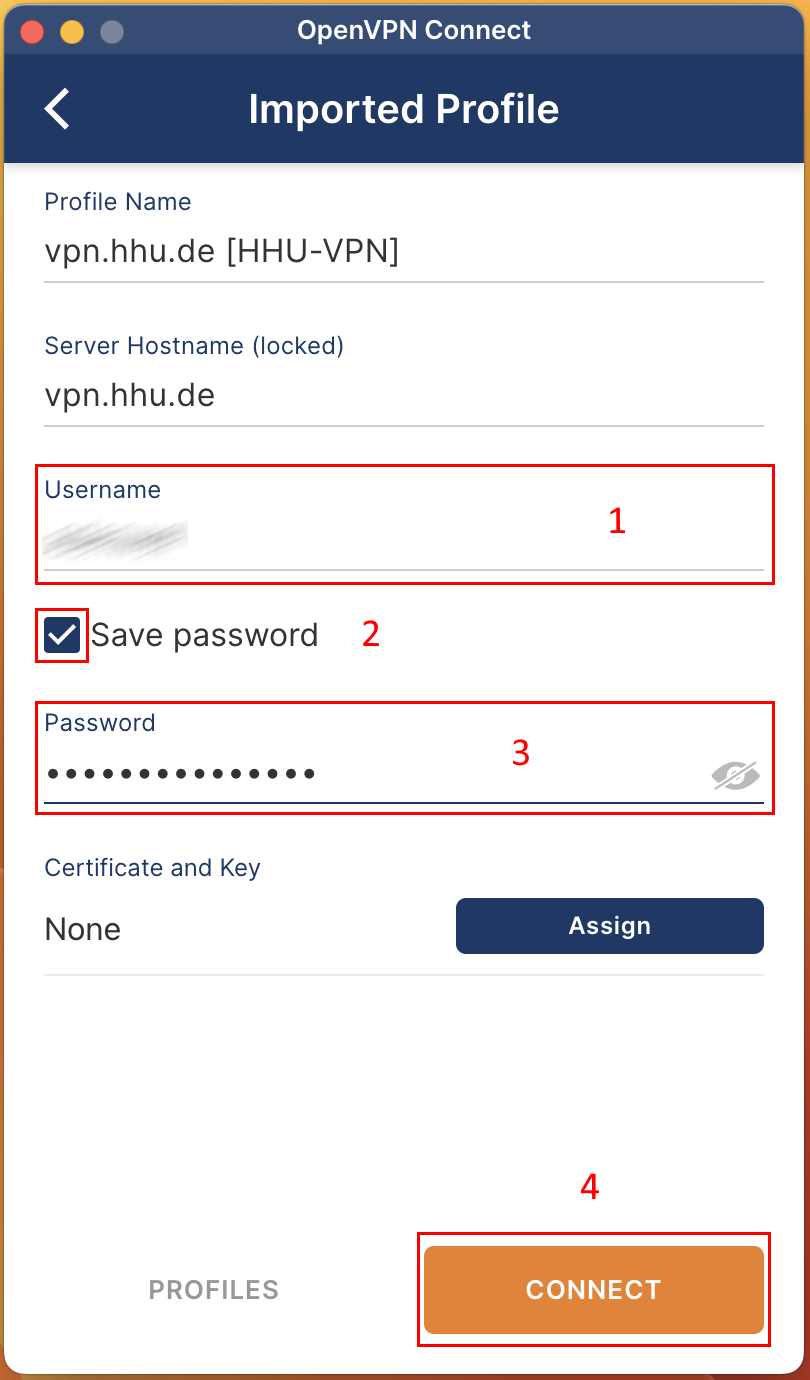
Schritt 5: Sie müssen nun Ihre Nutzerdaten eingeben: (1) Username ist Ihre Unikennung. Setzen Sie (2) ein Häkchen bei Save password. Geben Sie (3) als Password Ihr Unipasswort ein. Klicken Sie nun (4) auf Connect.
Step 5: You must now enter your user data: (1) Username is your university identifier. Set (2) a checkmark at Save password. Enter (3) your university password as Password. Now click (4) on Connect.
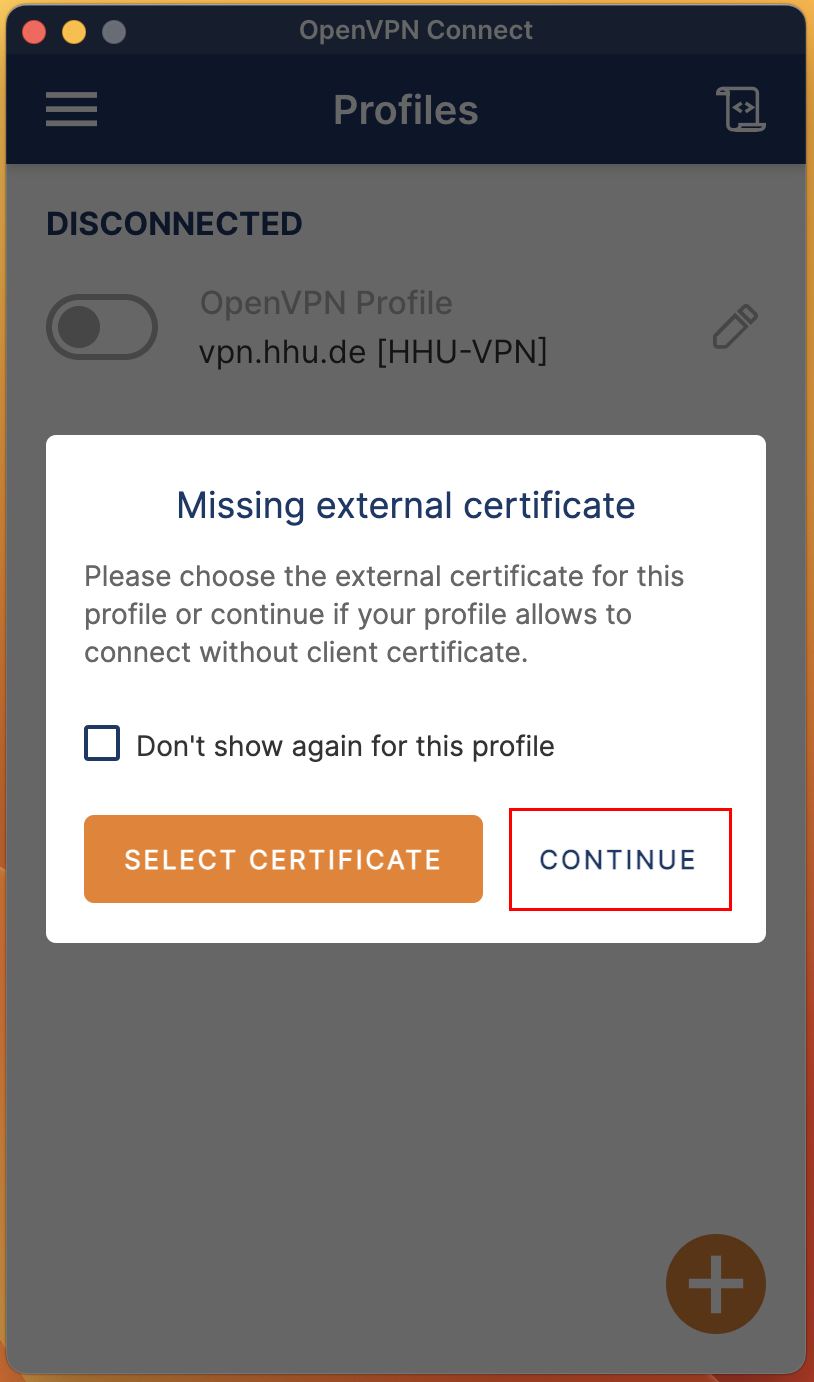
Schritt 6: Sie bekommen nun die Meldung, dass kein Zertifikat vorhanden ist („Missing external certificate“). Klicken Sie auf Continue.
Step 6: You will now receive a message that no certificate is available ("Missing external certificate"). Click Continue.
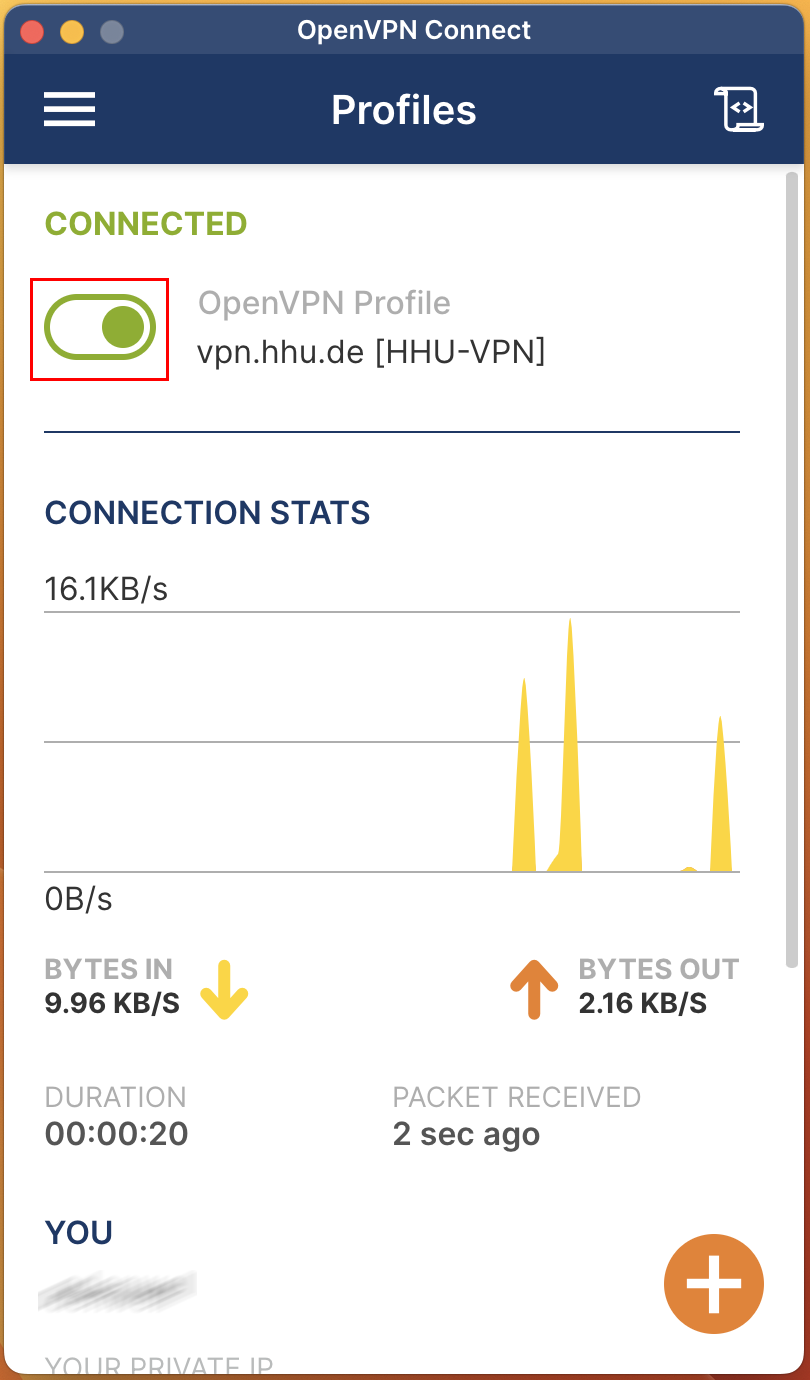
Schritt 7: OpenVPN baut nun eine Verbindung zum HHU-Netz auf. Die Verbindung steht, wenn bei Profiles in grün Connected angezeigt wird. Um OpenVPN zu beenden, klicken Sie einfach auf den grünen Schieber unter „Connected“.
Step 7: OpenVPN now establishes a connection to the HHU network. The connection is established when Connected is displayed in green under Profiles. To terminate OpenVPN, simply click on the green slider under "Connected"
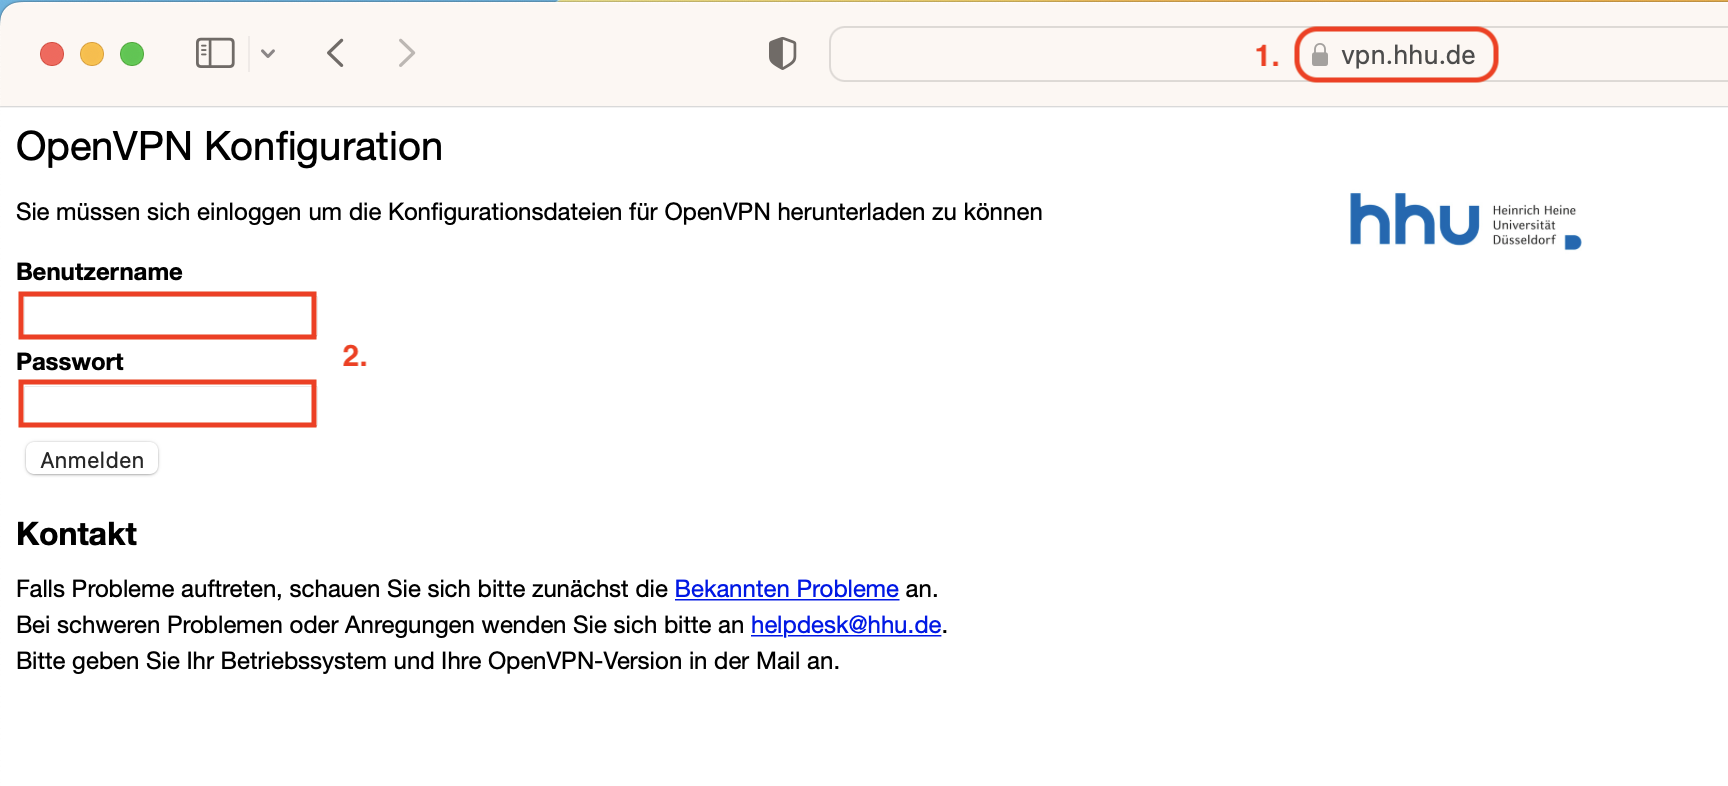
Schritt 1: Gehen Sie auf die Seite vpn.hhu.de (1.) und loggen Sie sich mit Ihrer Unikennung und dem dazugehörigen Passwort (2.) ein.
Step 1: Go to the vpn.hhu.de page (1.) and log in with your university ID (Unikennung) and the corresponding password (2.).
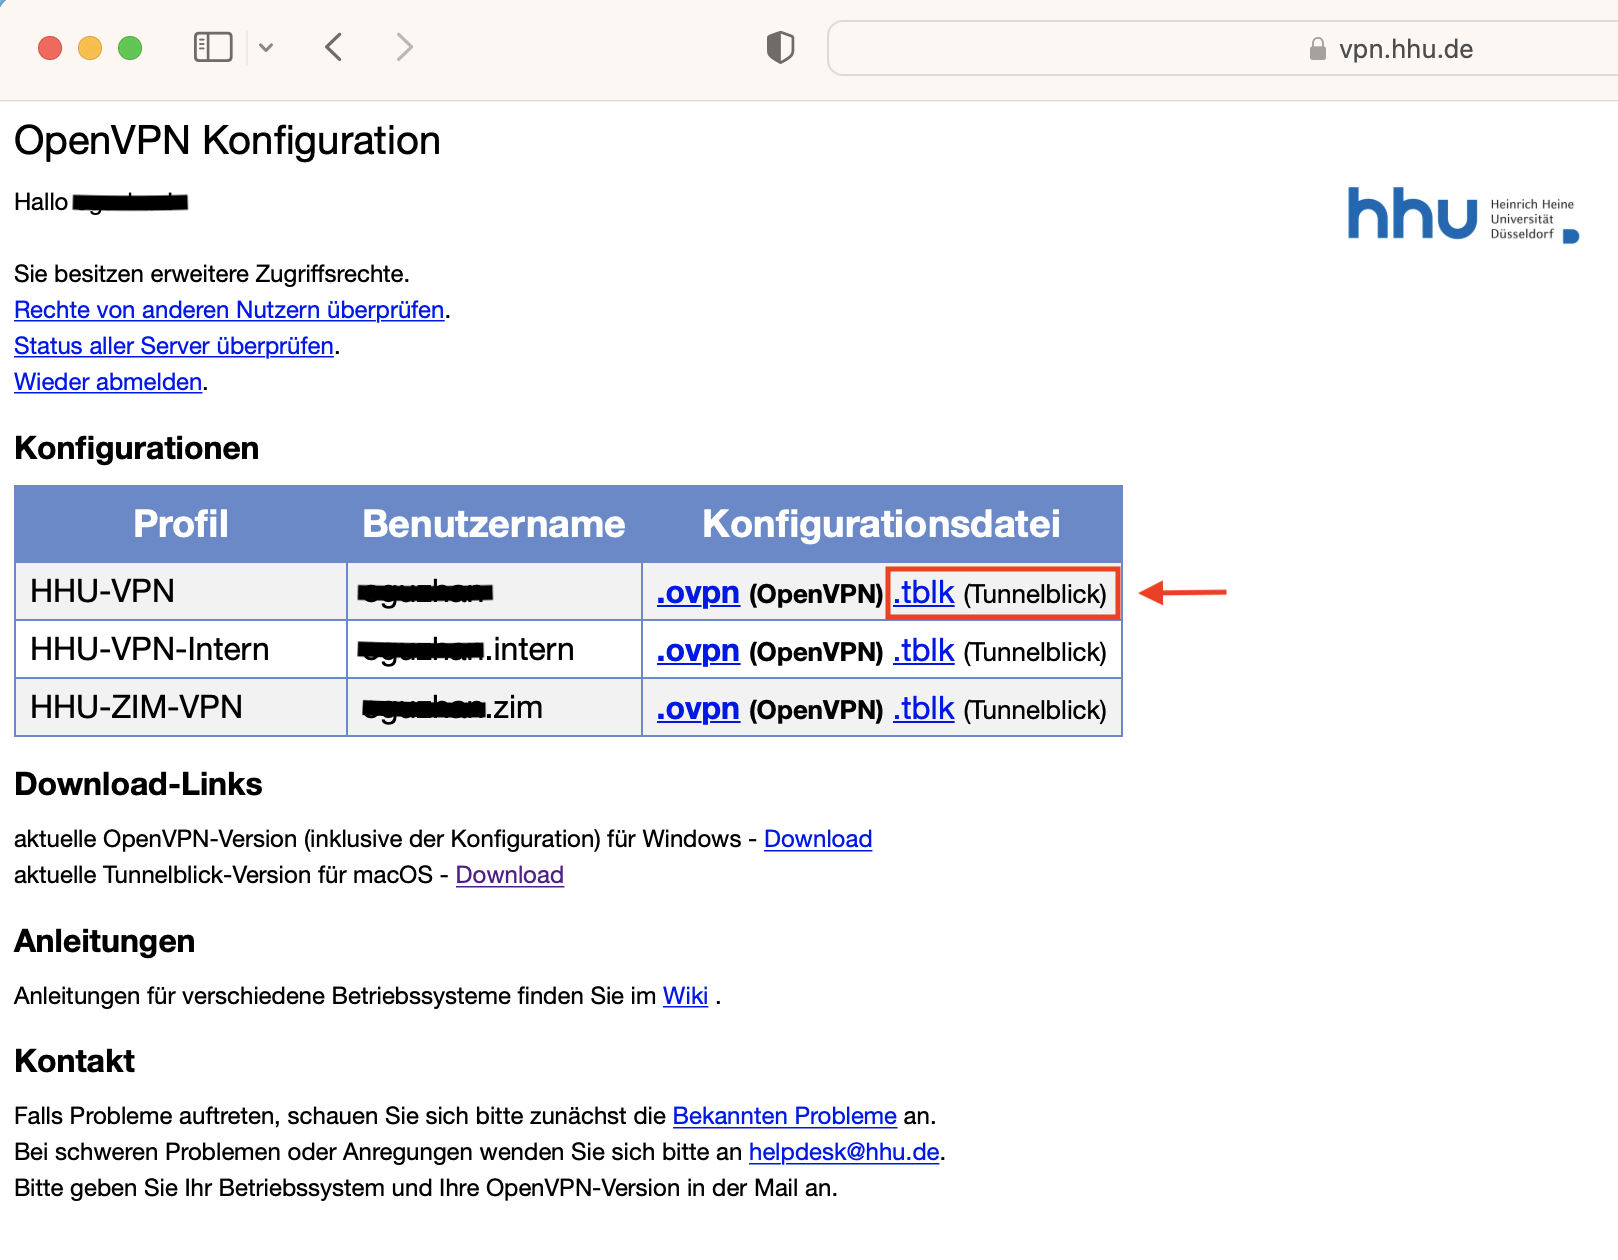
Schritt 2: Unter dem Punkt Konfigurationen → Konfigurationsdatei finden Sie die Konfigurationsdatei ".tblk (Tunnelblick)". Laden Sie diese herunter.
Hinweis: Der Unterschied zwischen dem Profil "HHU-VPN" und "HHU-VPN-Intern" ist, dass Sie mit dem "HHU-VPN-Intern"-Profil lediglich bei den HHU-Seiten den VPN-Tunnel nutzen. Bei jeglichen anderen Seiten wird der VPN-Tunnel ausgeschlossen.
Step 2: Under the item Configurations → Configuration file you will find the configuration file ".tblk (Tunnelblick)". Download this.
Note: The difference between the "HHU-VPN" and "HHU-VPN-Internal" profile is that with the "HHU-VPN-Internal" profile you only use the VPN tunnel for HHU pages. For any other pages the VPN tunnel is excluded.
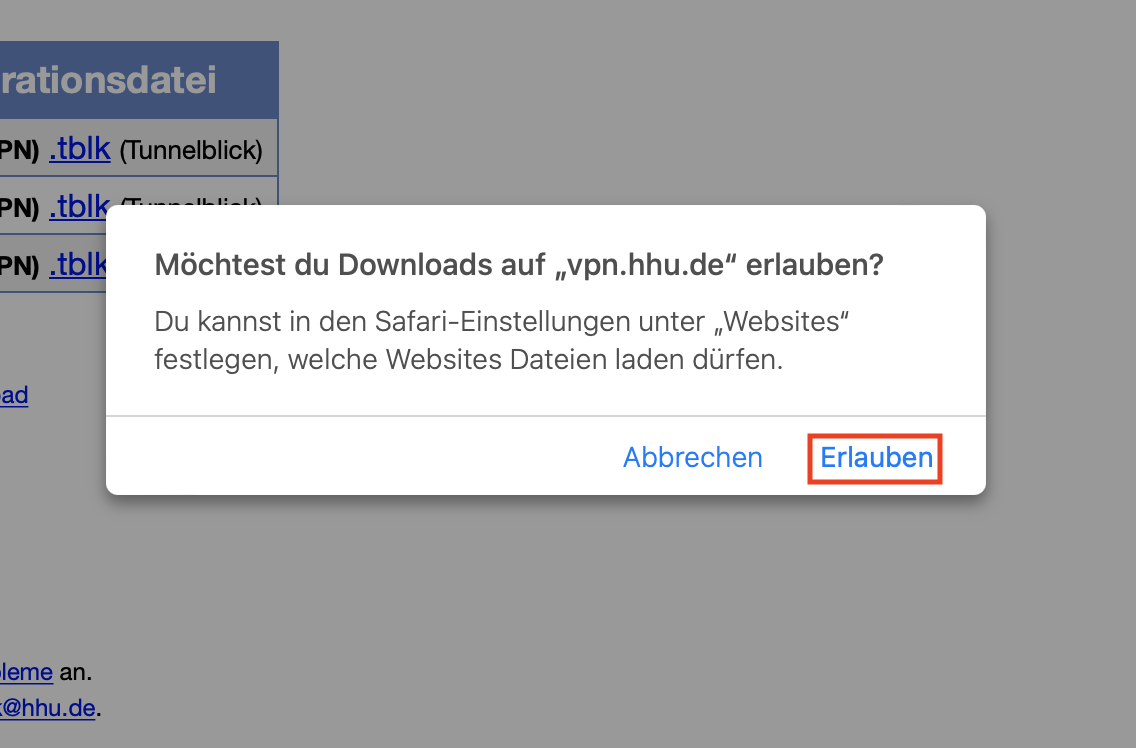
Schritt 3: Klicken Sie auf "Erlauben" um den Download durchzuführen.
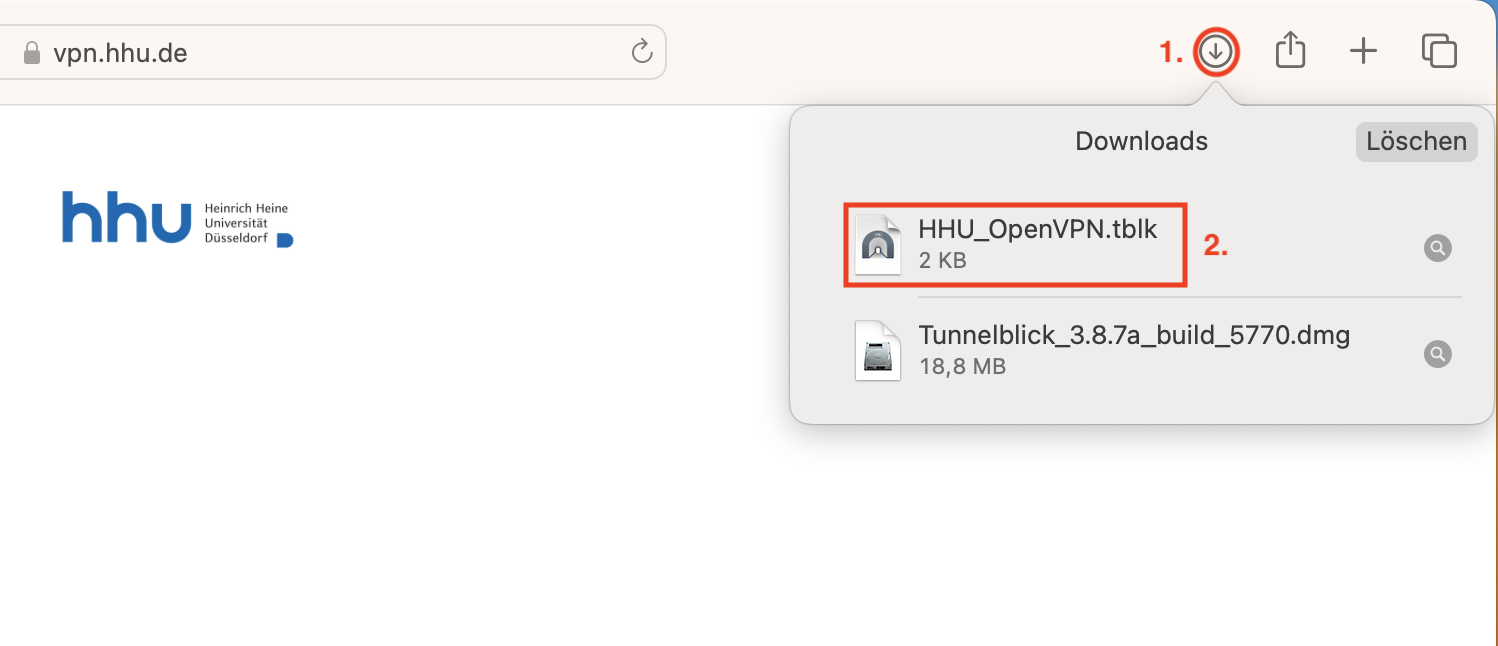
Schritt 4: Gehen Sie auf "Downloads" (oben rechts auf den Pfeil im Kreis klicken) (1.) und machen Sie einen Doppelklick auf die heruntergeladene Datei "HHU_OpenVPN.tblk" (2.), um sie zu starten.
Step 3: Click "Allow" to perform the download.
Step 4: Go to "Downloads" (click the arrow in the circle on the top right) (1.) and double-click the downloaded file "HHU_OpenVPN.tblk" (2.) to launch it.
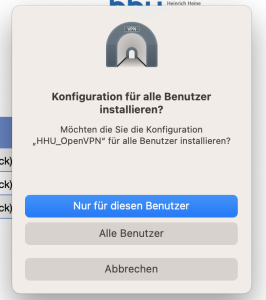
Schritt 5: Sie werden nun gefragt, ob die Konfiguration für "Alle Benutzer" oder "Nur für diesen Benutzer" installiert werden soll. Wählen Sie aus, je nachdem wenn Sie weitere Konten auf dem Mac angelegt haben, ob diese Ihre Konfigurationsdatei auch benutzen können oder nicht.
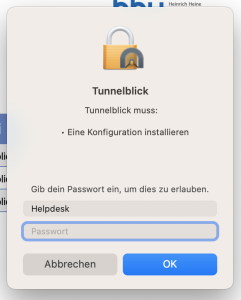
Geben Sie anschließend das Passwort Ihres Mac's ein, um die Installation abzuschließen.
Step 5: You will now be asked if you want to install the configuration for "All users" or "Only for this user". Select, depending on if you have created additional accounts on the Mac, if they can also use your configuration file or not.
Then enter your Mac's password to complete the installation.
VPN-Tunnelblick starten
Start VPN-Tunnelblick
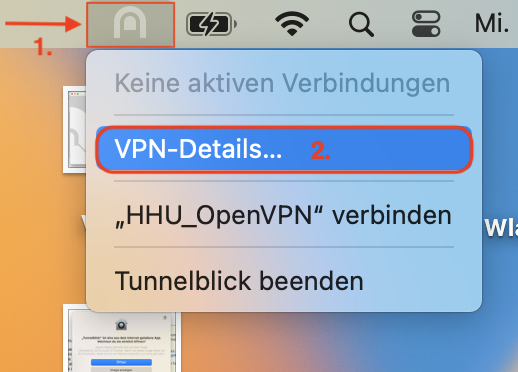
Schritt 1: Klicken Sie oben rechts in der Leiste auf das Tunnelblick-Symbol (1.) und dann auf "VPN-Details..." (2.) um auf die Übersicht mit der Konfiguration und der Log-Datei zu kommen.
Step 1: Click on the tunnelblick icon at the top right of the bar (1.) and then on "VPN details...". (2.) to get to the overview with the configuration and the log file.
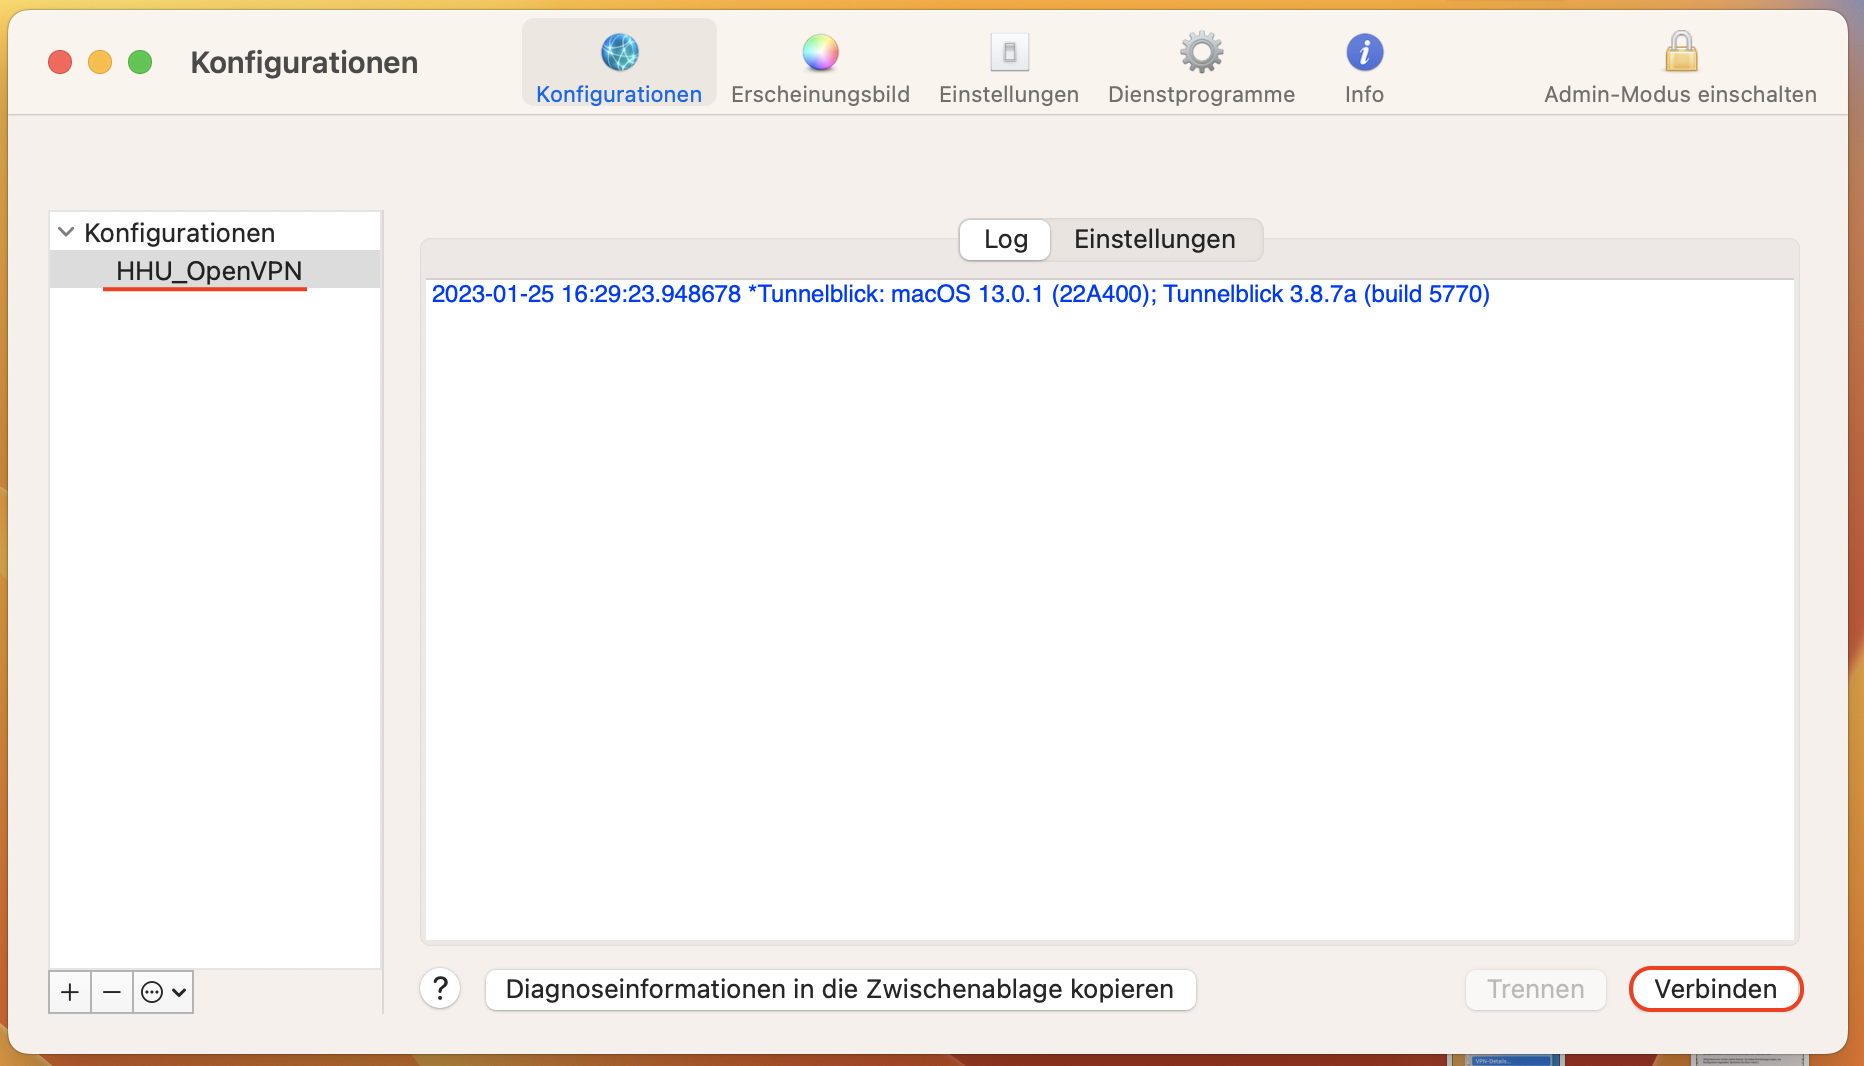
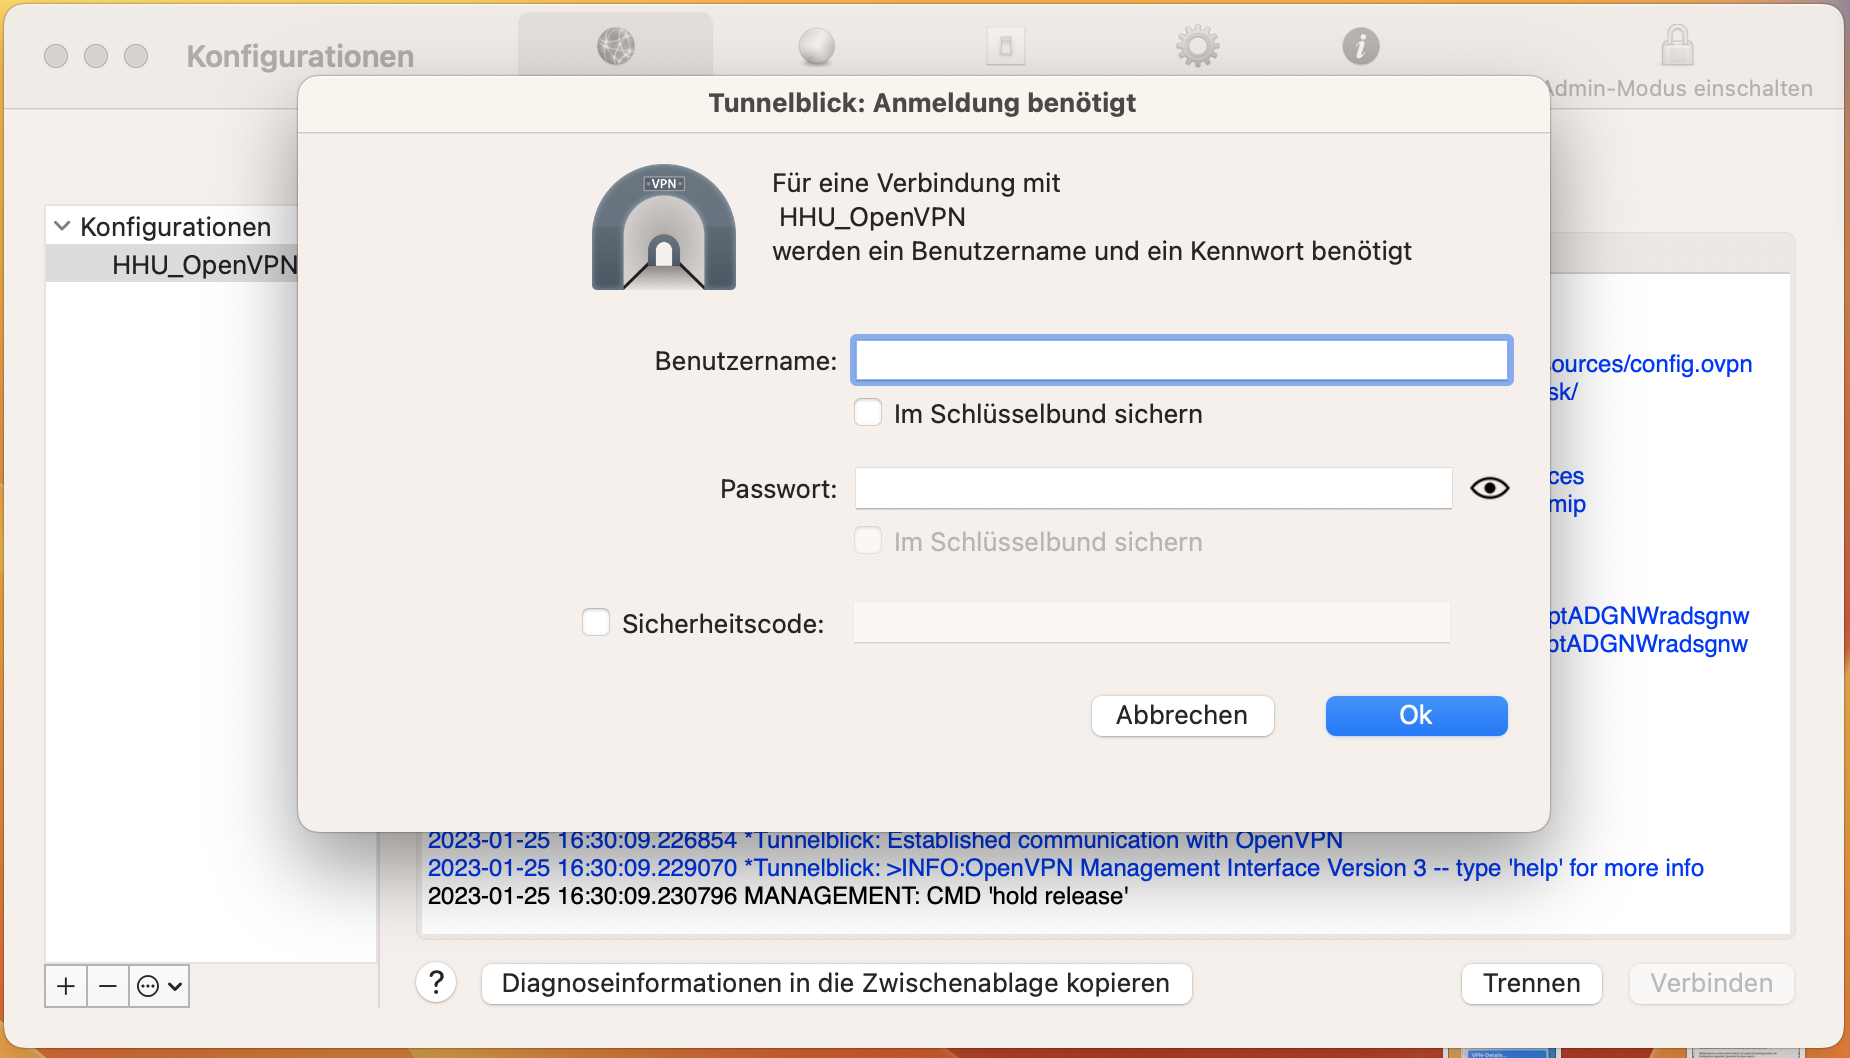
Schritt 2: Oben links im Fenster unter "Konfigurationen" sehen Sie nun die installierte Konfigurationsdatei. Klicken Sie unten rechts im Fenster auf "Verbinden" und geben Sie Ihre Anmeldedaten (Unikennung + Passwort) ein, um die VPN-Verbindung aufzubauen.
Step 2: At the top left of the window under "Configurations" you will now see the installed configuration file. Click on "Connect" at the bottom right of the window and enter your credentials (Uni ID + password) to establish the VPN connection.
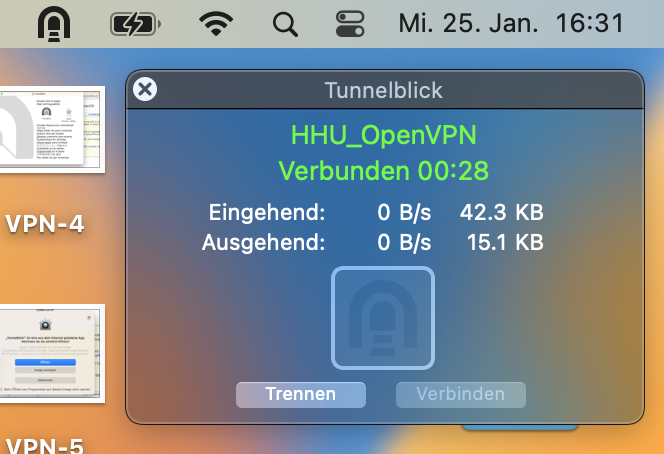
Schritt 3: Nachdem Sie die Anmeldedaten eingeben haben, wird die Verbindung geladen und das Fenster verschwindet. Oben rechts in der Leiste sollten Sie nun das Tunnelblick-Symbol schwarz ausgefüllt sehen. Wenn Sie mit der Maus draufgehen, erscheint das Fenster, wo Sie sehen können, dass Sie verbunden (grün) sind.
Step 3: After you enter the credentials, the connection will load and the window will disappear. At the top right of the bar, you should now see the Tunnelblick icon filled in black. If you go on it with the mouse, the window will appear where you can see that you are connected (green).