ACHTUNG: Sollten Sie in der Vergangenheit auf Ihrem Gerät schon einmal eine eduroam-Verbindung eingerichtet haben, sollten Sie zunächst das alte Profil löschen (siehe Punkt 3)
ATTENTION: If you have already set up an eduroam connection on your device in the past, you should first delete the old profile (see point 3)
Kurzinformation / Short information
Inhalt style none
1. Mit Internet verbinden /
Connect to Internet
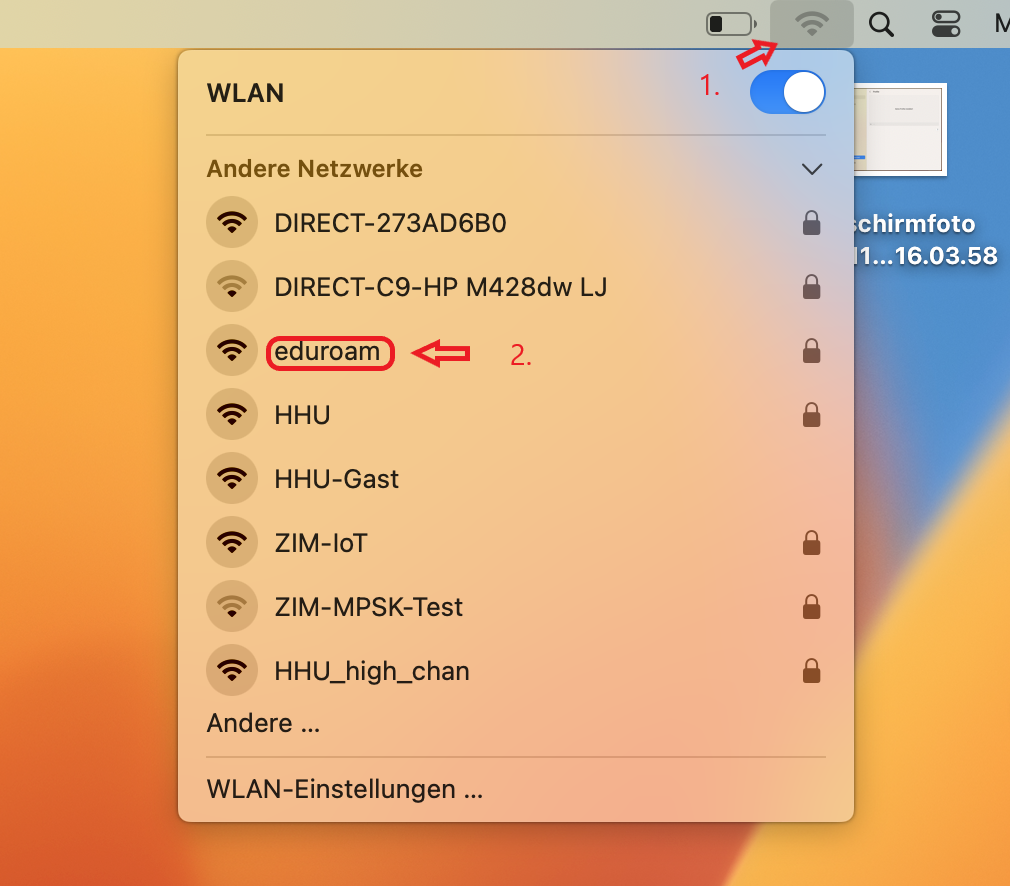
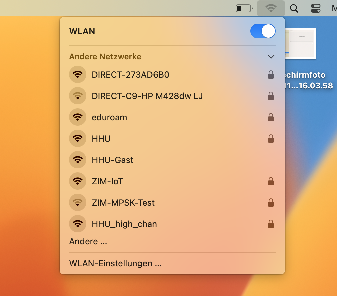
Schritt 1: Verbinden Sie sich mit dem Internet. Sollten Sie auf dem Campusgelände sein, klicken Sie oben rechts auf das WLAN-Symbol (1) und dann auf eduroam (2).
Step 1: Connect to the Internet. If you are on campus, click on the WLAN icon (1) in the upper right corner and then on eduroam (2).

Schritt 2: Geben Sie dann Ihre Uni-Kennung ein und hängen Sie "@hhu.de" an, also unikennung@hhu.de
Step 2: Then enter your university username (Uni-Kennung)and followe it with "@hhu.de", so uniUsername@hhu.de.
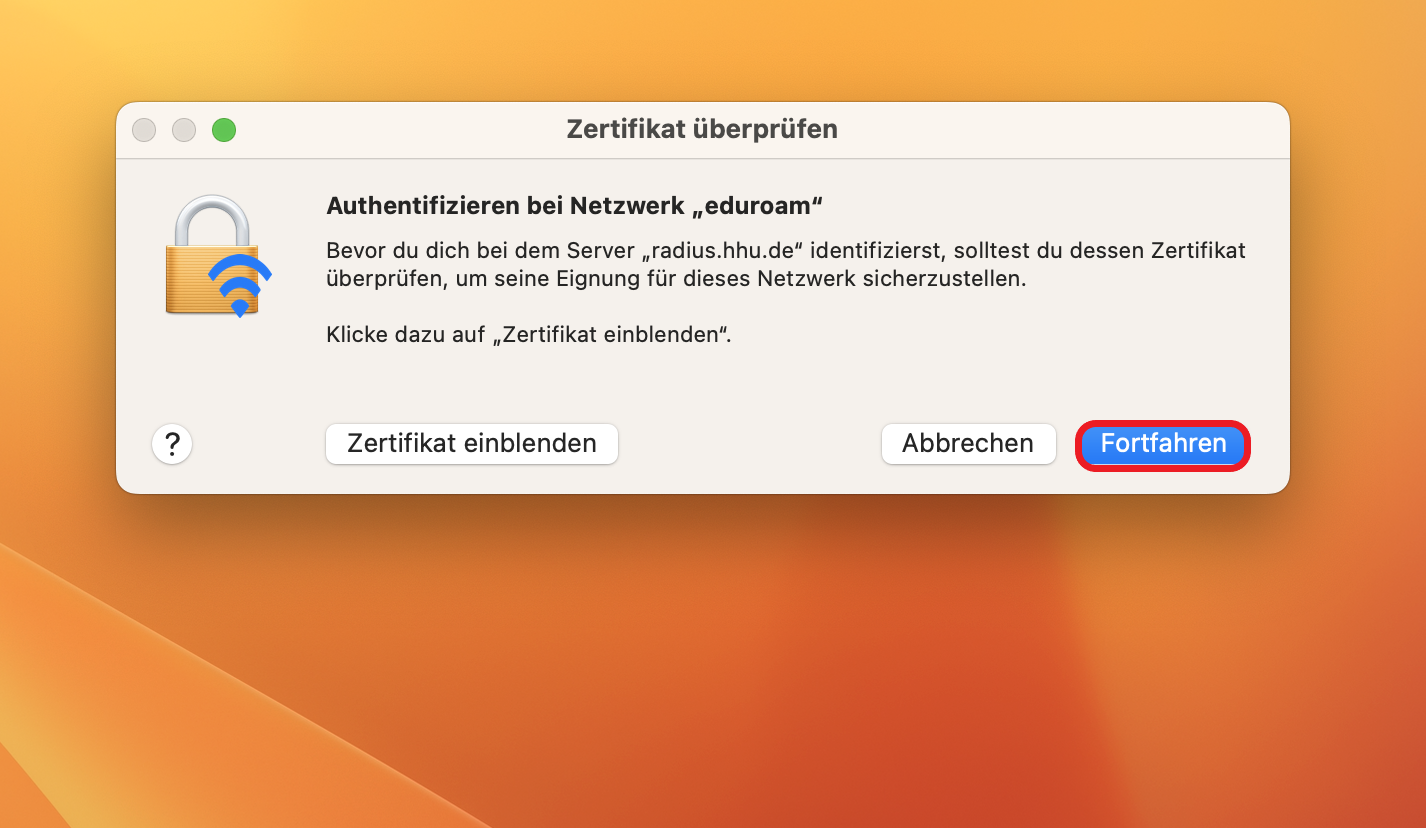
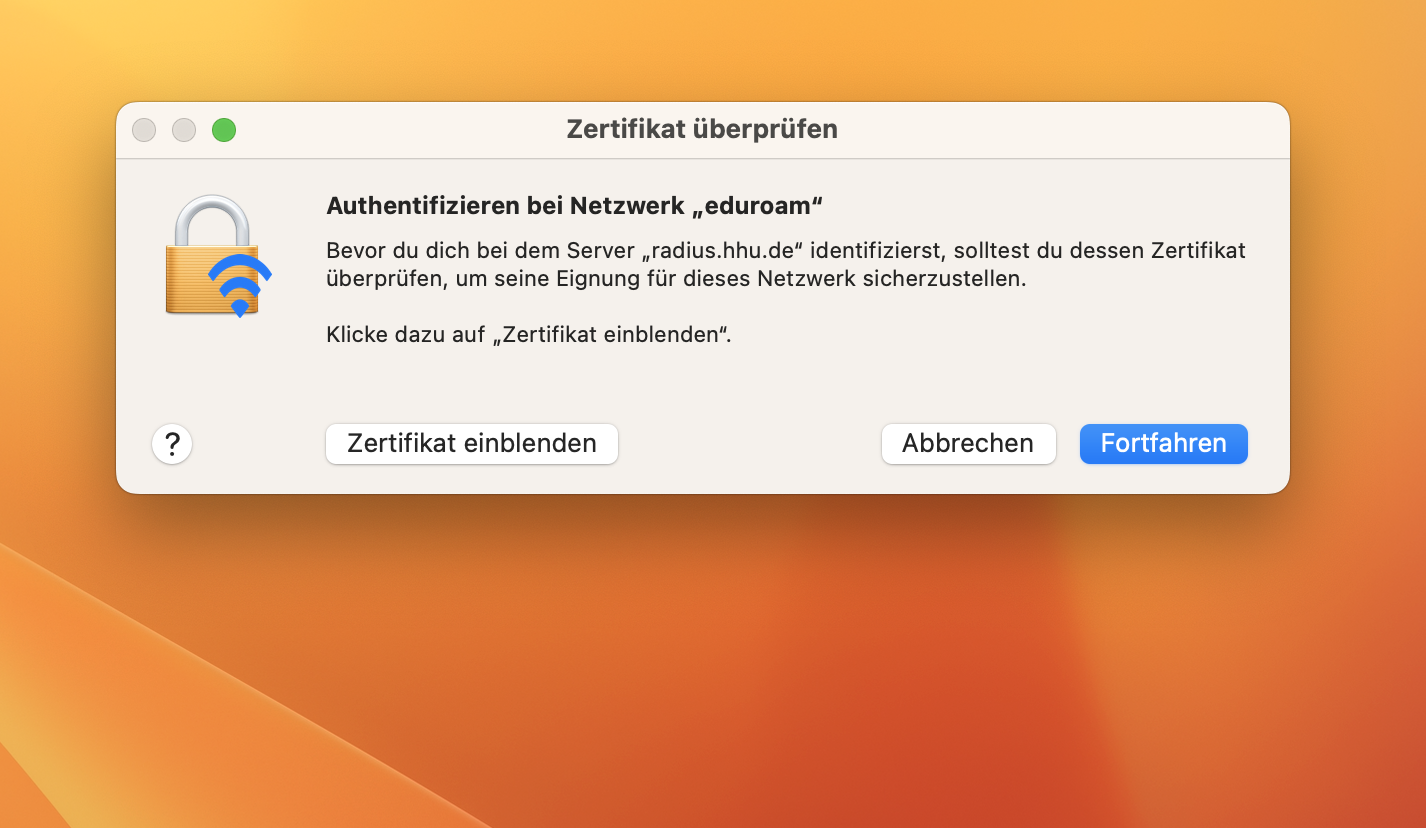
Schritt 3: Die Authentifizierung für die Zertifikatsüberprüfung mit "Fortfahren" bestätigen.
Nun sind Sie mit dem Internet (Eduroam) verbunden.
Step 3: Confirm the authentication for the certificate check with "Continue".
Now you are connected to the internet (Eduroam).
3.
Neues Profil mit Telesec-Zertifikat (G2) installieren
/
Install new profile with Telesec certificate (G2)
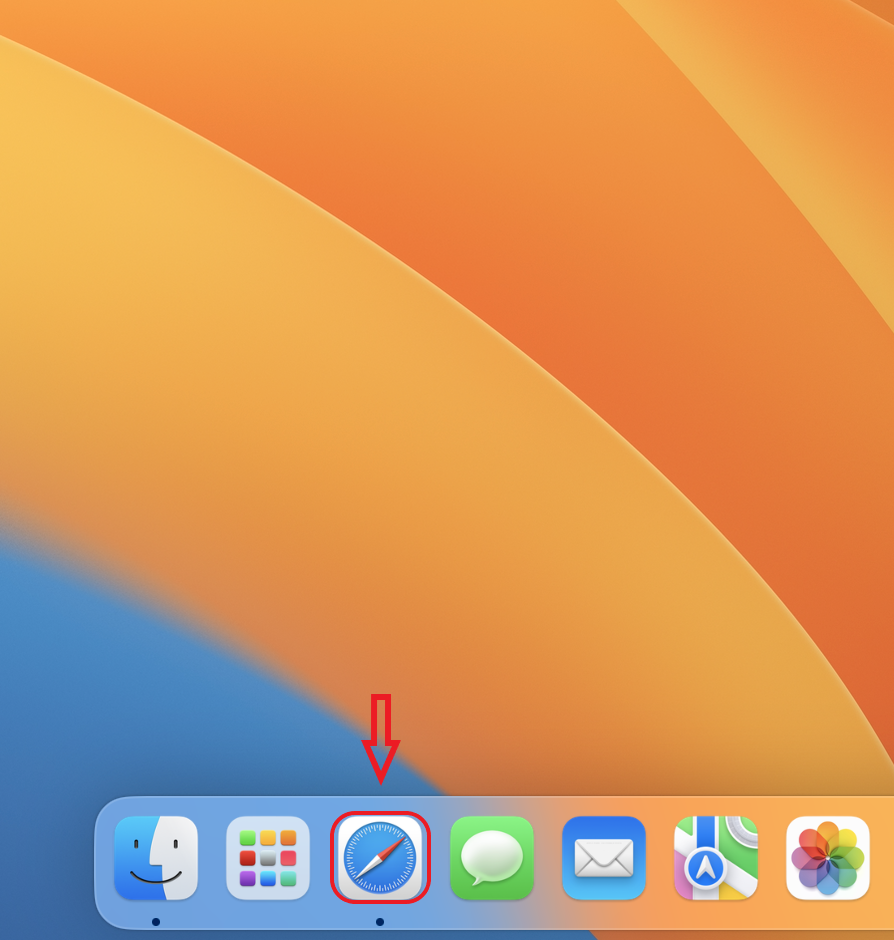
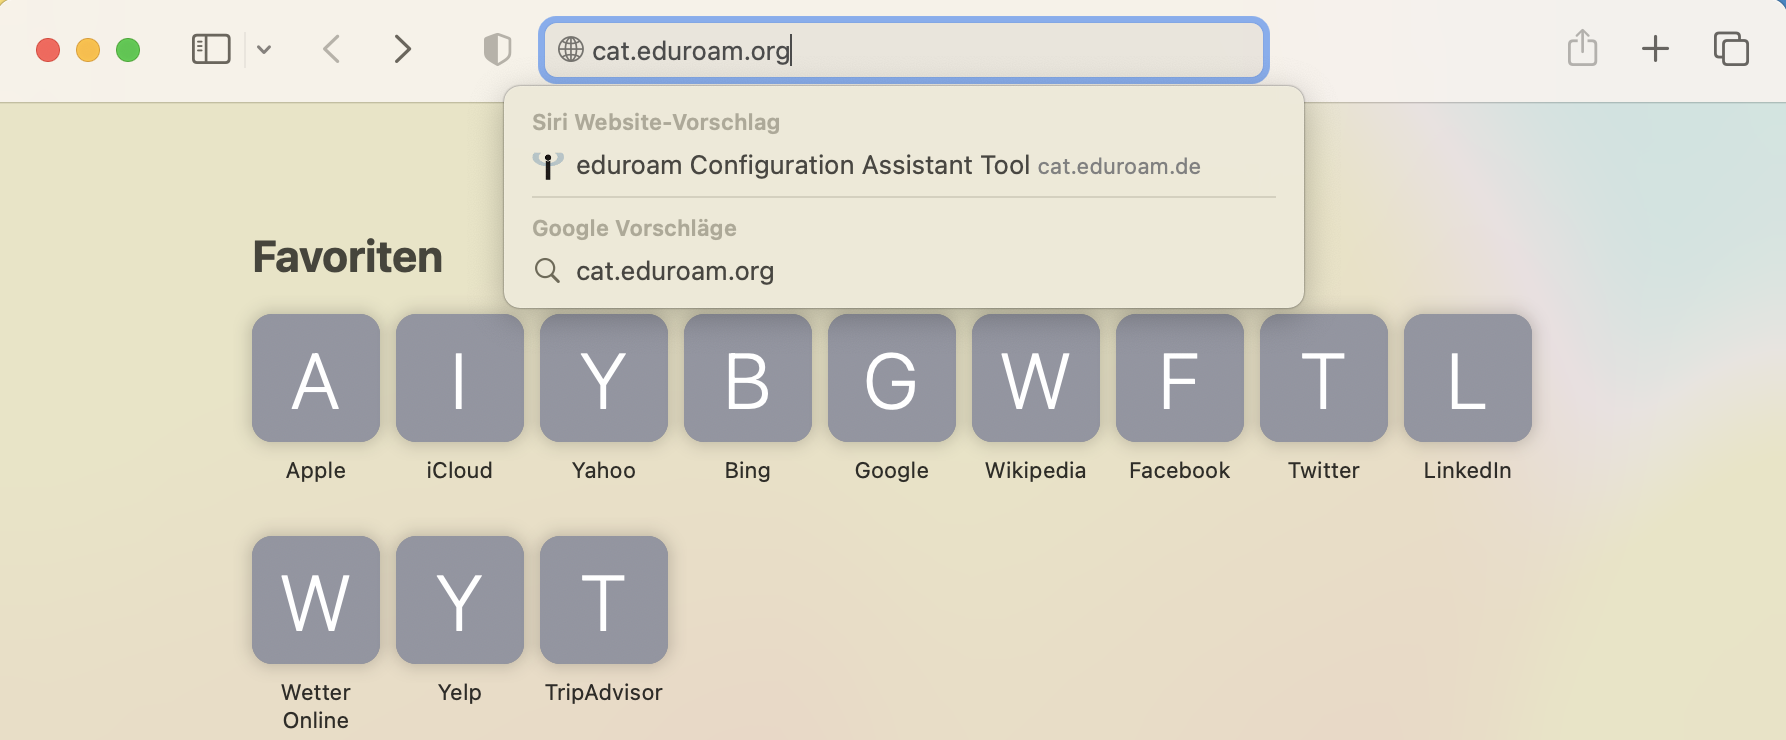
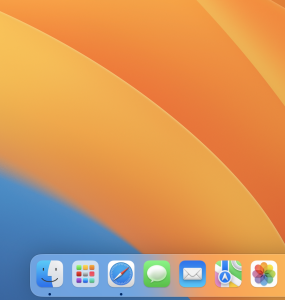
Schritt 1: Starten Sie Safari.
Step 1: Launch Safari.
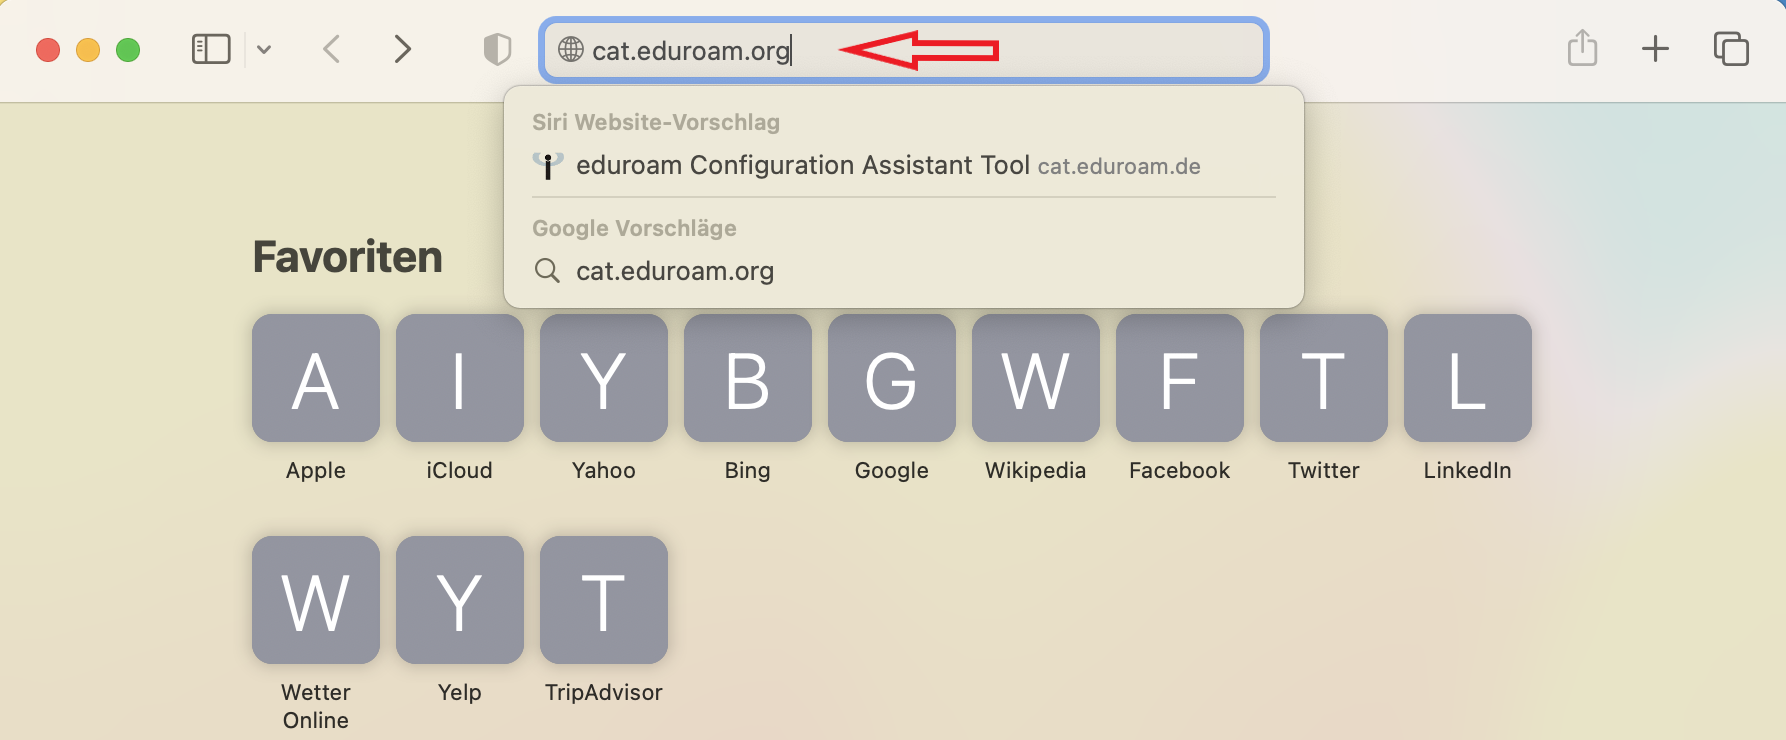
Schritt 2: Öffnen Sie die Webseite cat.eduroam.org (ohne www davor).
Step 2: Open the cat.eduroam.org website (without www in front of it).
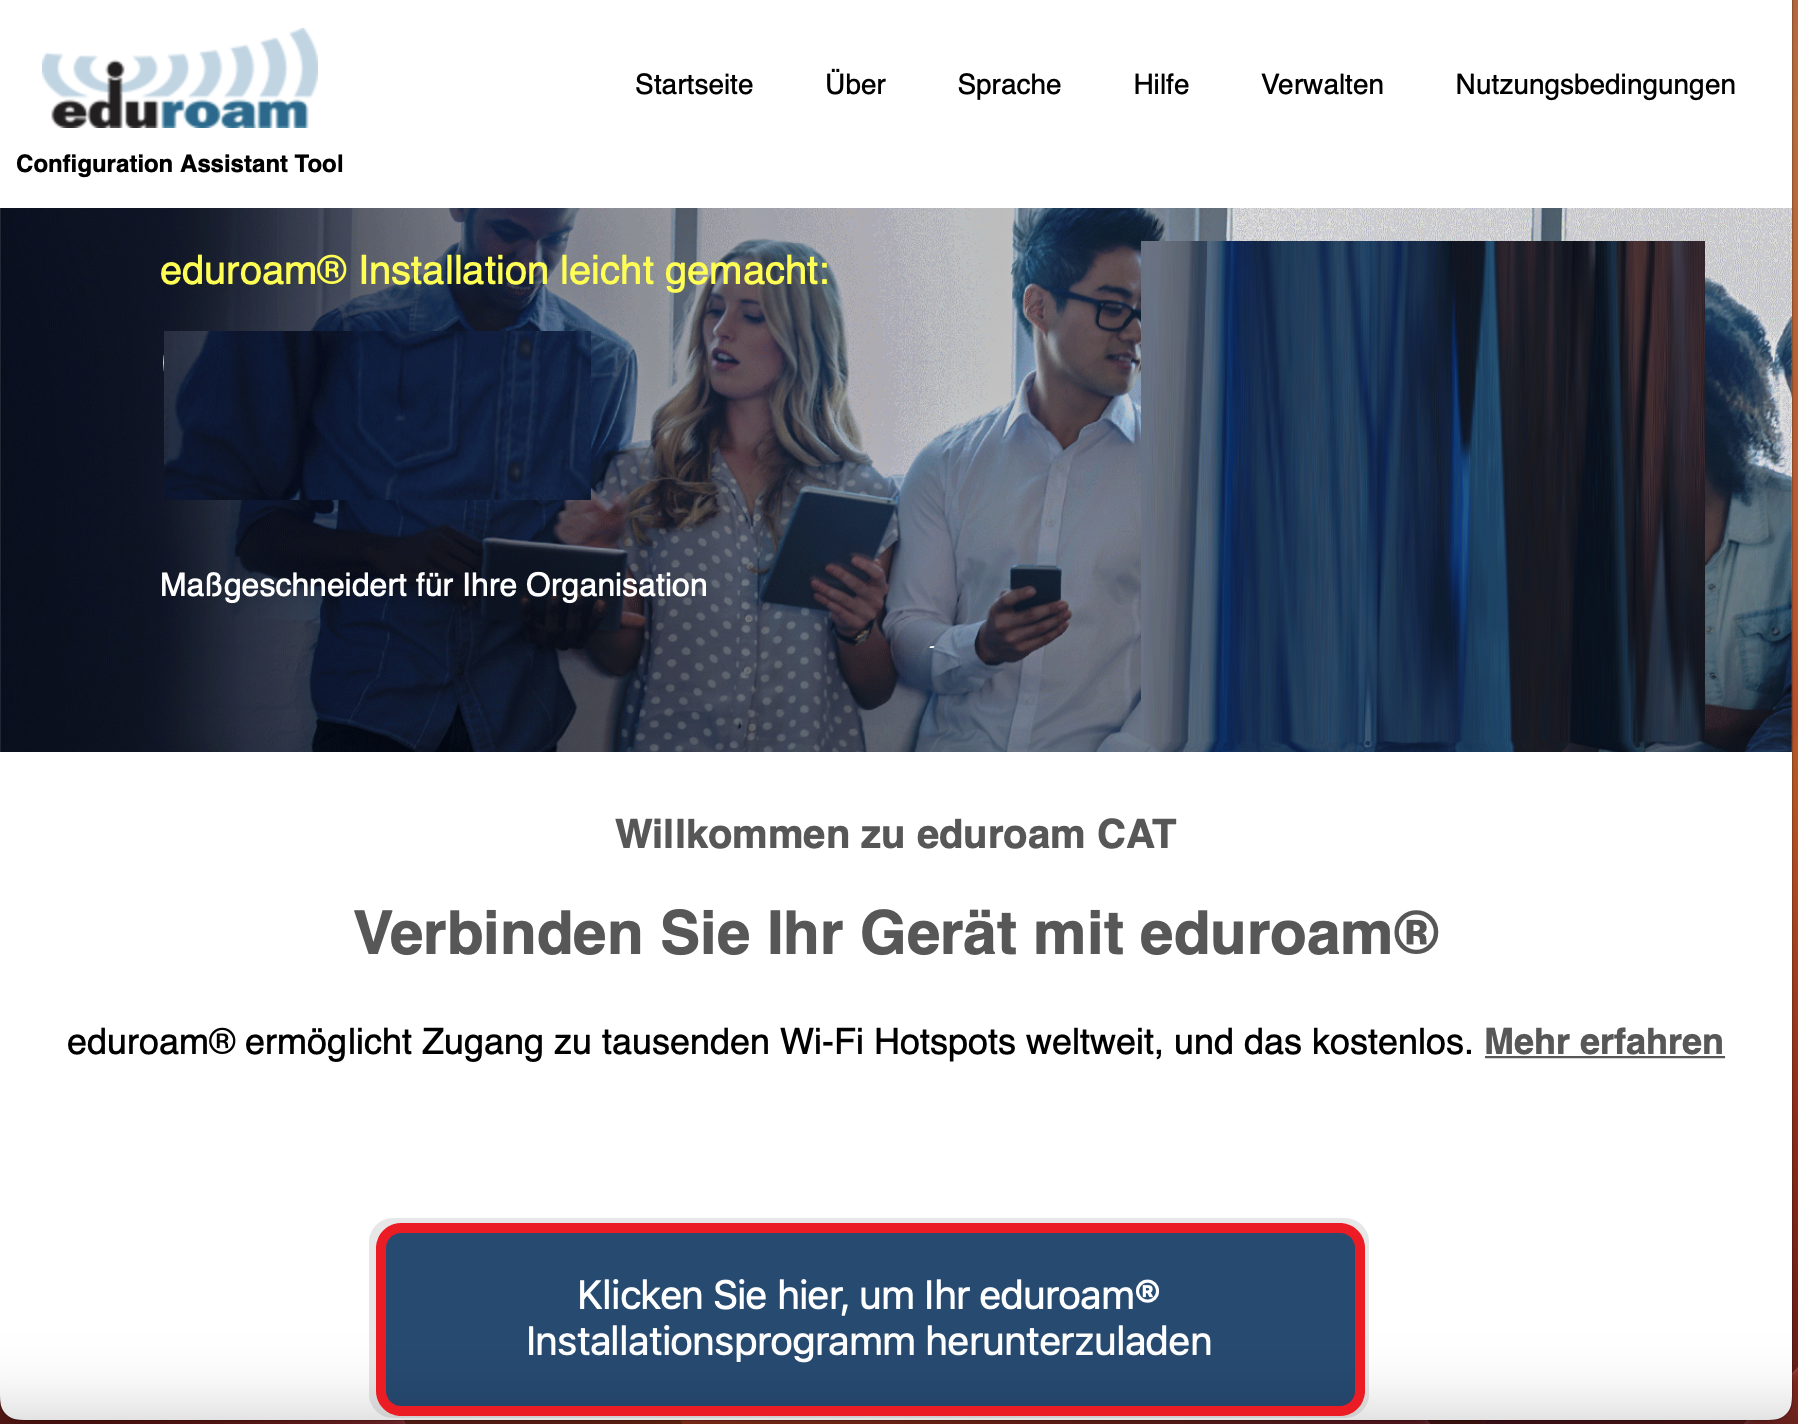
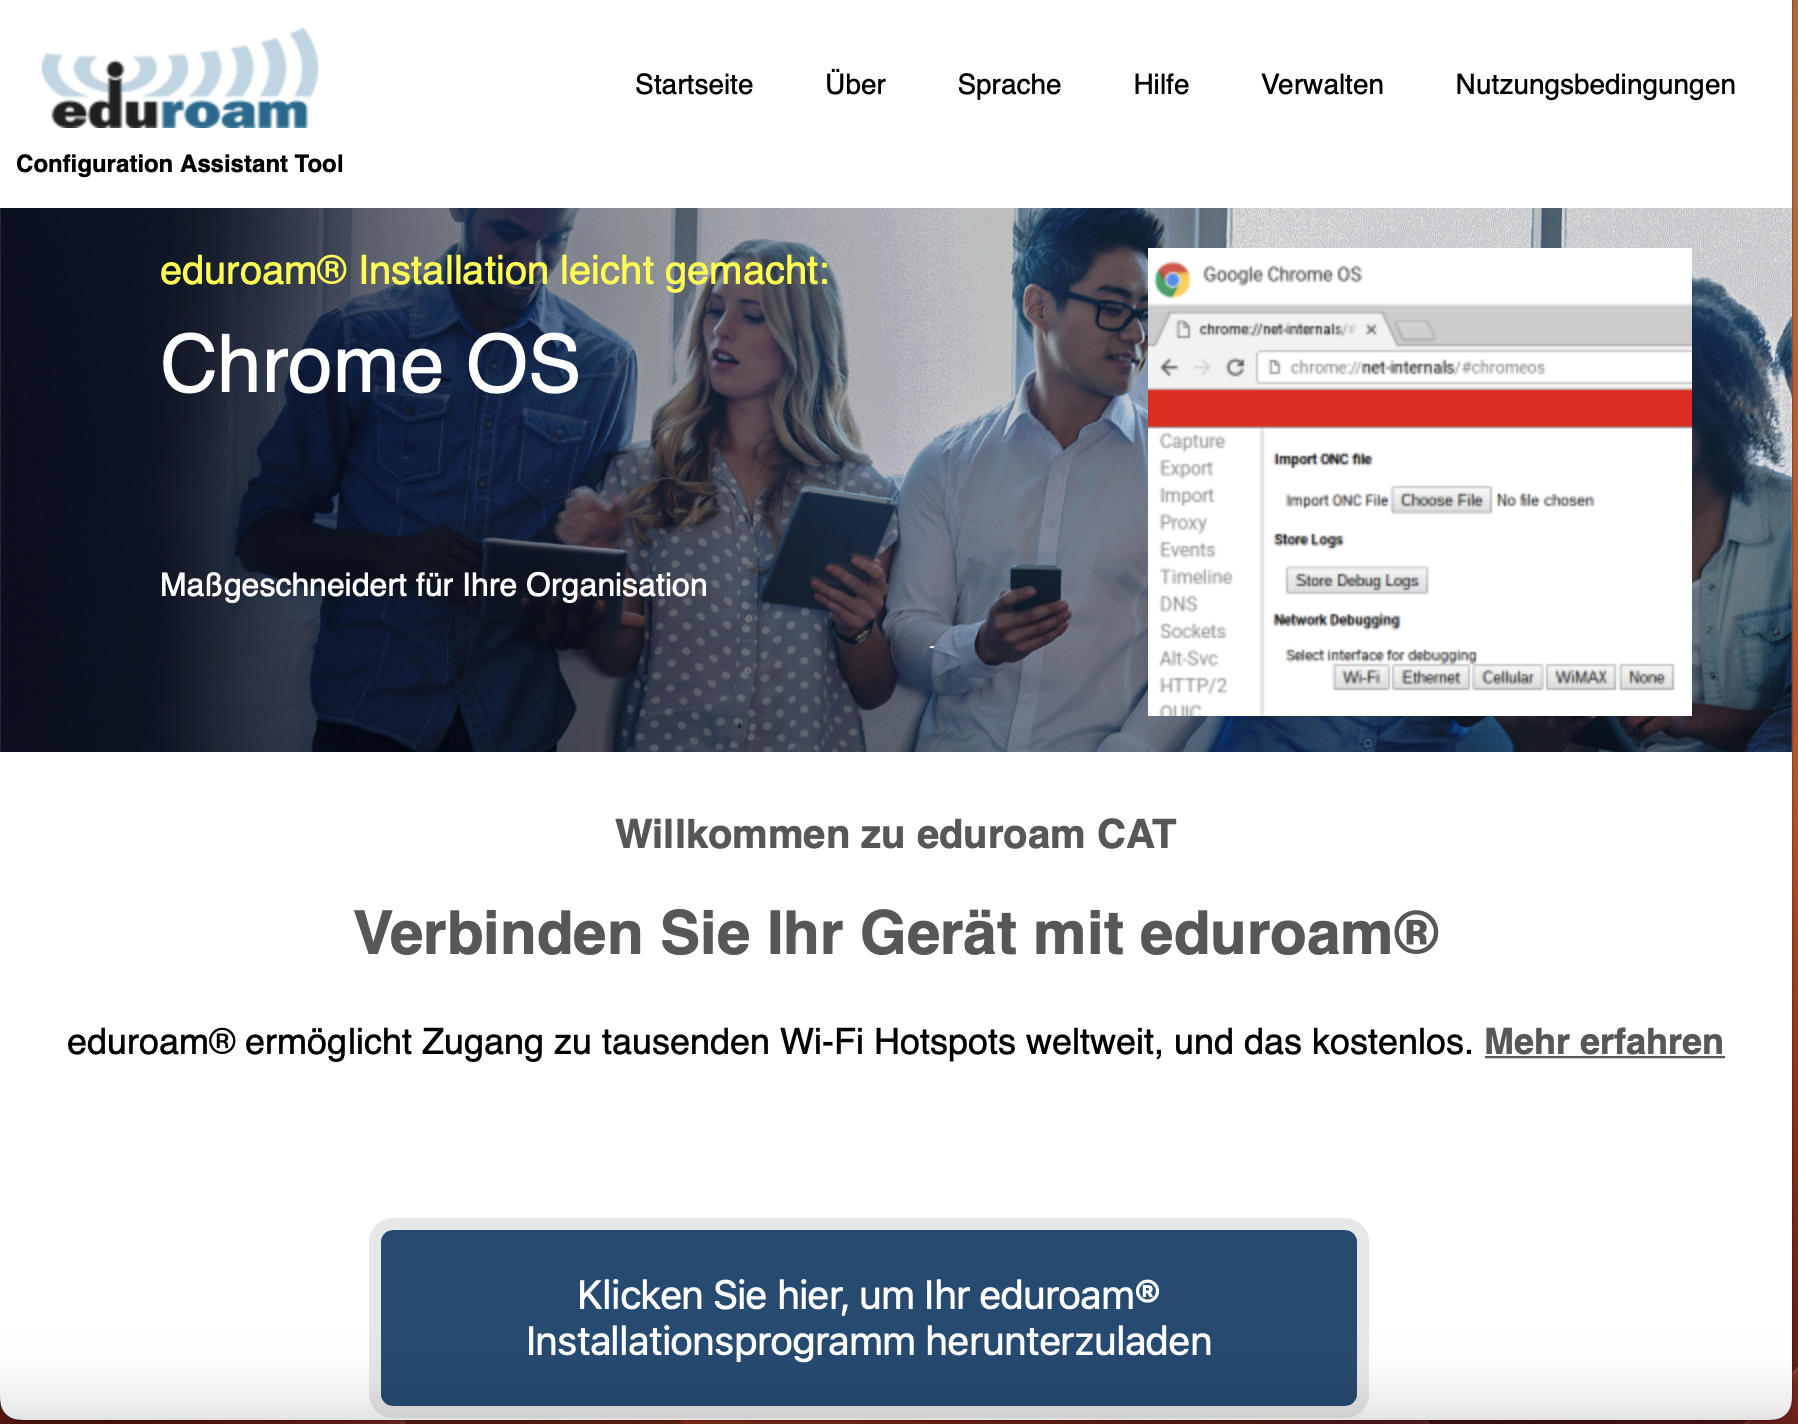
Schritt 3: Klicken Sie unten auf den großen blauen Button.
Step 3: Click on the big blue button below.
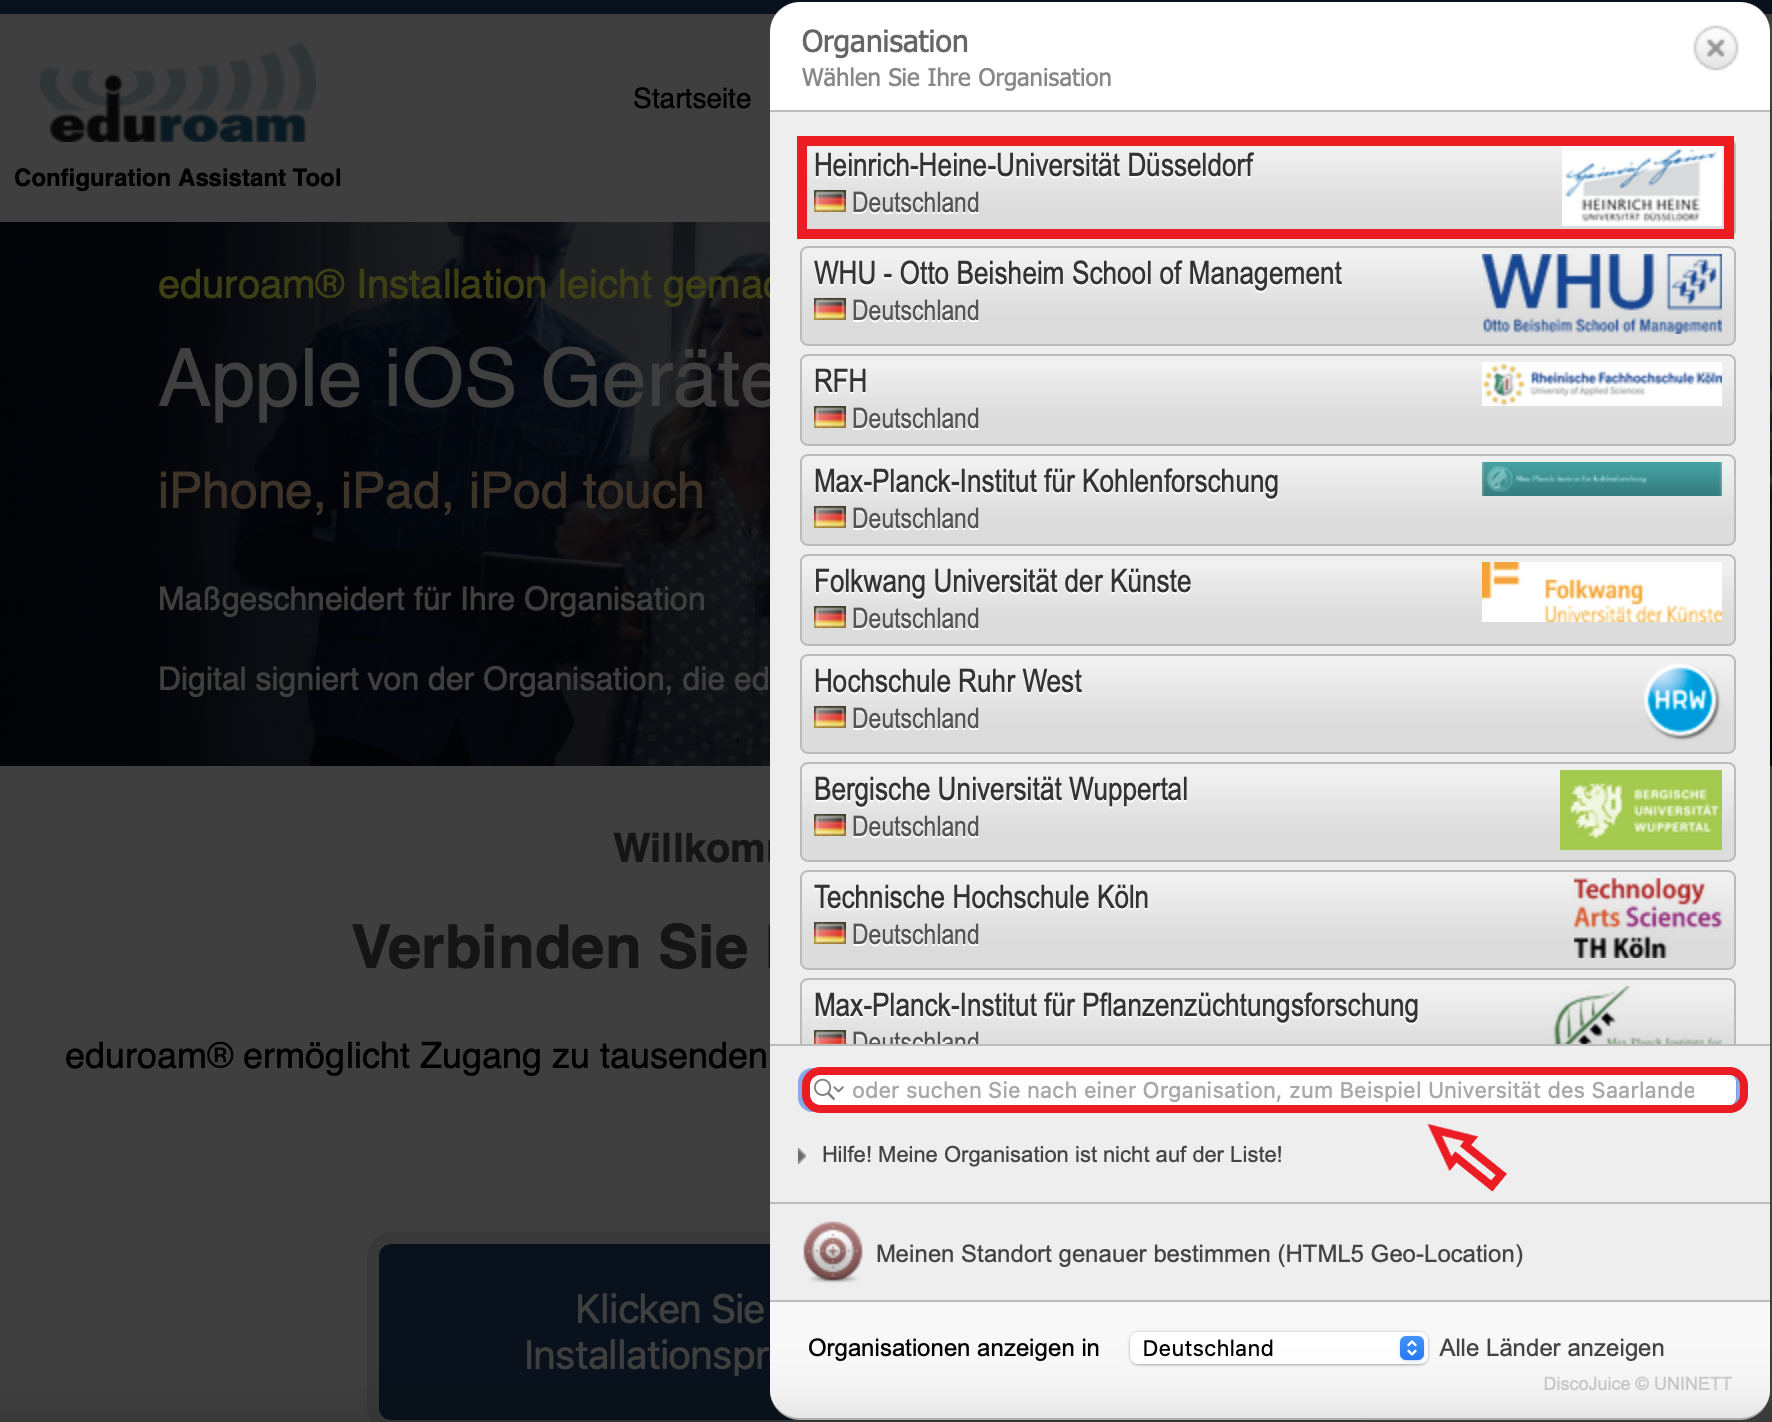
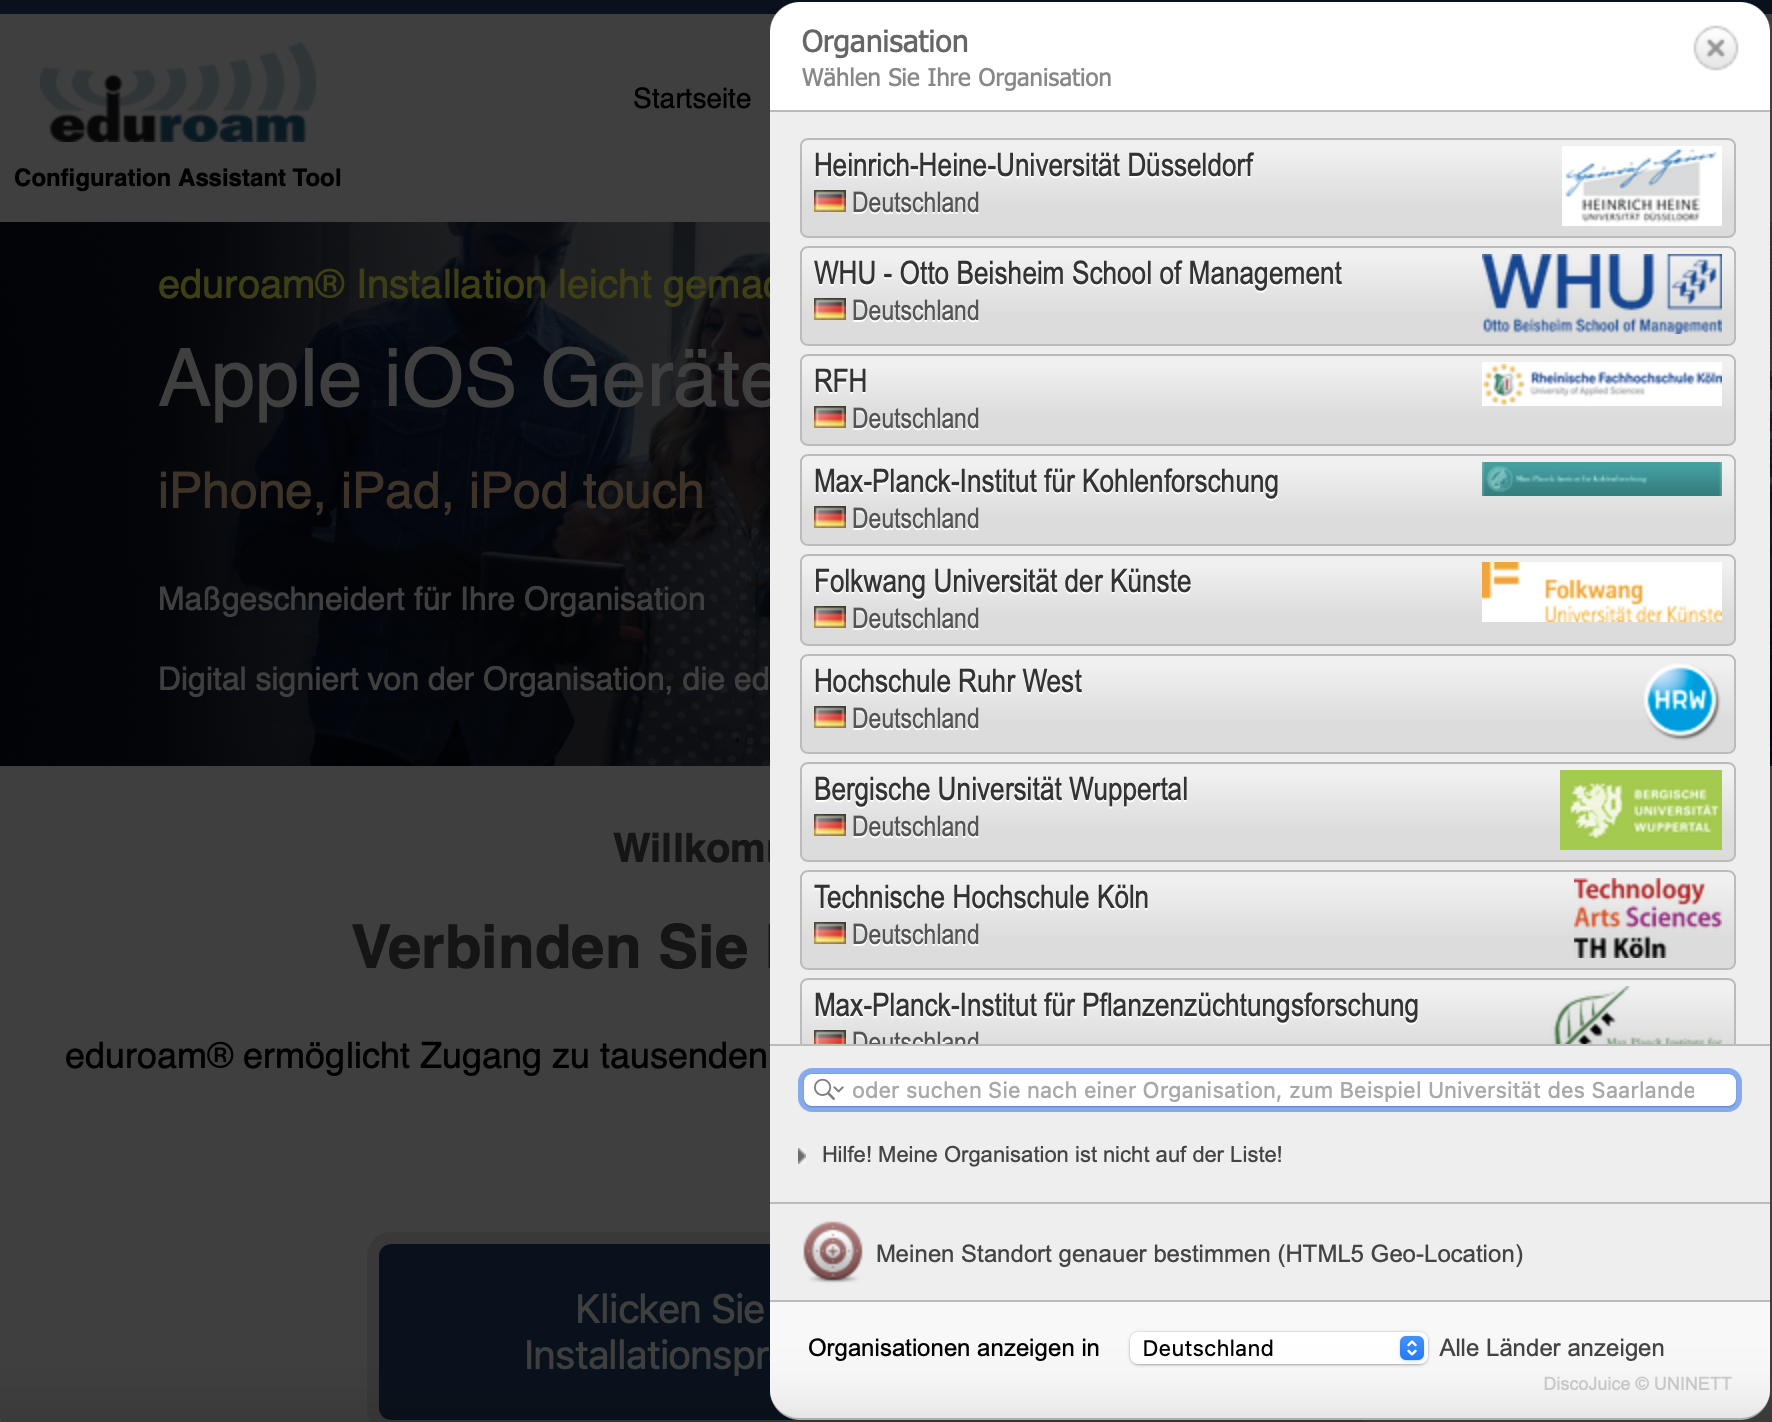
Schritt 4: Klicken Sie auf Heinrich-Heine-Universität Düsseldorf.
Step 4: Click on Heinrich-Heine-Universität Düsseldorf.

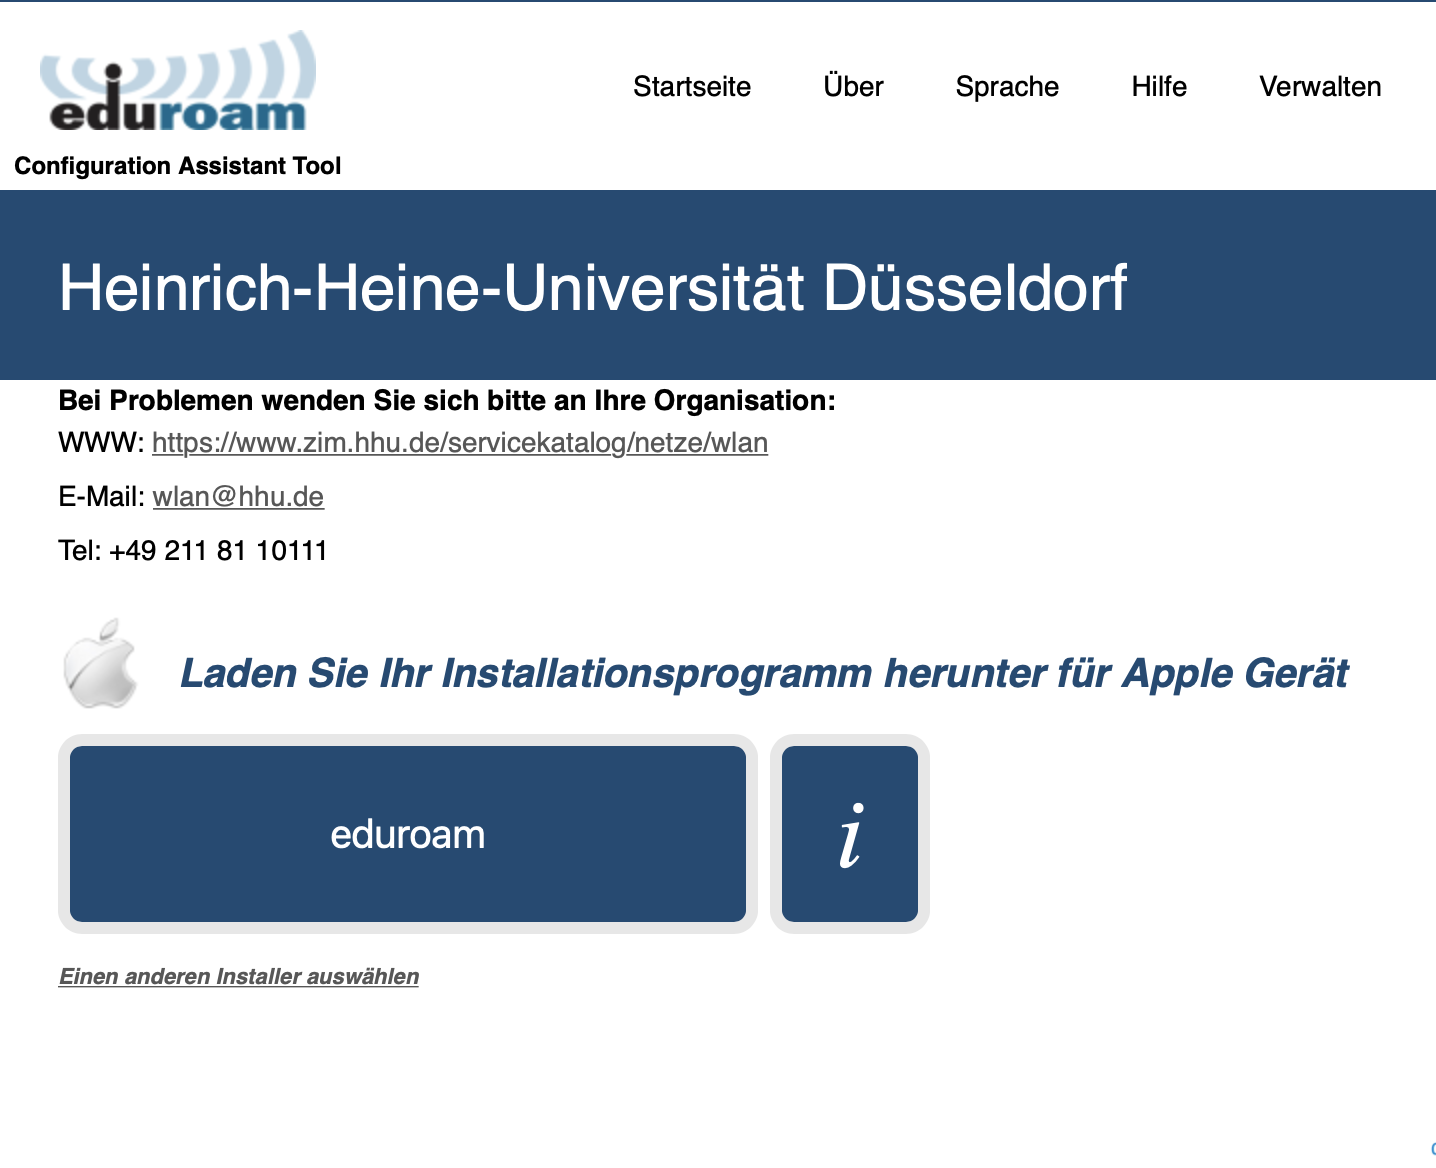
Schritt 5: Klicken Sie auf den großen blauen Button.
Step 5: Click on the big blue button.
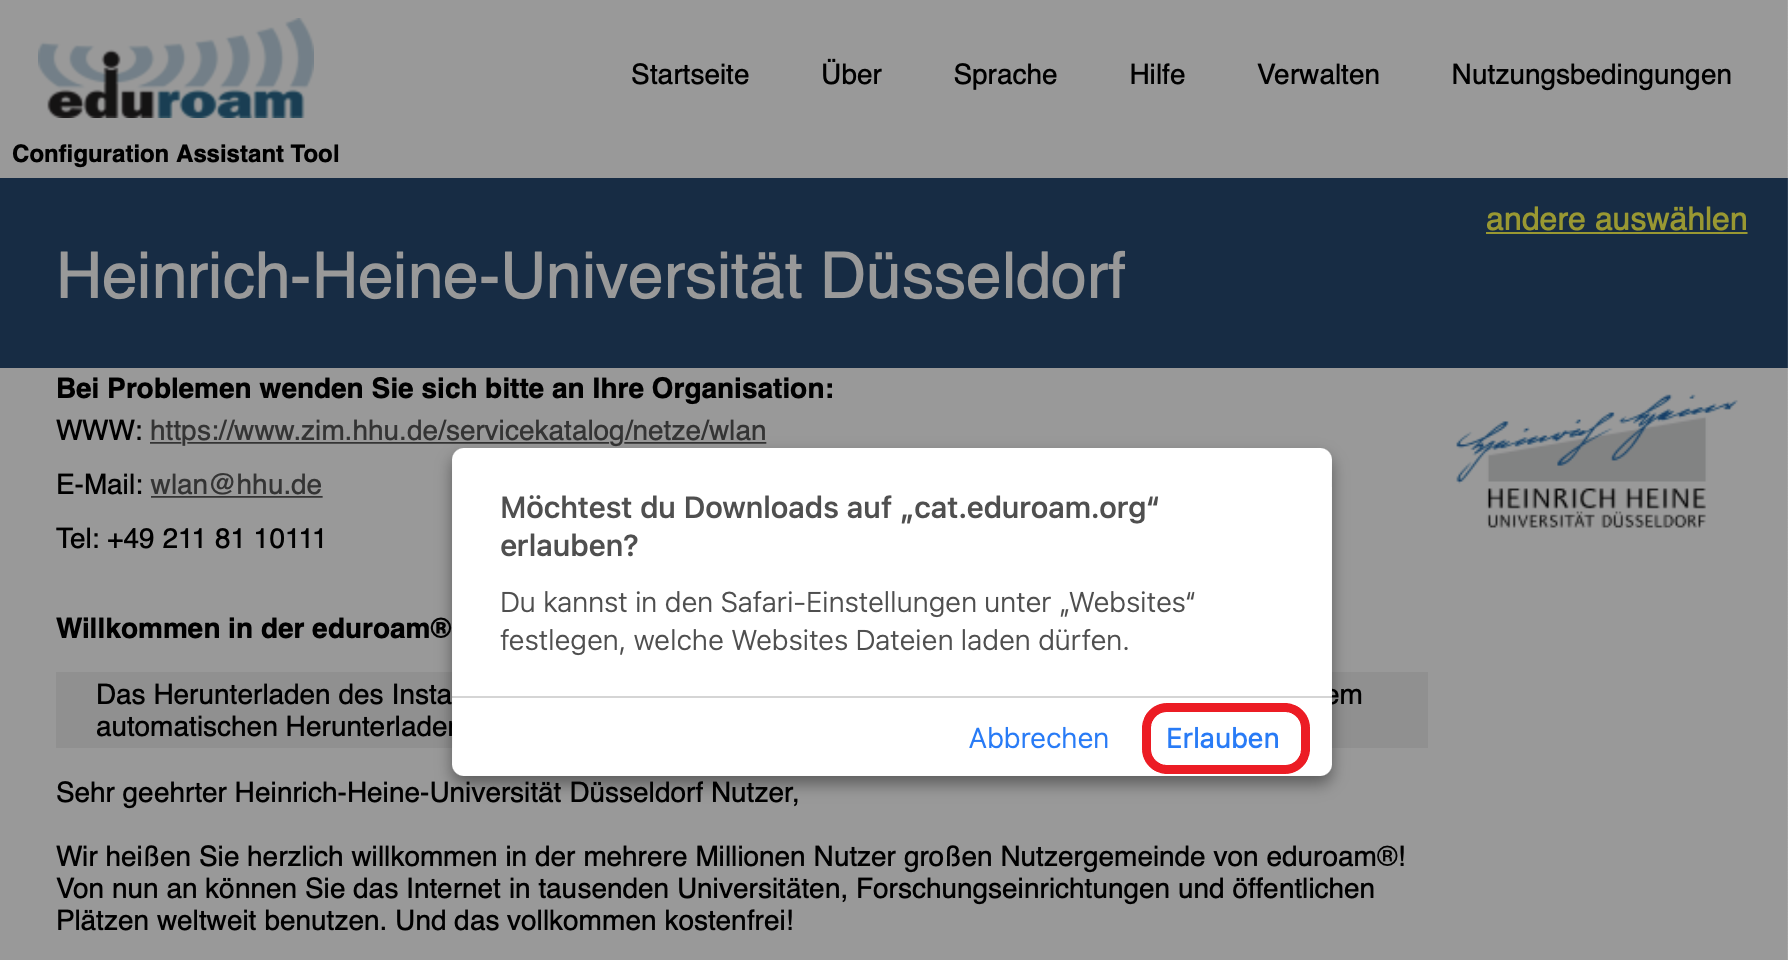
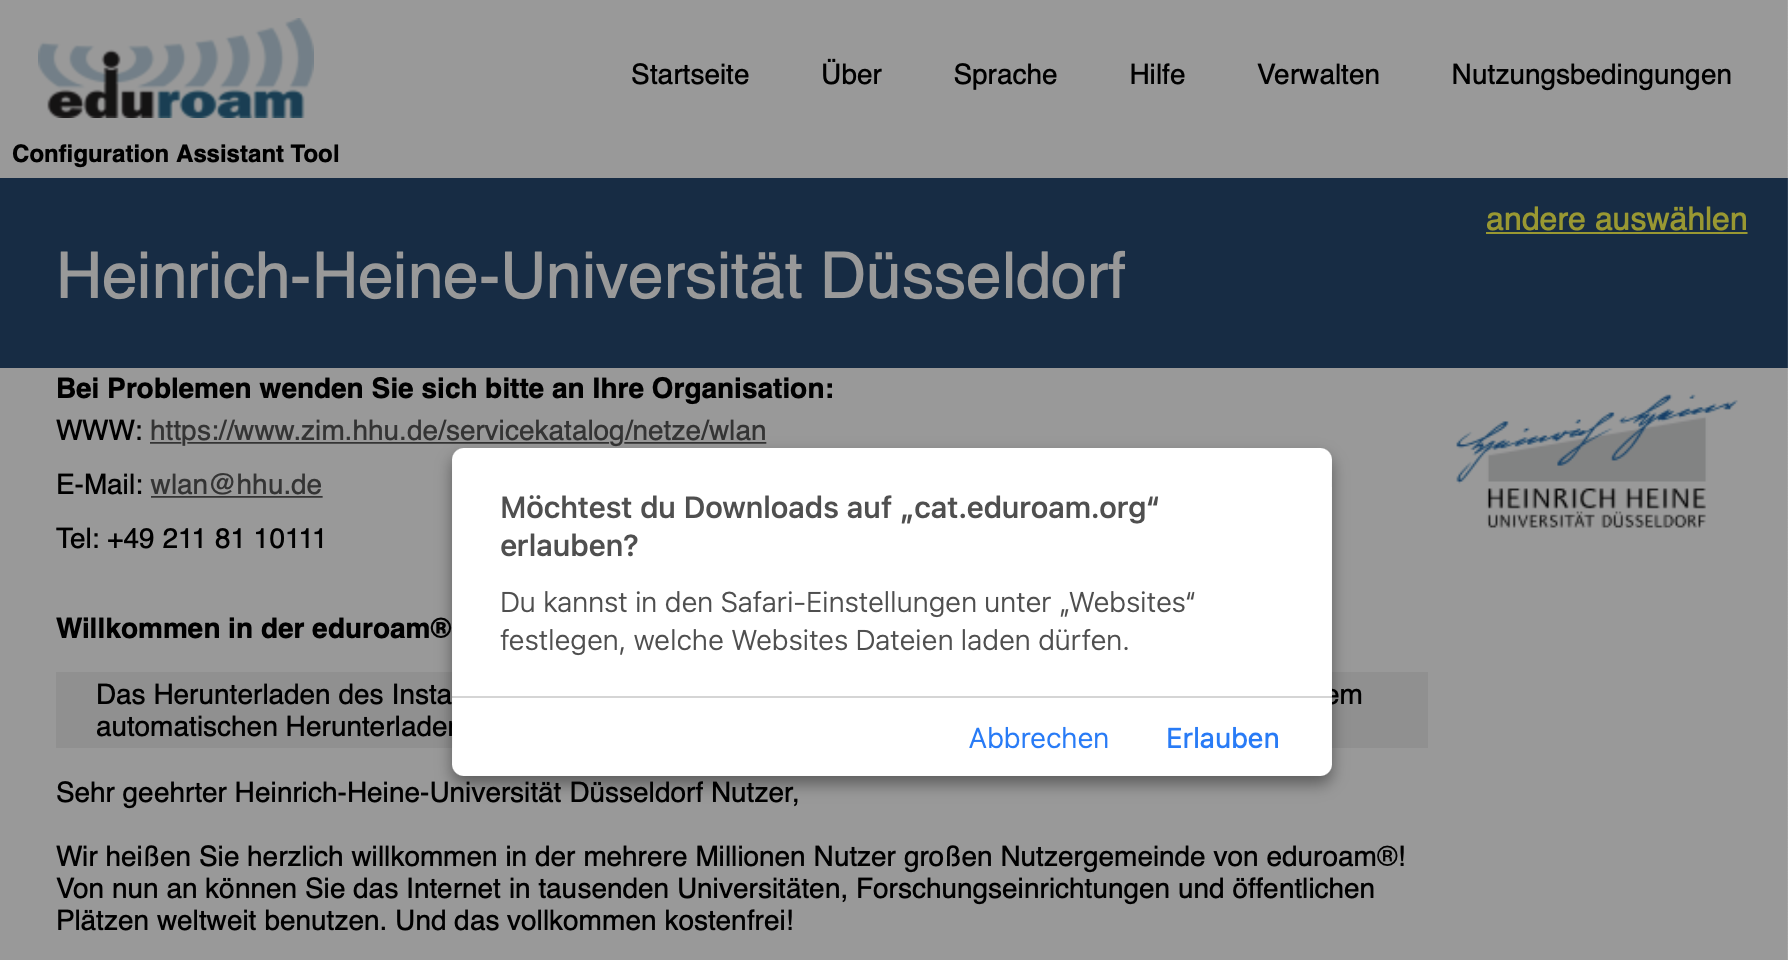
Schritt 6: Klicken Sie im neuen Fenster auf "Erlauben".
Step 6: Click "Permit" in the new window.

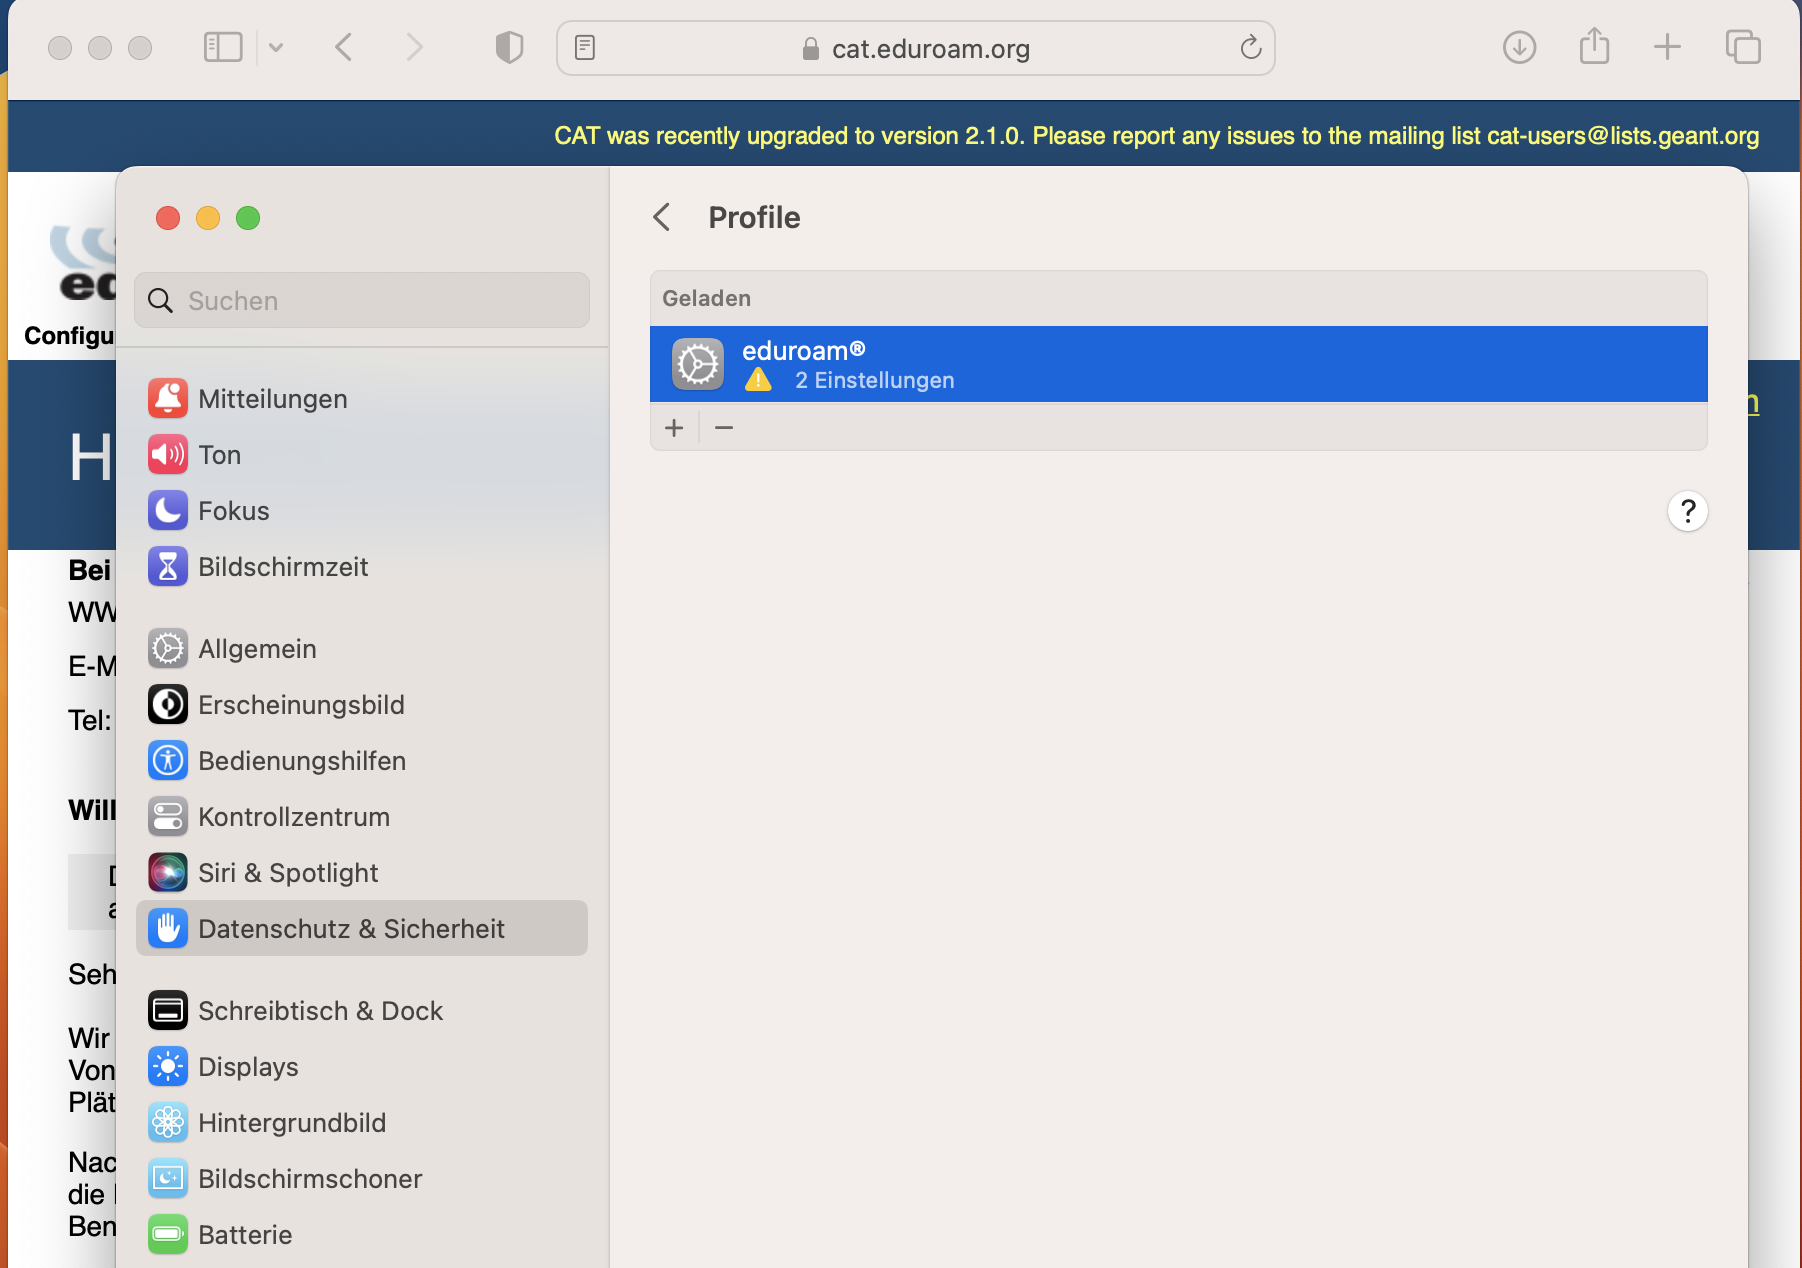
Schritt 7: Gehen Sie in die Einstellungen und dann auf "Datenschutz & Sicherheit". Ganz unten finden Sie "Profile". Klicken Sie auf das geladene Profil "eduroam".
Step 7: Go to the settings and then to "Privacy & Security". At the bottom you will find "Profiles". Click on the loaded profile "eduroam".

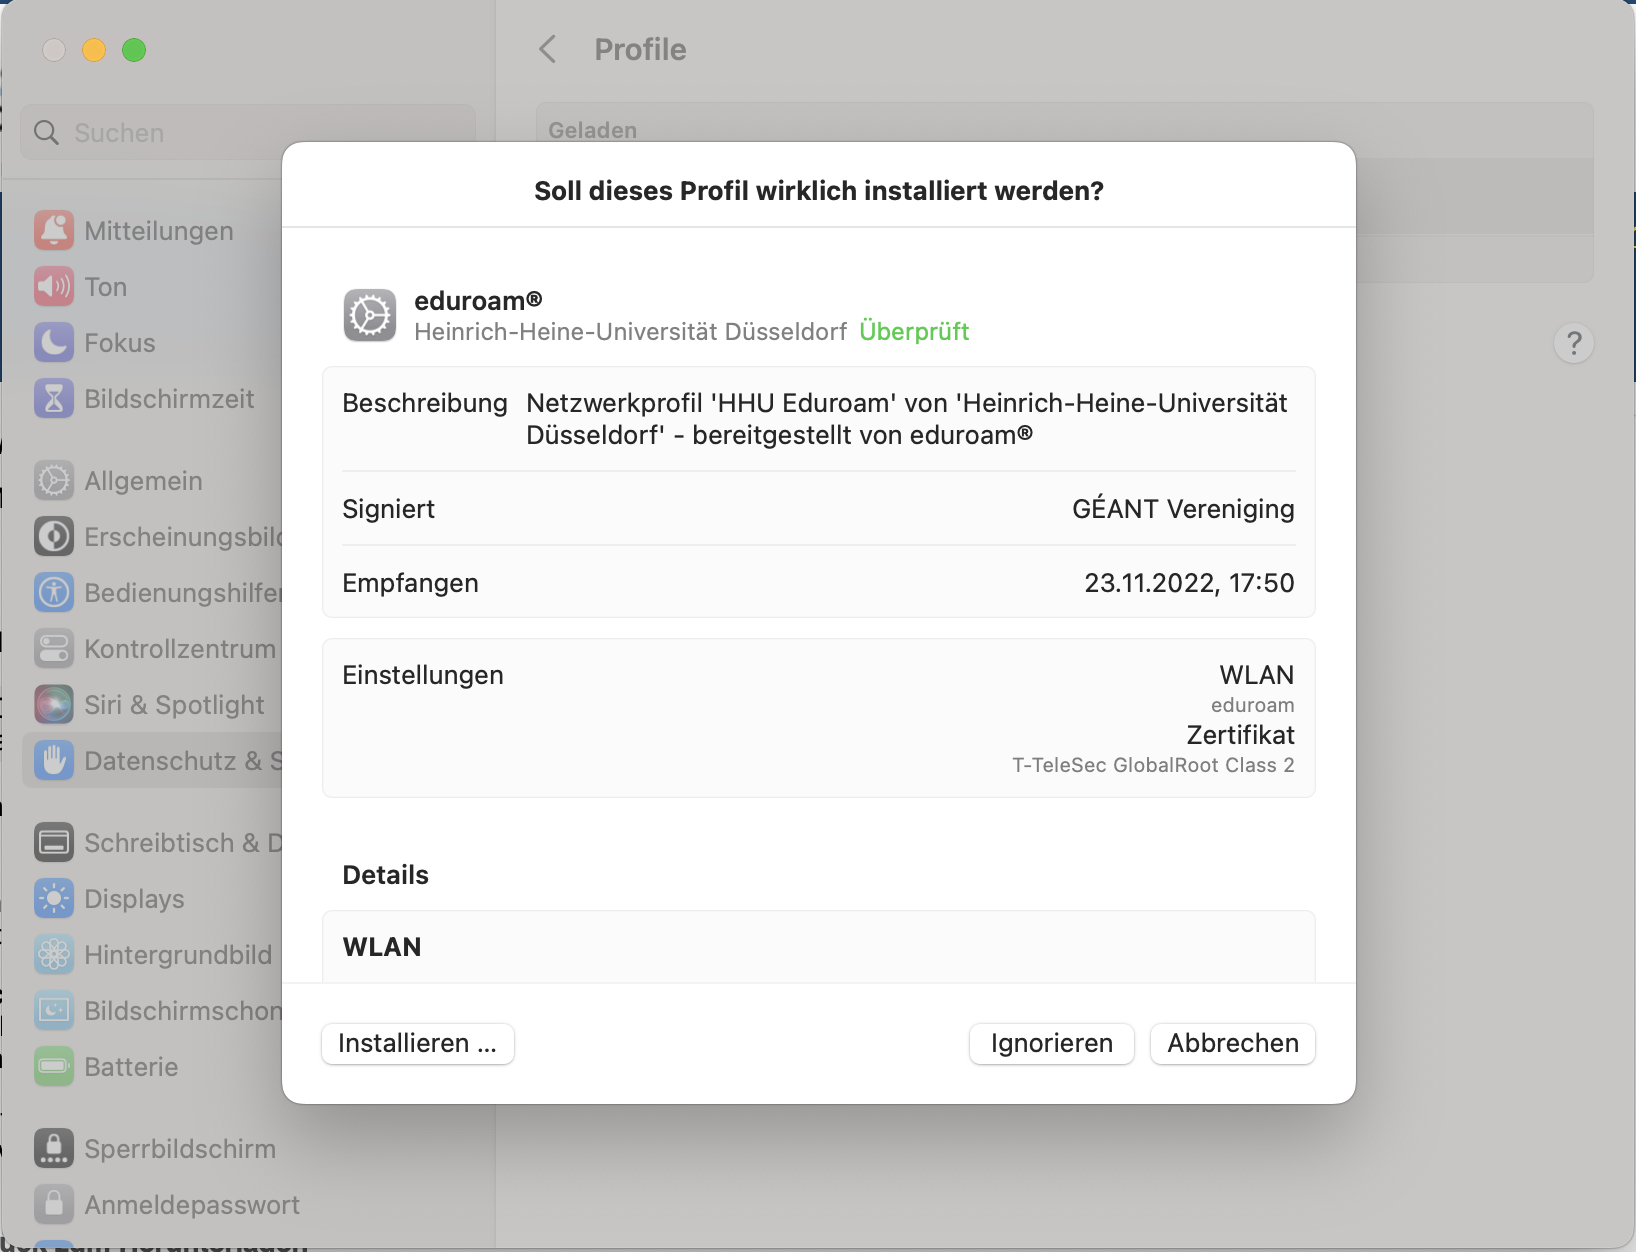
Schritt 8: Klicken Sie in dem geöffneten Fenster links unten auf "Installieren..".
Step 8: In the opened window, click on "Install..." at the bottom left.
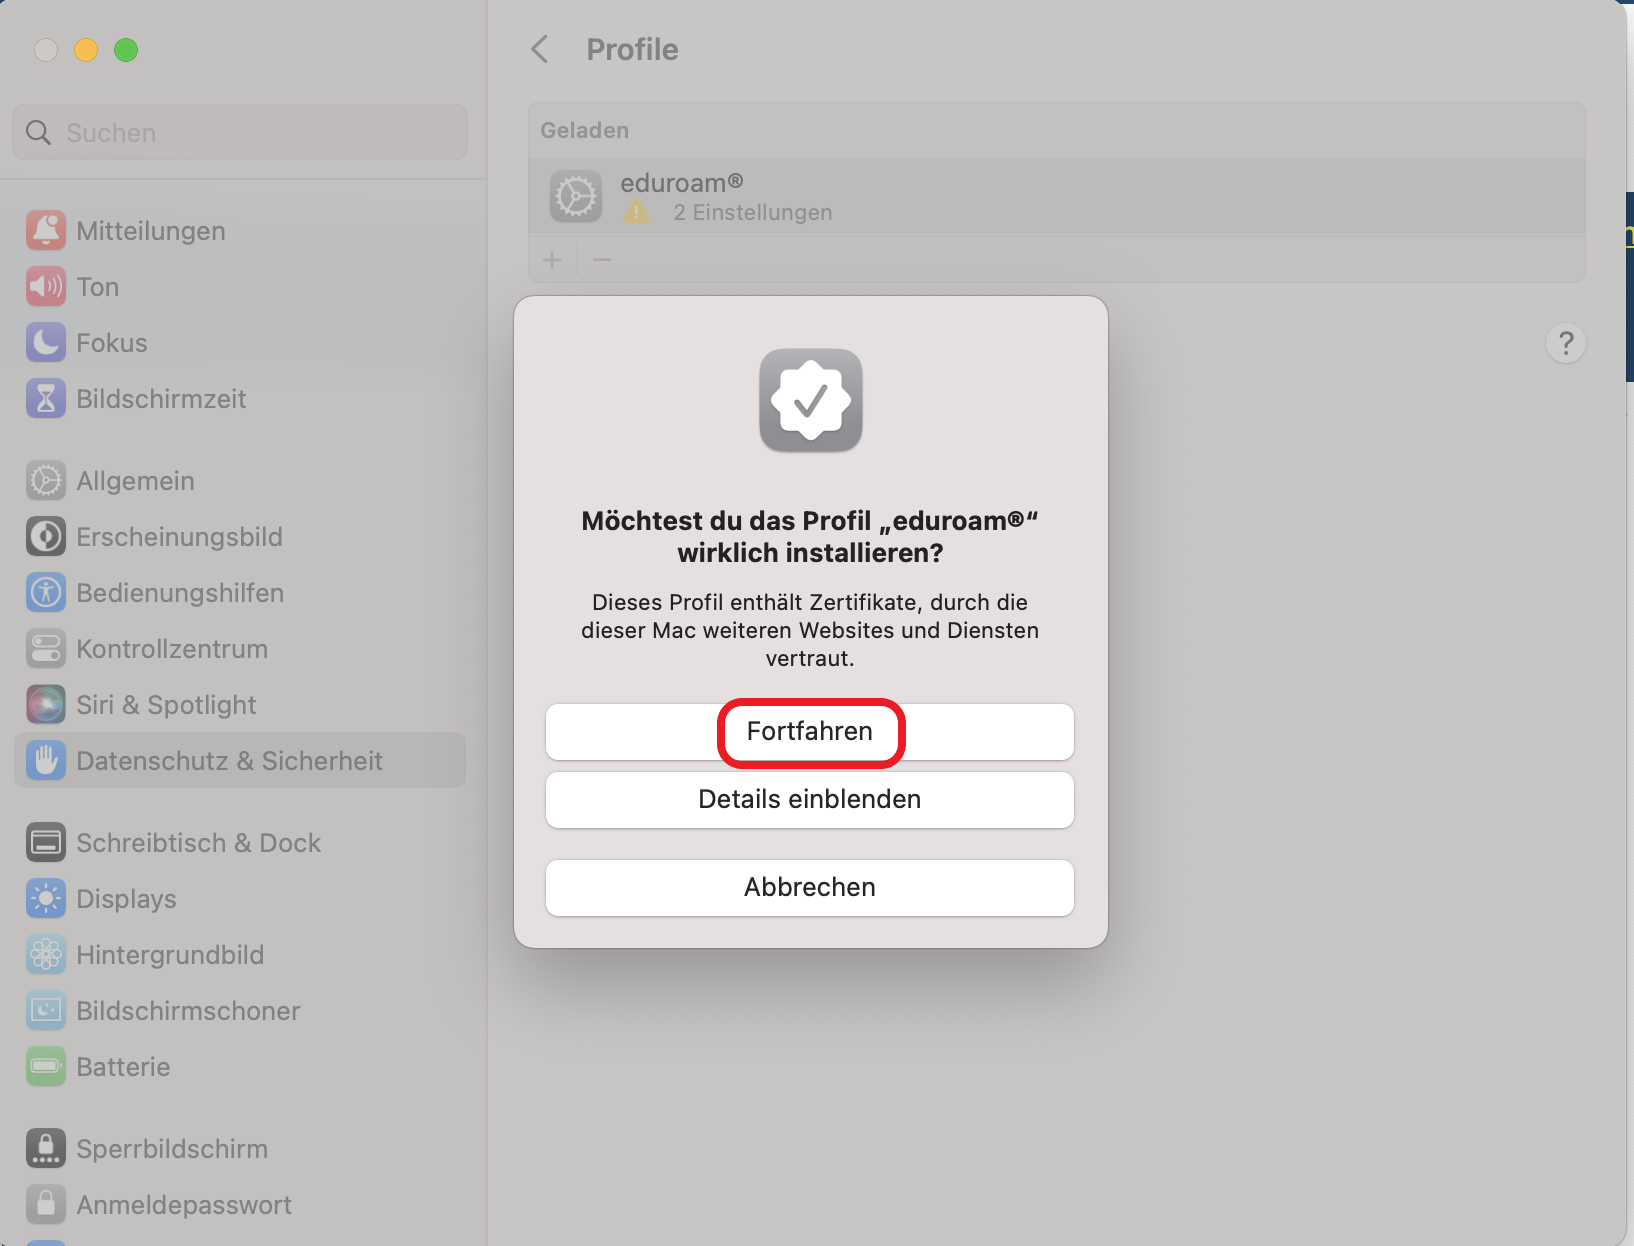
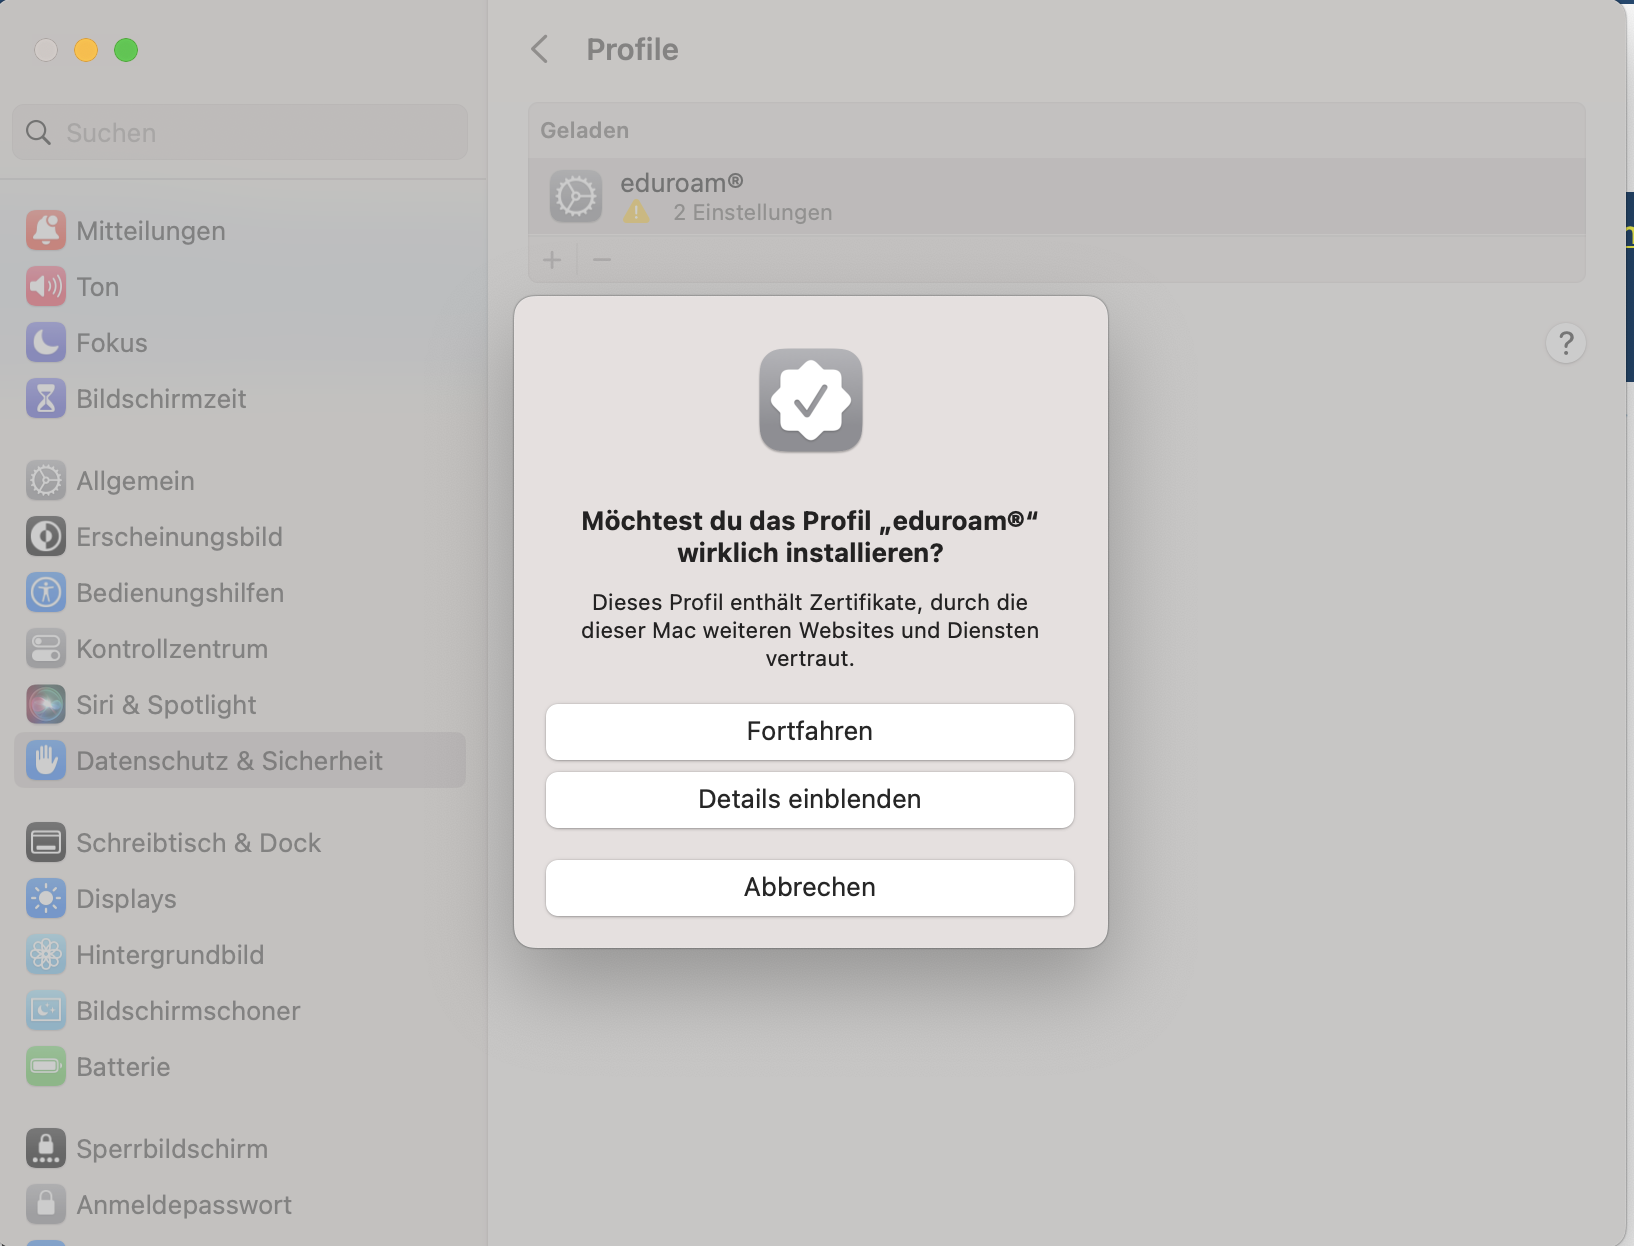
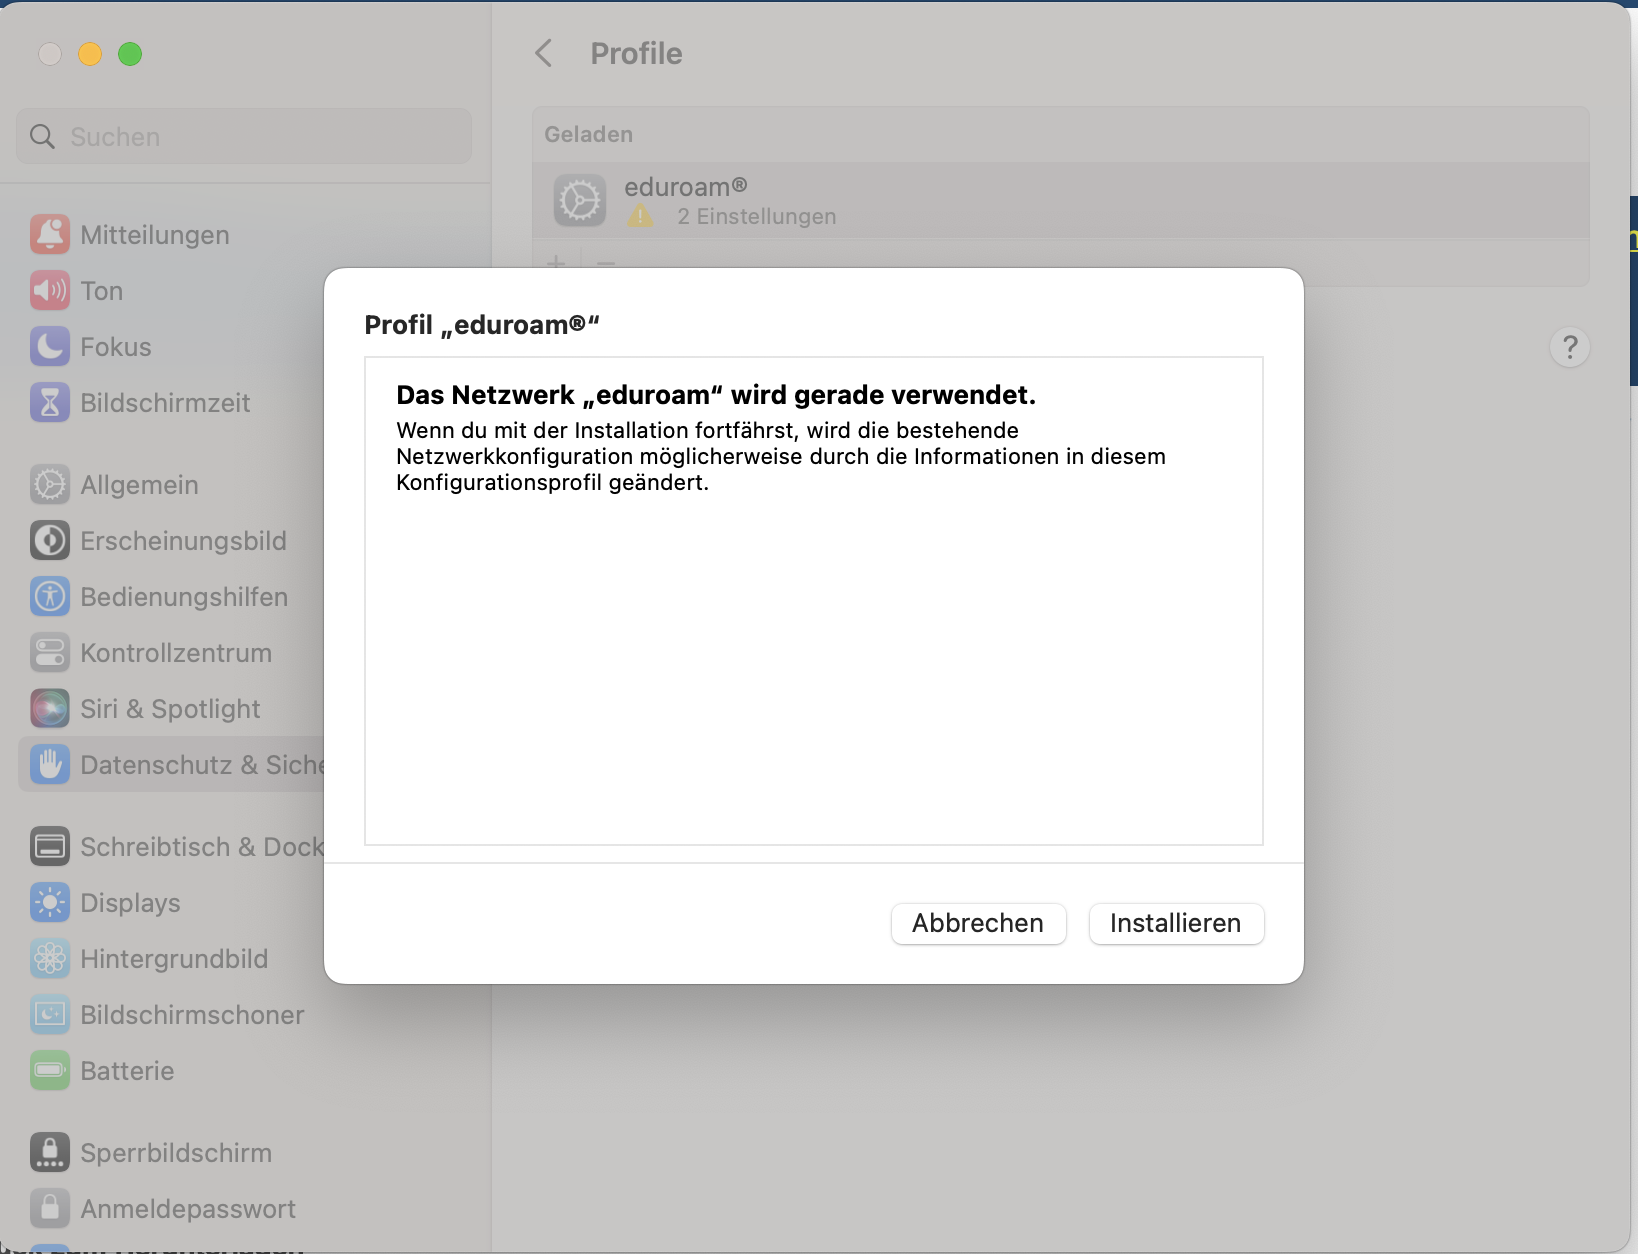
Schritt 9: Klicken Sie in dem geöffneten Fenster auf "Fortfahren".
Step 9: Click on "Continue" in the opened window.

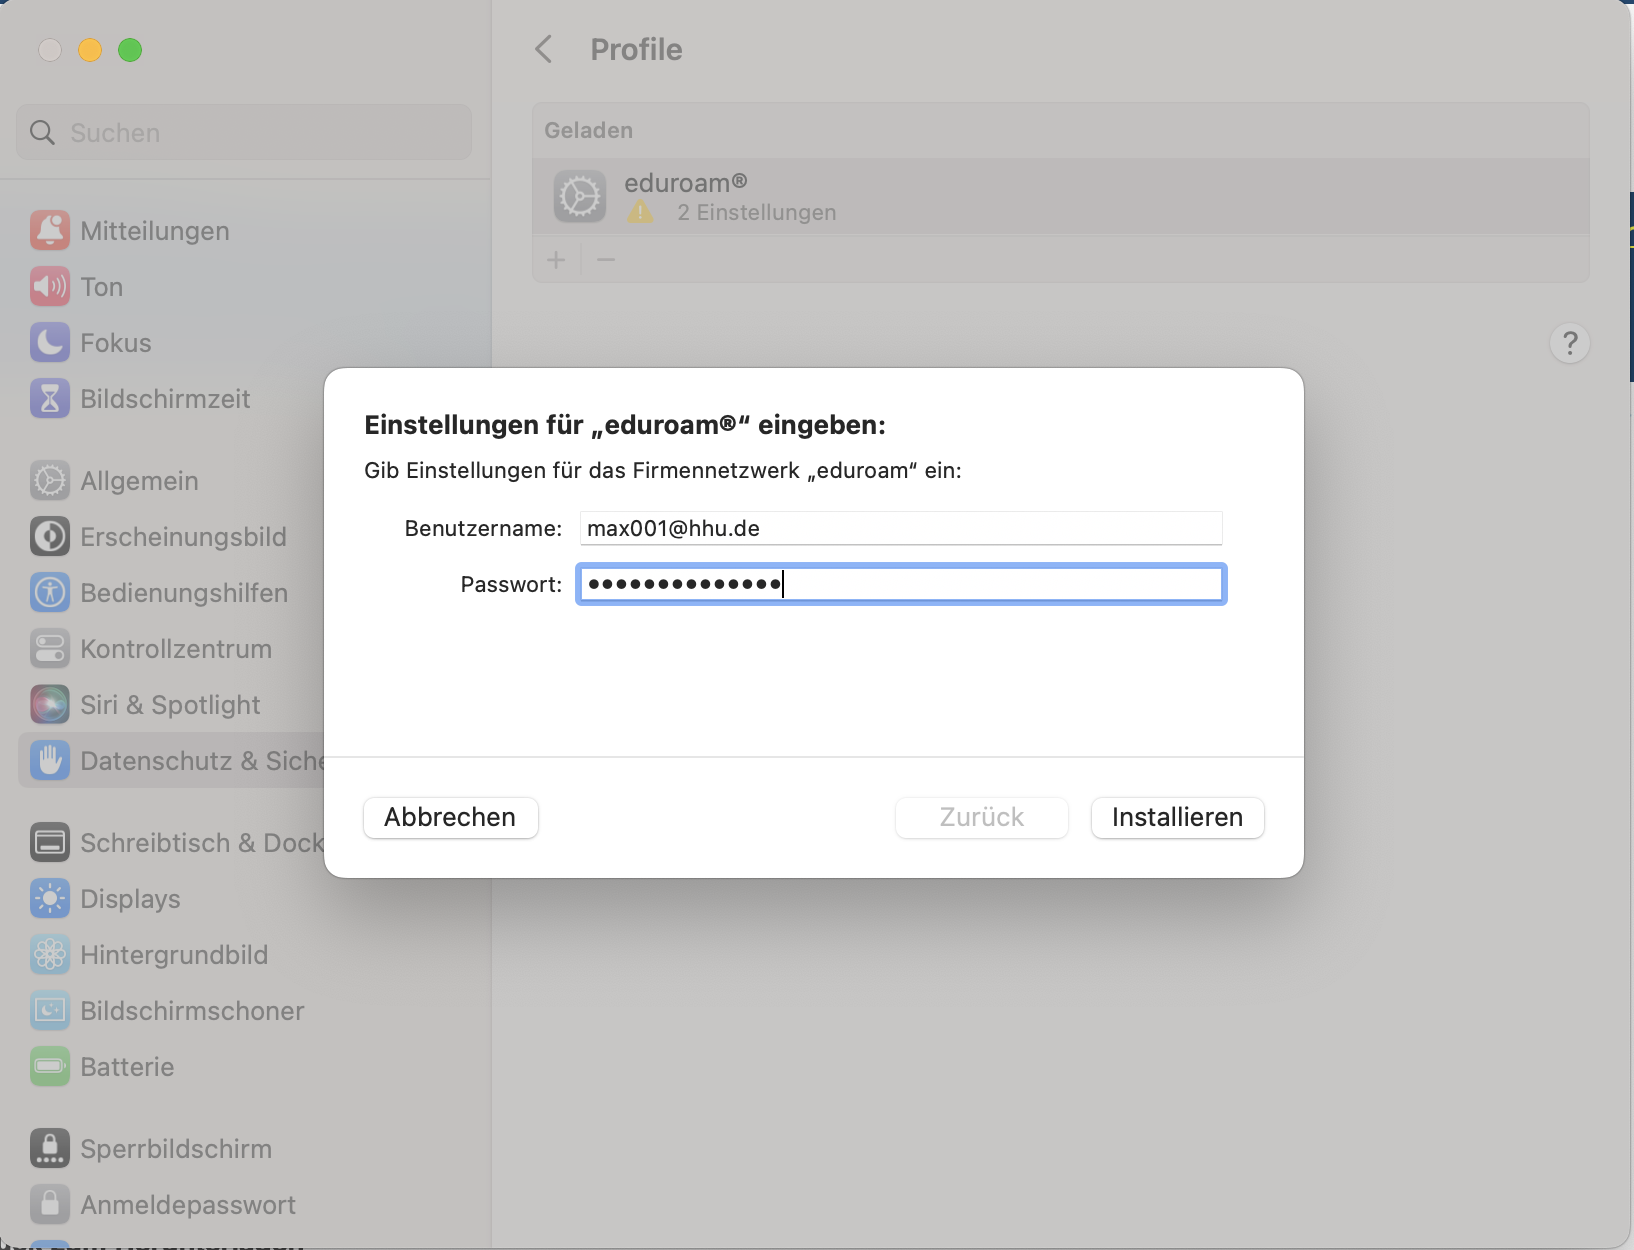
Schritt 10: Geben Sie Ihre Anmeldedaten ein (Uni-Kennung + Passwort) und klicken Sie dann unten rechts auf installieren. Achten Sie auch hier auf den Anhang @hhu.de an die Uni-Kennung.
Step 10: Enter your login data (university username + password) and then click on install at the bottom right. Make sure to add @hhu.de to the uni username here too.

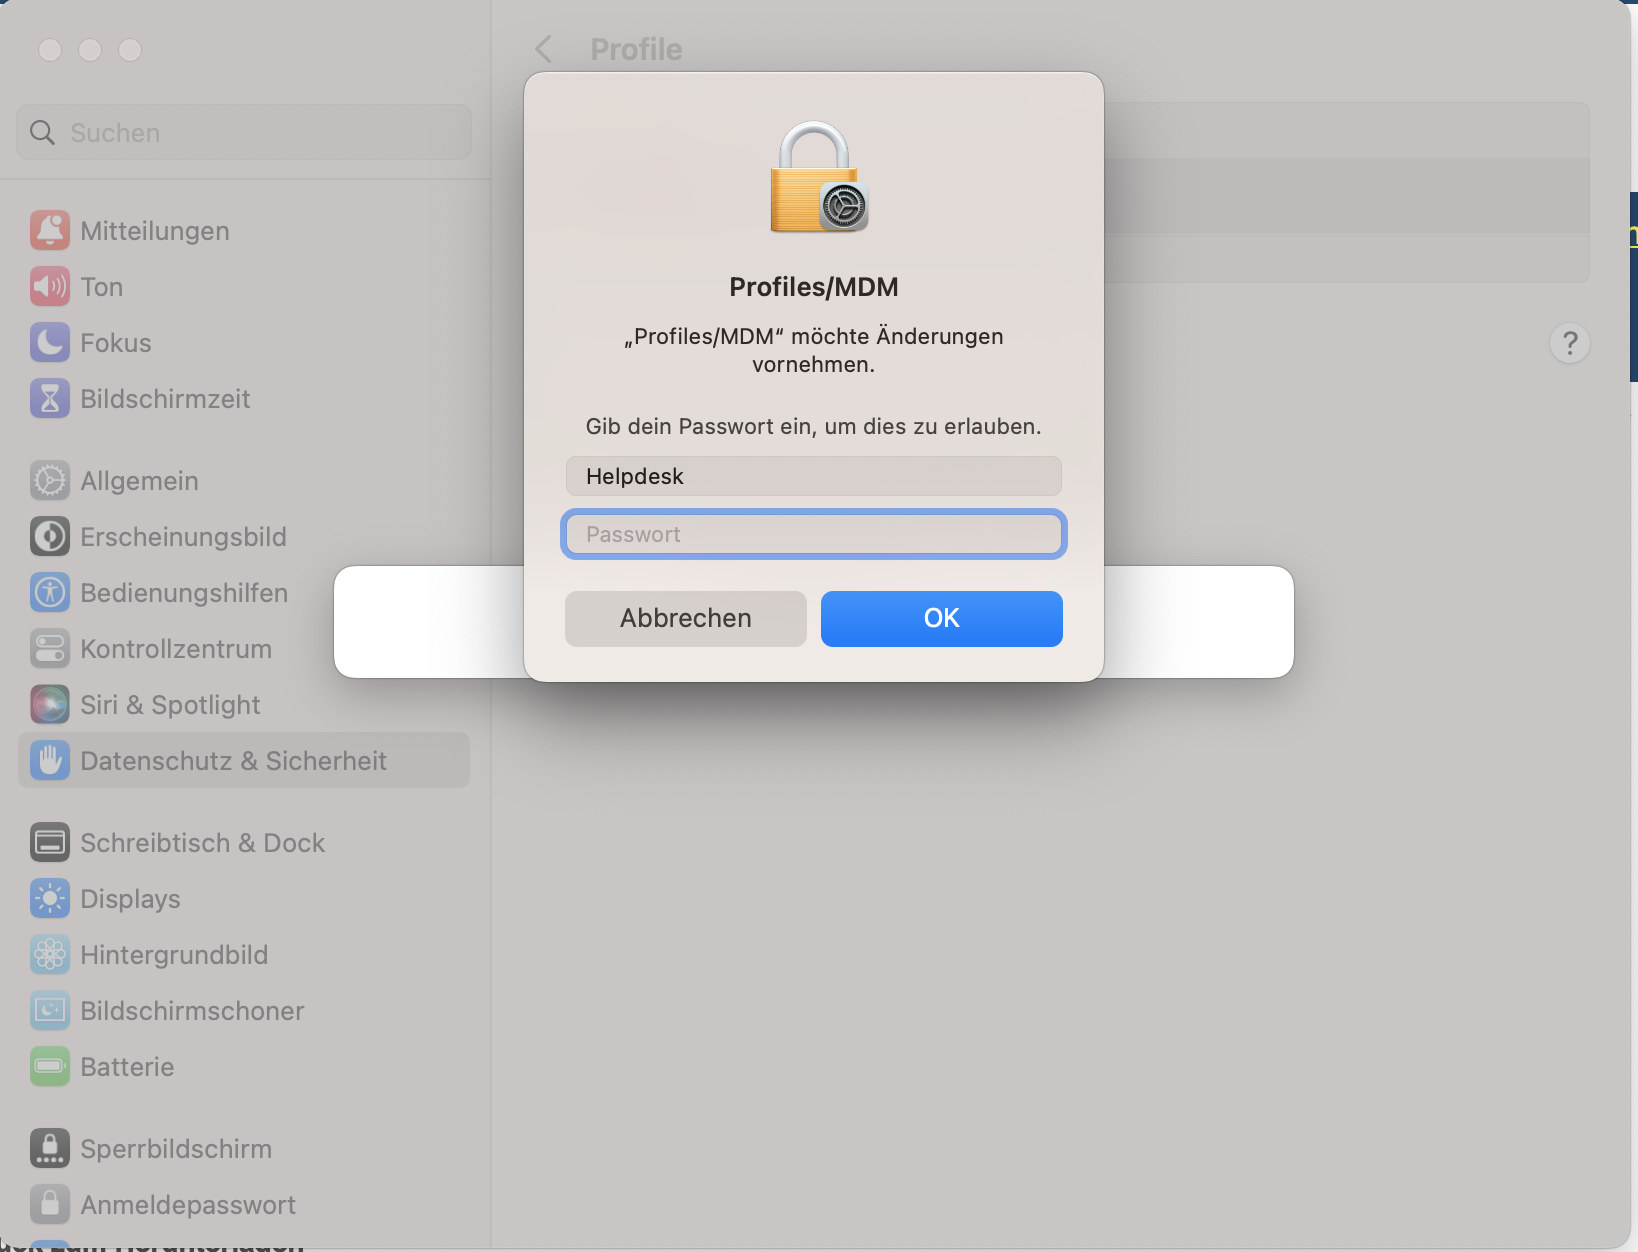
Schritt 11: Geben Sie dann das (Administrator-)Passwort Ihres Macs ein.
Step 11: Then enter the (administrator) password of your Mac.

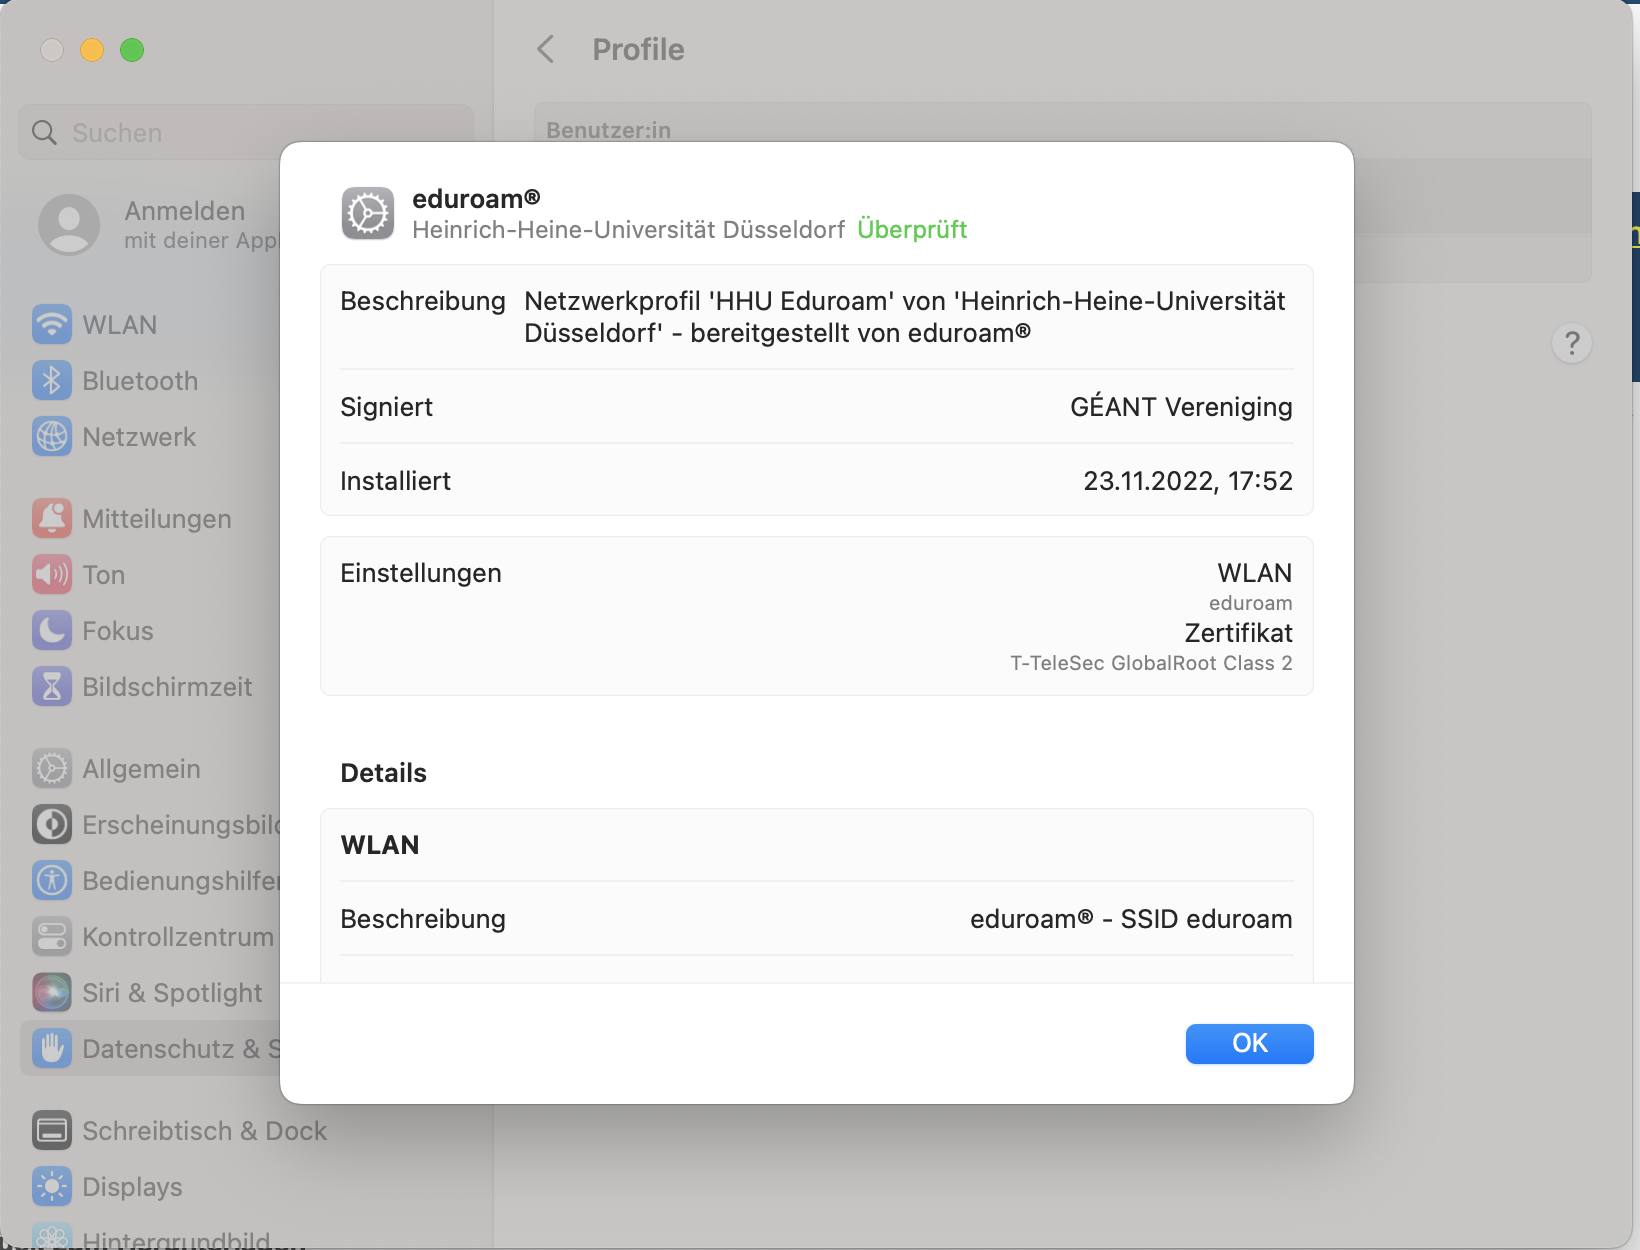
Schritt 12: Das richtige Profil ist installiert, wenn im folgenden Fenster unter "Zertifikat" T-TeleSec GlobalRoot Class 2 steht.
Step 12: The correct profile is installed if the following window says T-TeleSec GlobalRoot Class 2 under "Certificate".
3. Bestehende eduroam-Einrichtung aus WLAN-Konfiguration und Profil-Konfiguration löschen /
| Anker | ||||
|---|---|---|---|---|
|
Delete existing eduroam setup from WLAN configuration and profile configuration
| Anker | ||||
|---|---|---|---|---|
|
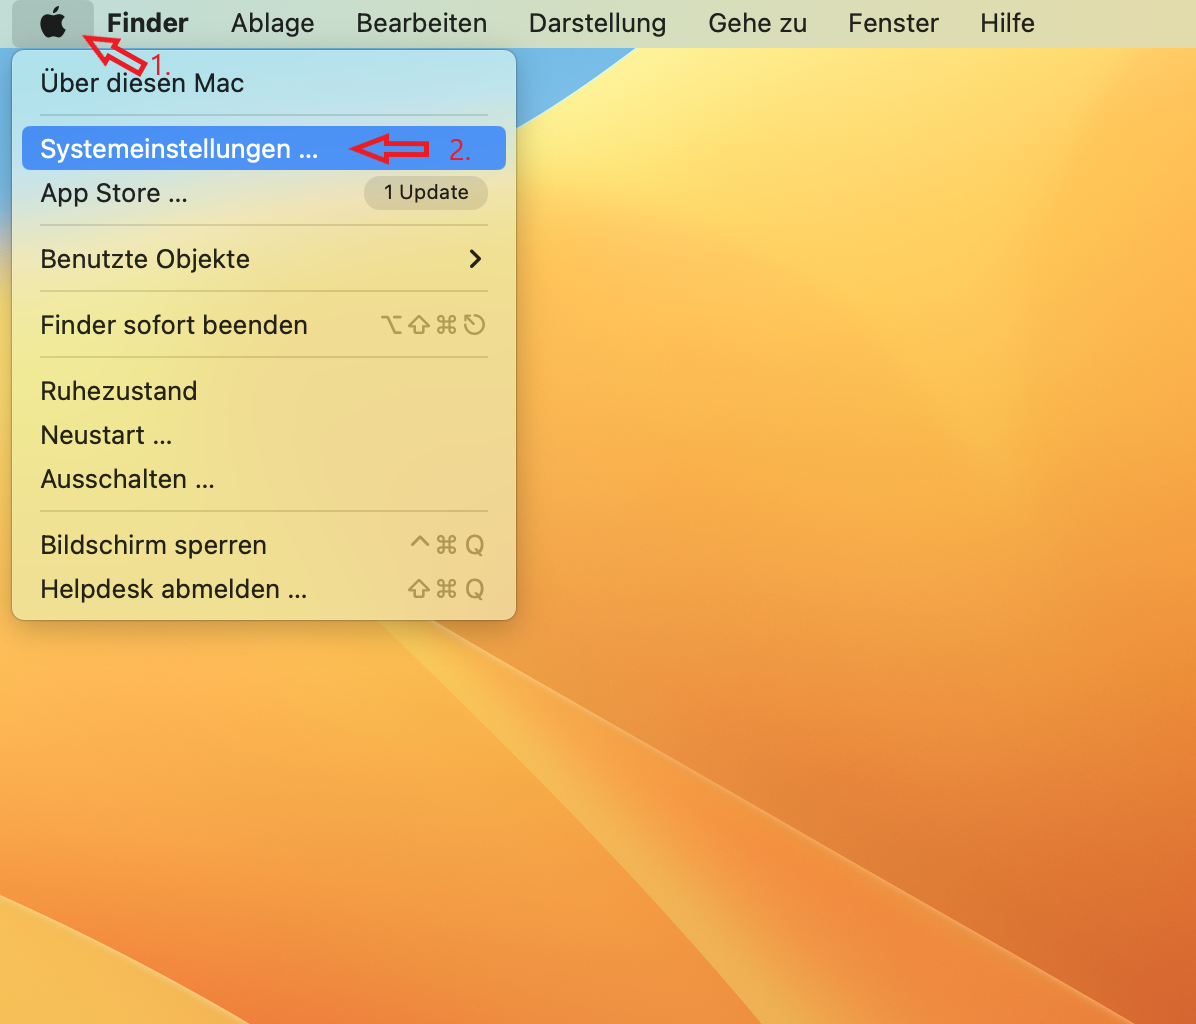
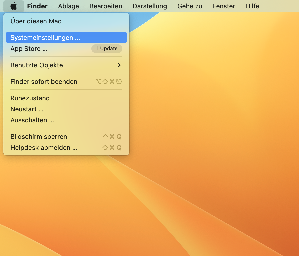
Schritt 1: Klicken Sie oben links auf das Apfel-Symbol (1) und wählen Sie "Systemeinstellungen" (2) aus.
Step 1: Click the apple icon (1) in the upper left corner and select "System Preferences" (2).
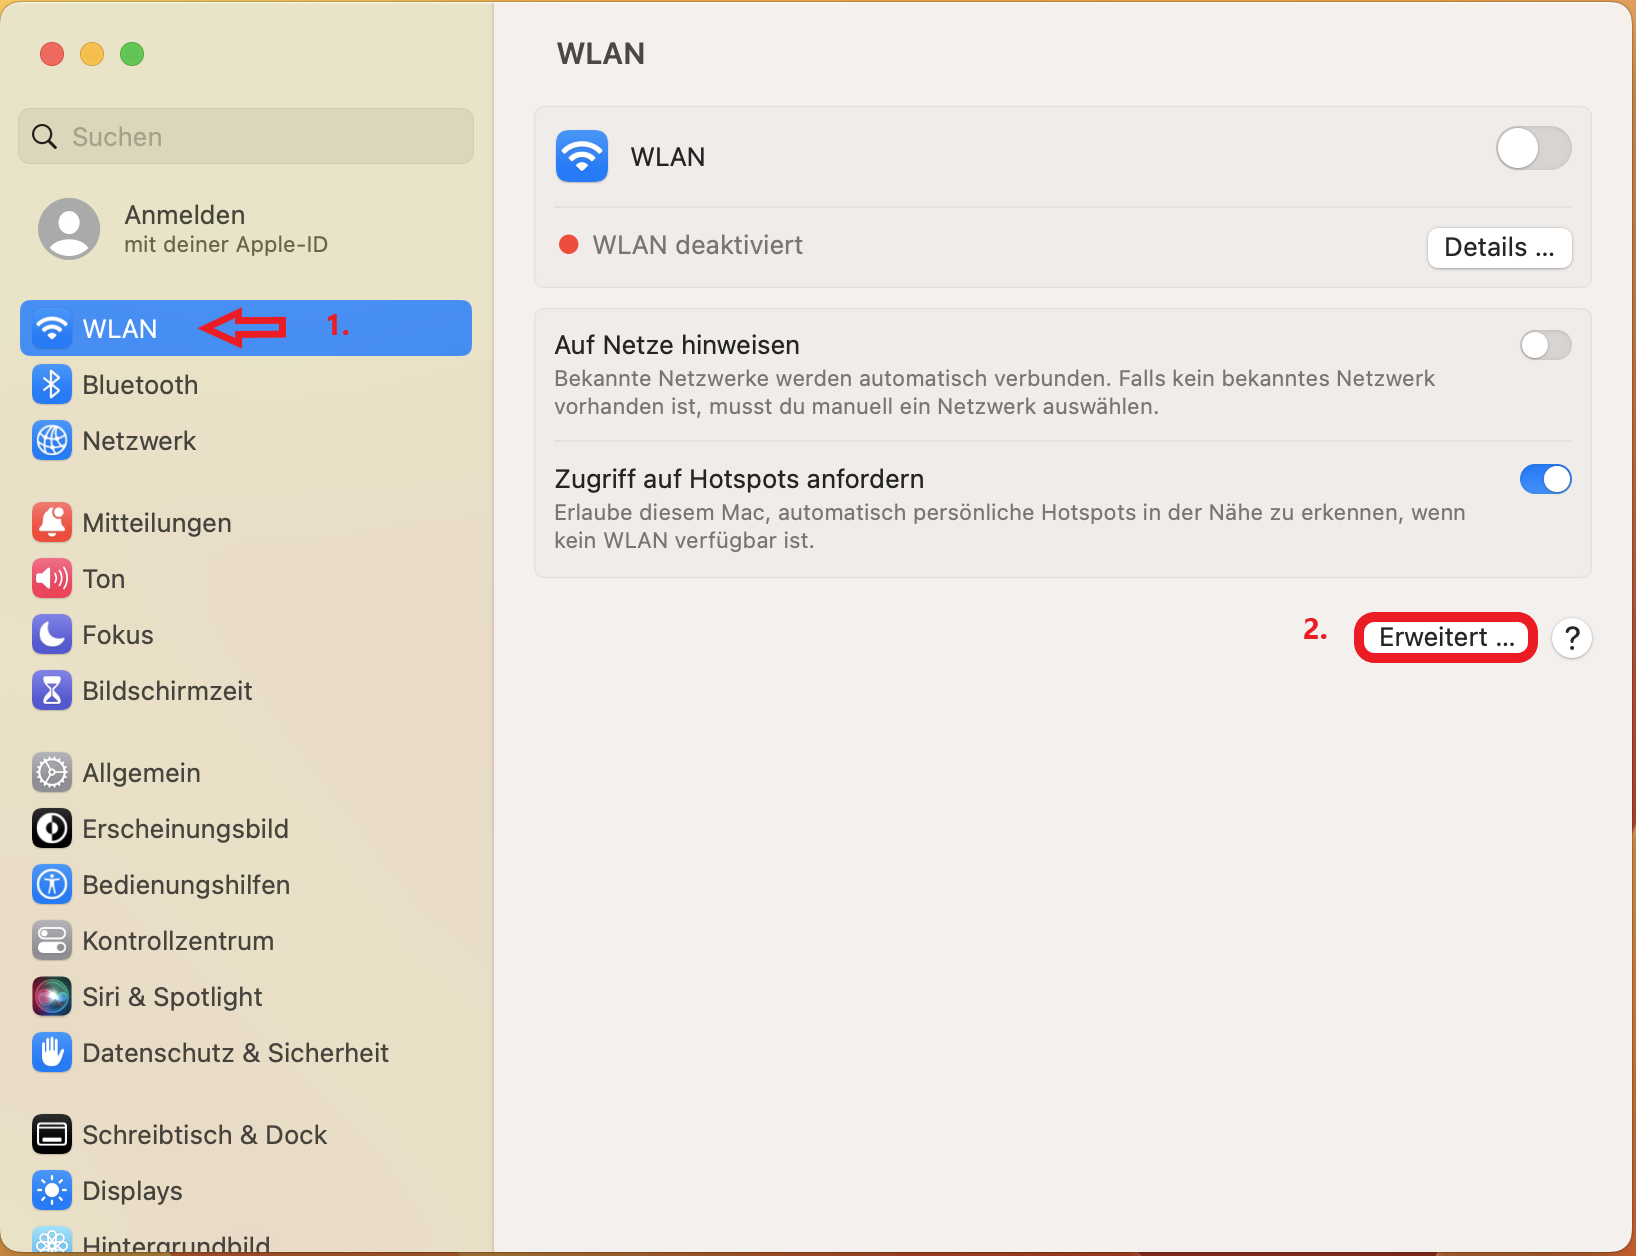
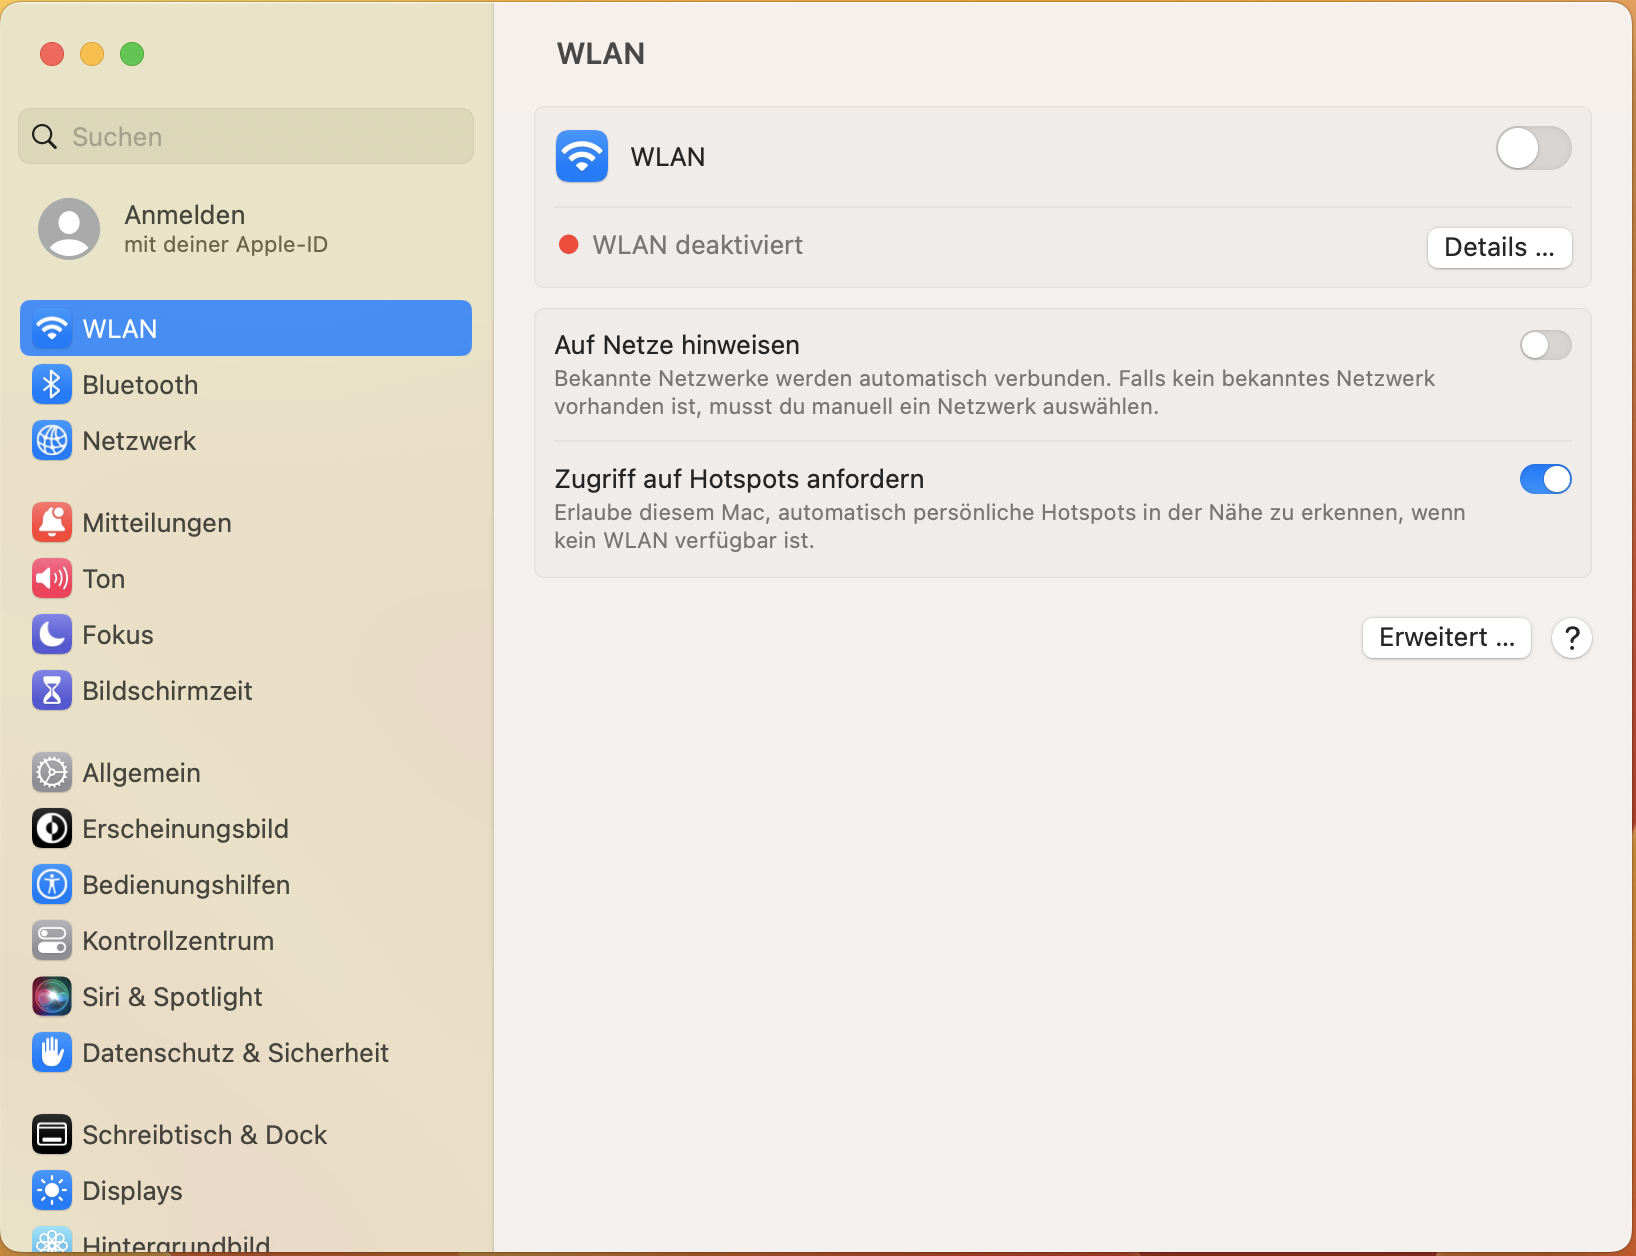
Schritt 2: Klicken Sie auf "WLAN" (1) und dann auf "Erweitert..." (2).
Step 2: Click on "WIFI" (1) and then on "advanced..." (2).
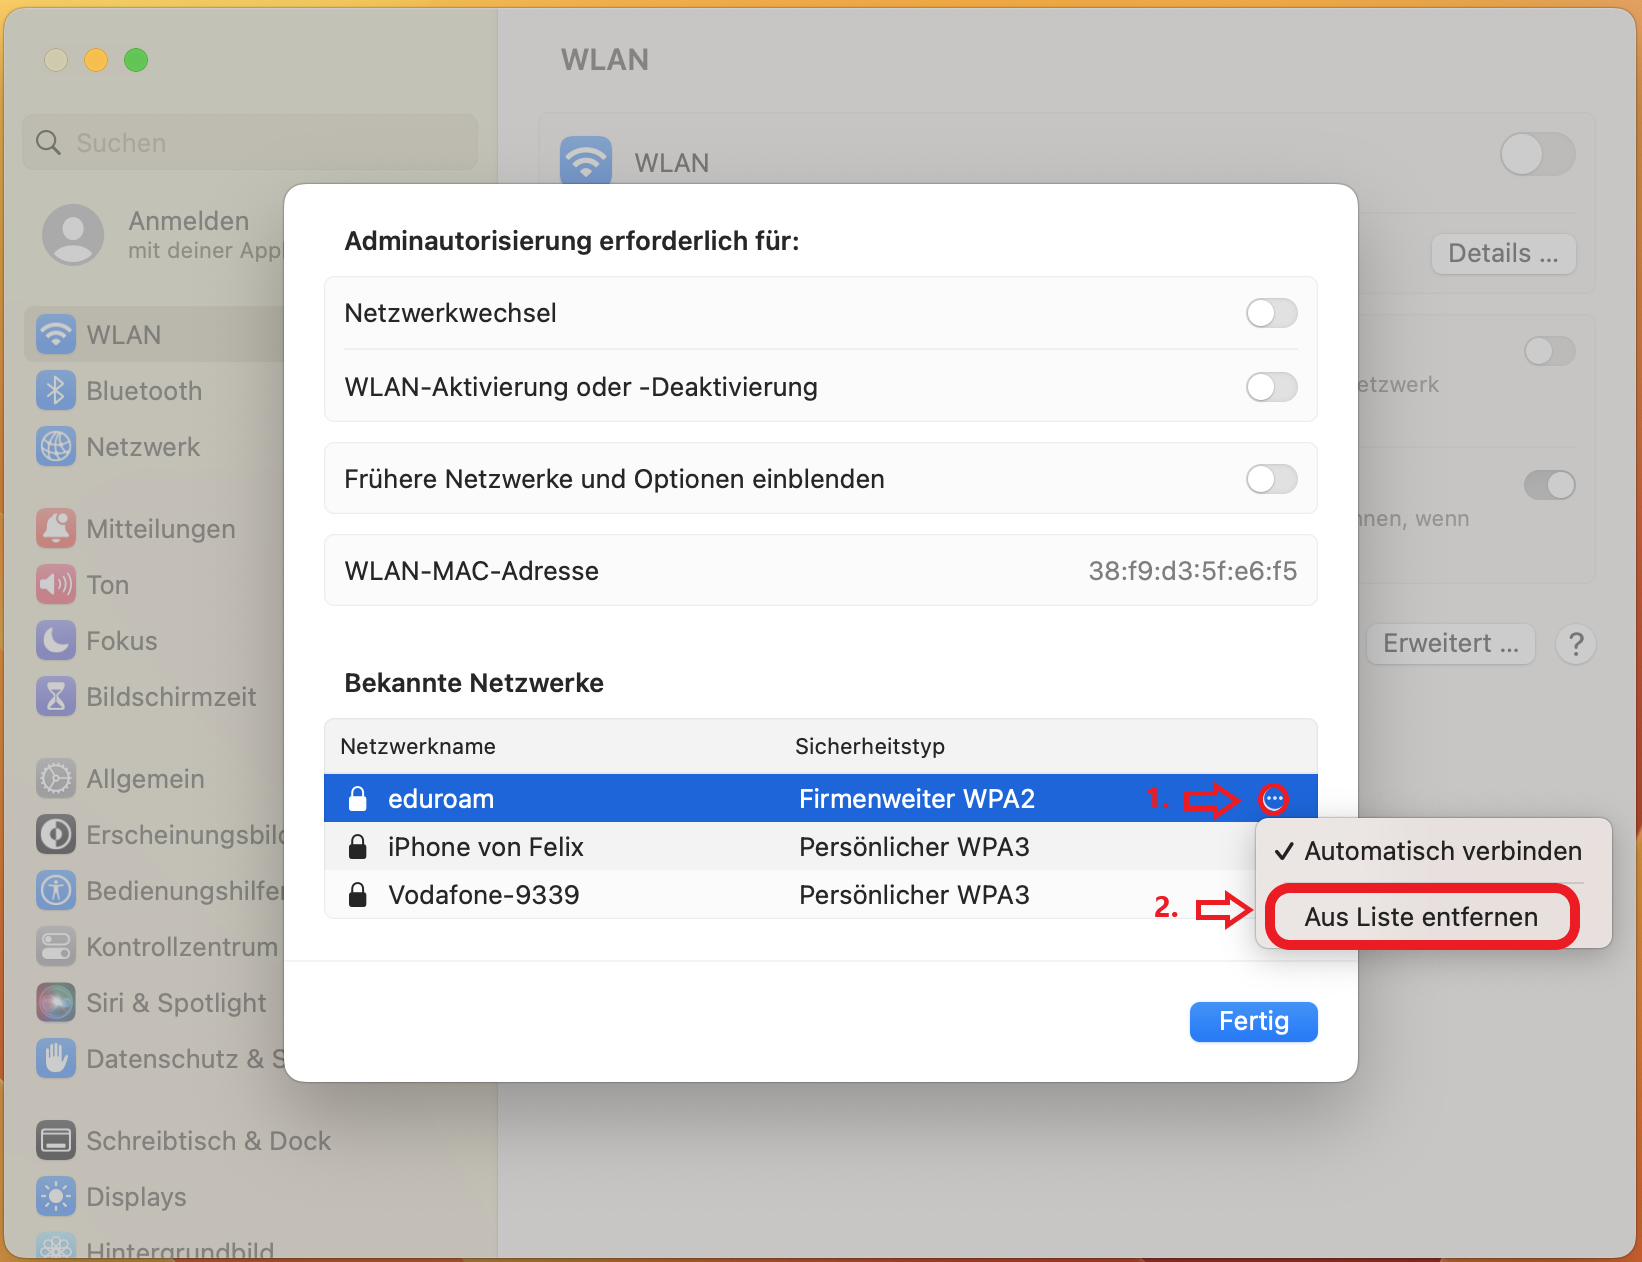
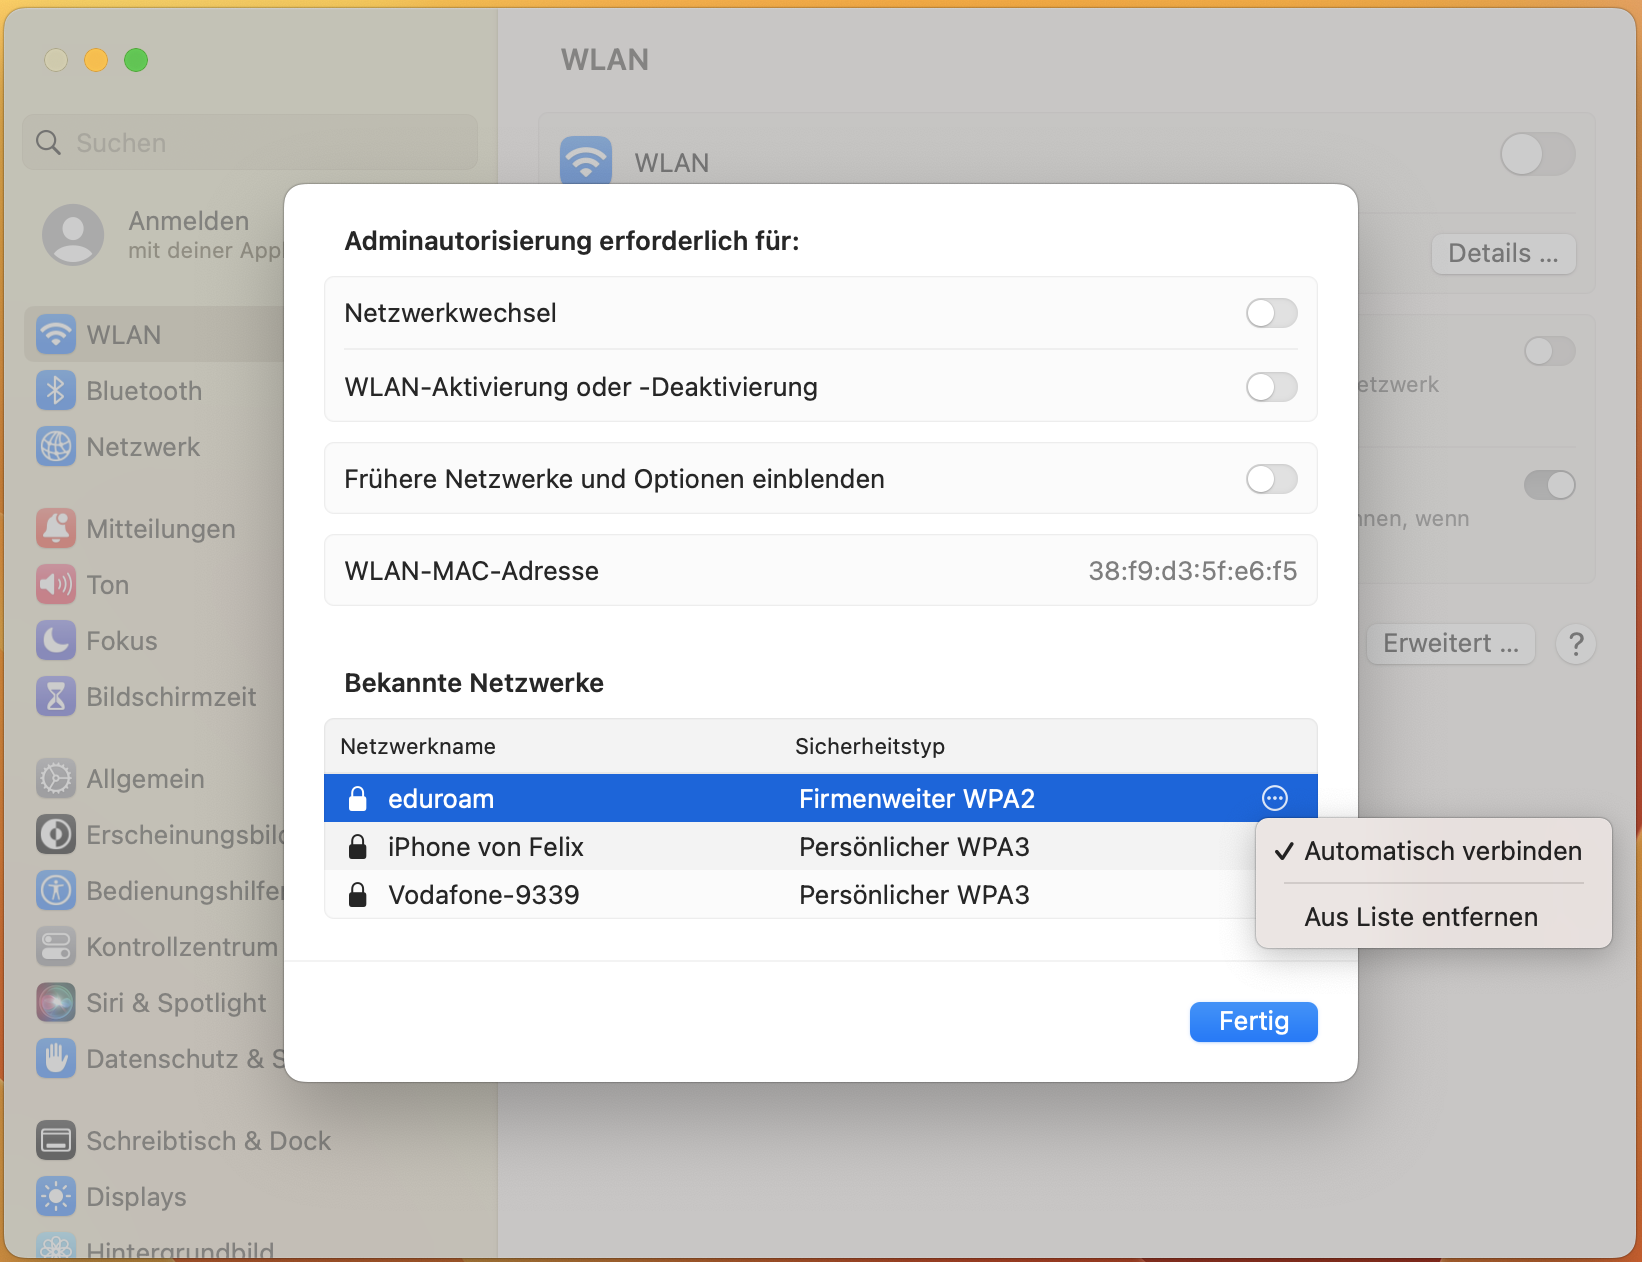
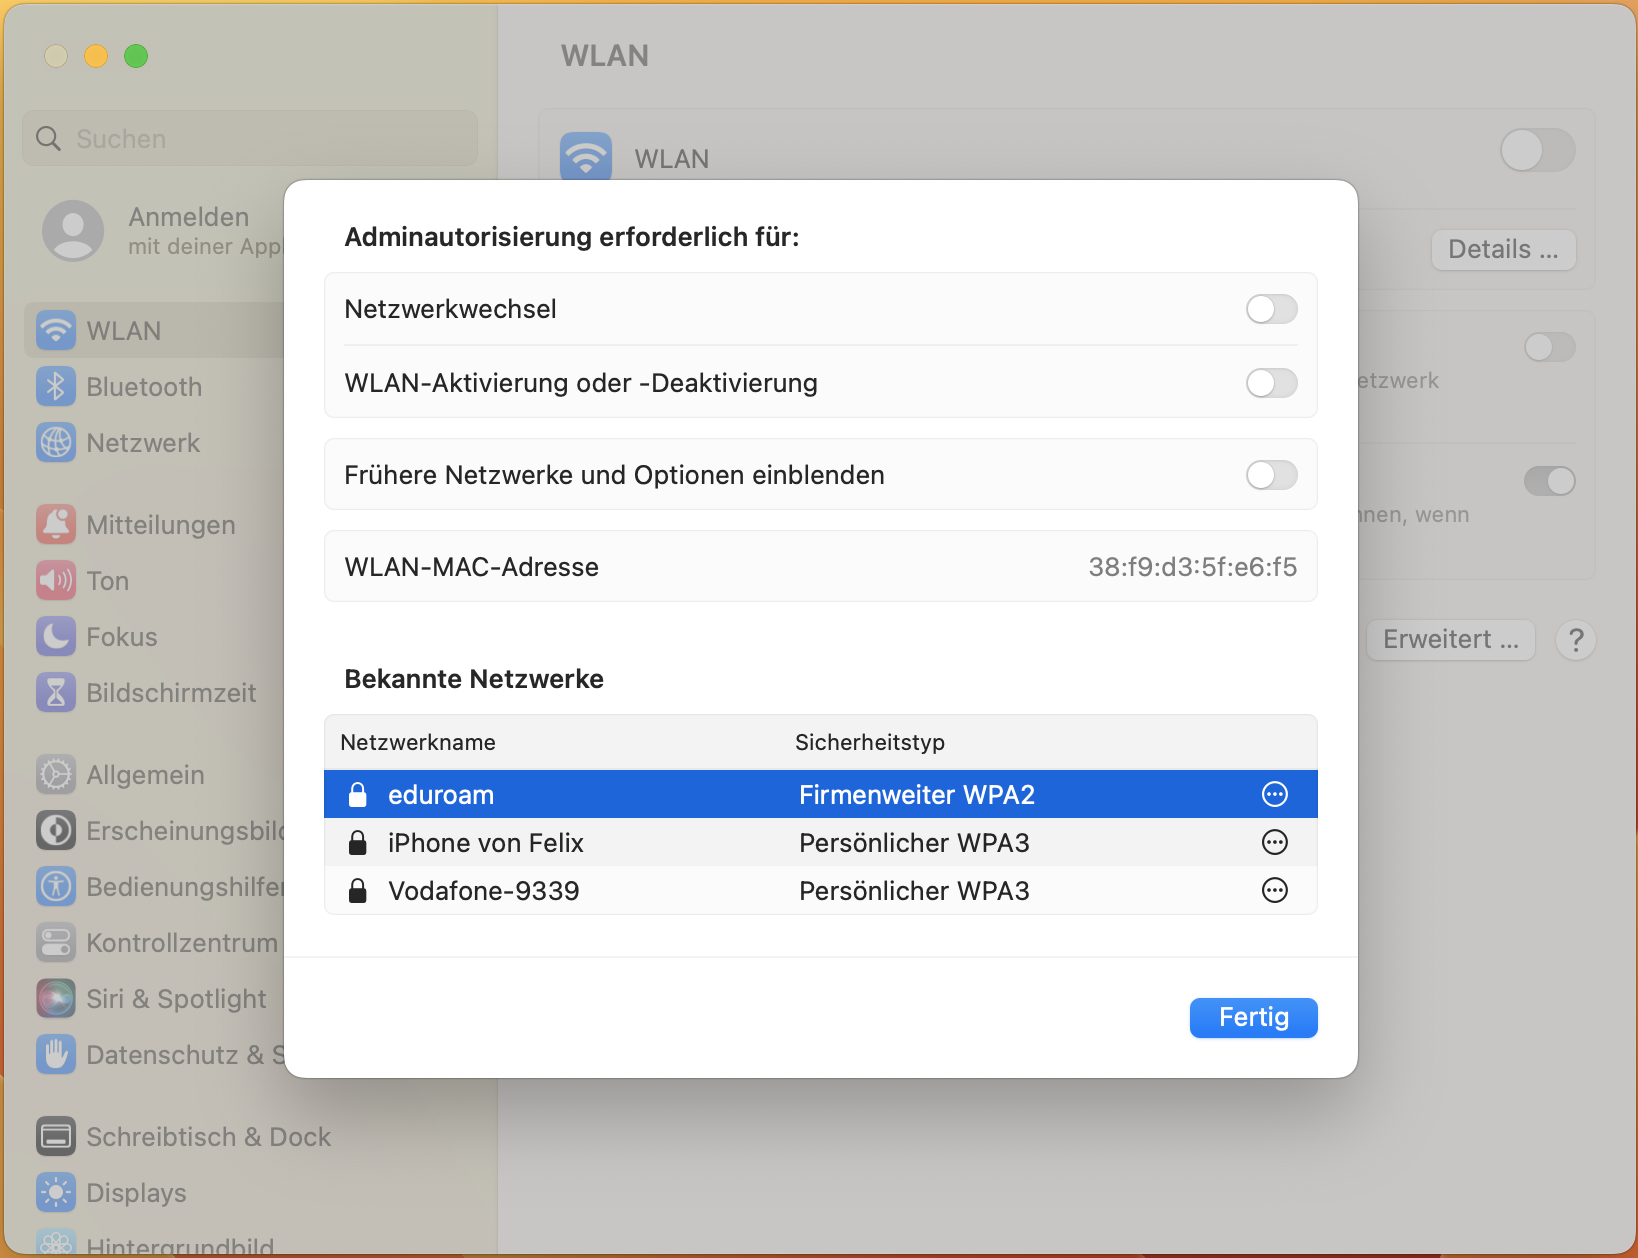
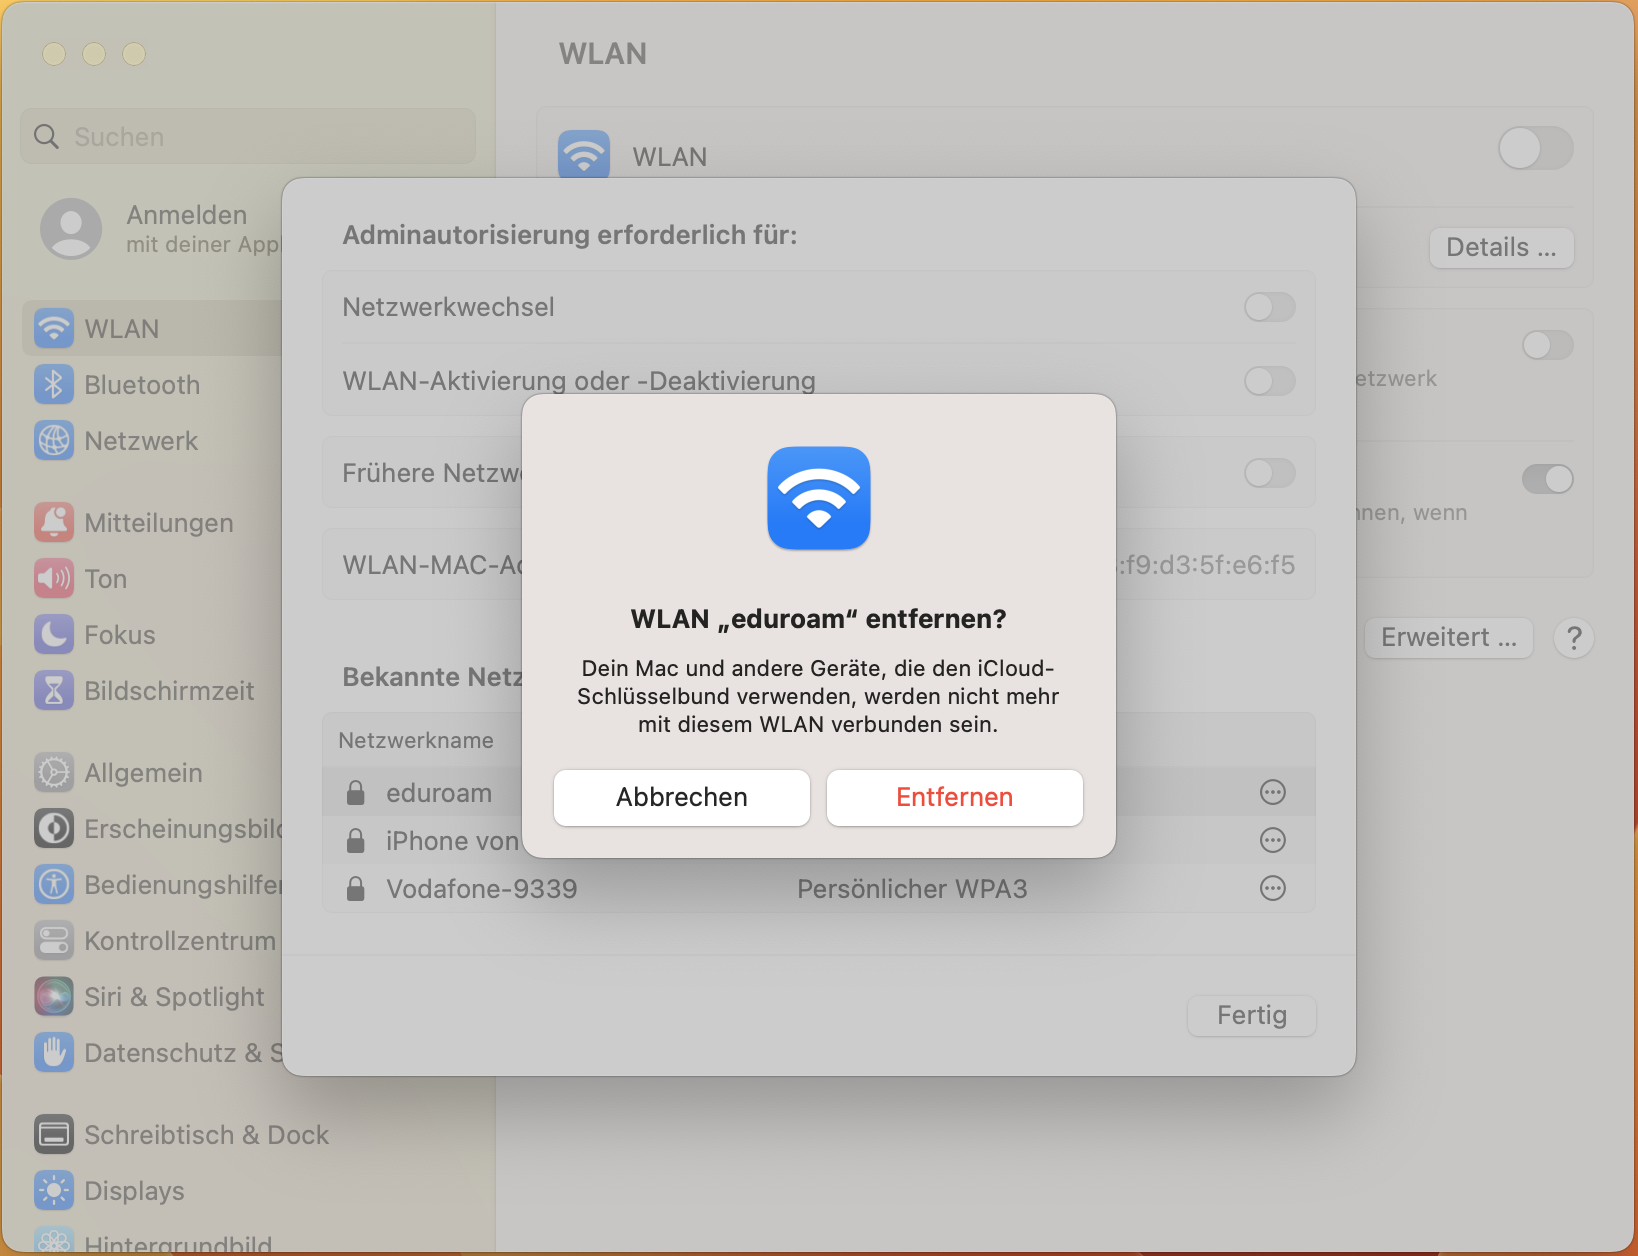
Schritt 3: Suchen Sie "eduroam" in der Liste und klicken Sie auf die drei Punkte (1) und dann wählen Sie "Aus Liste entfernen" (2) aus.
Step 3: Search for "eduroam" in the list and click on the three dots (1) and then select "Remove from list" (2).
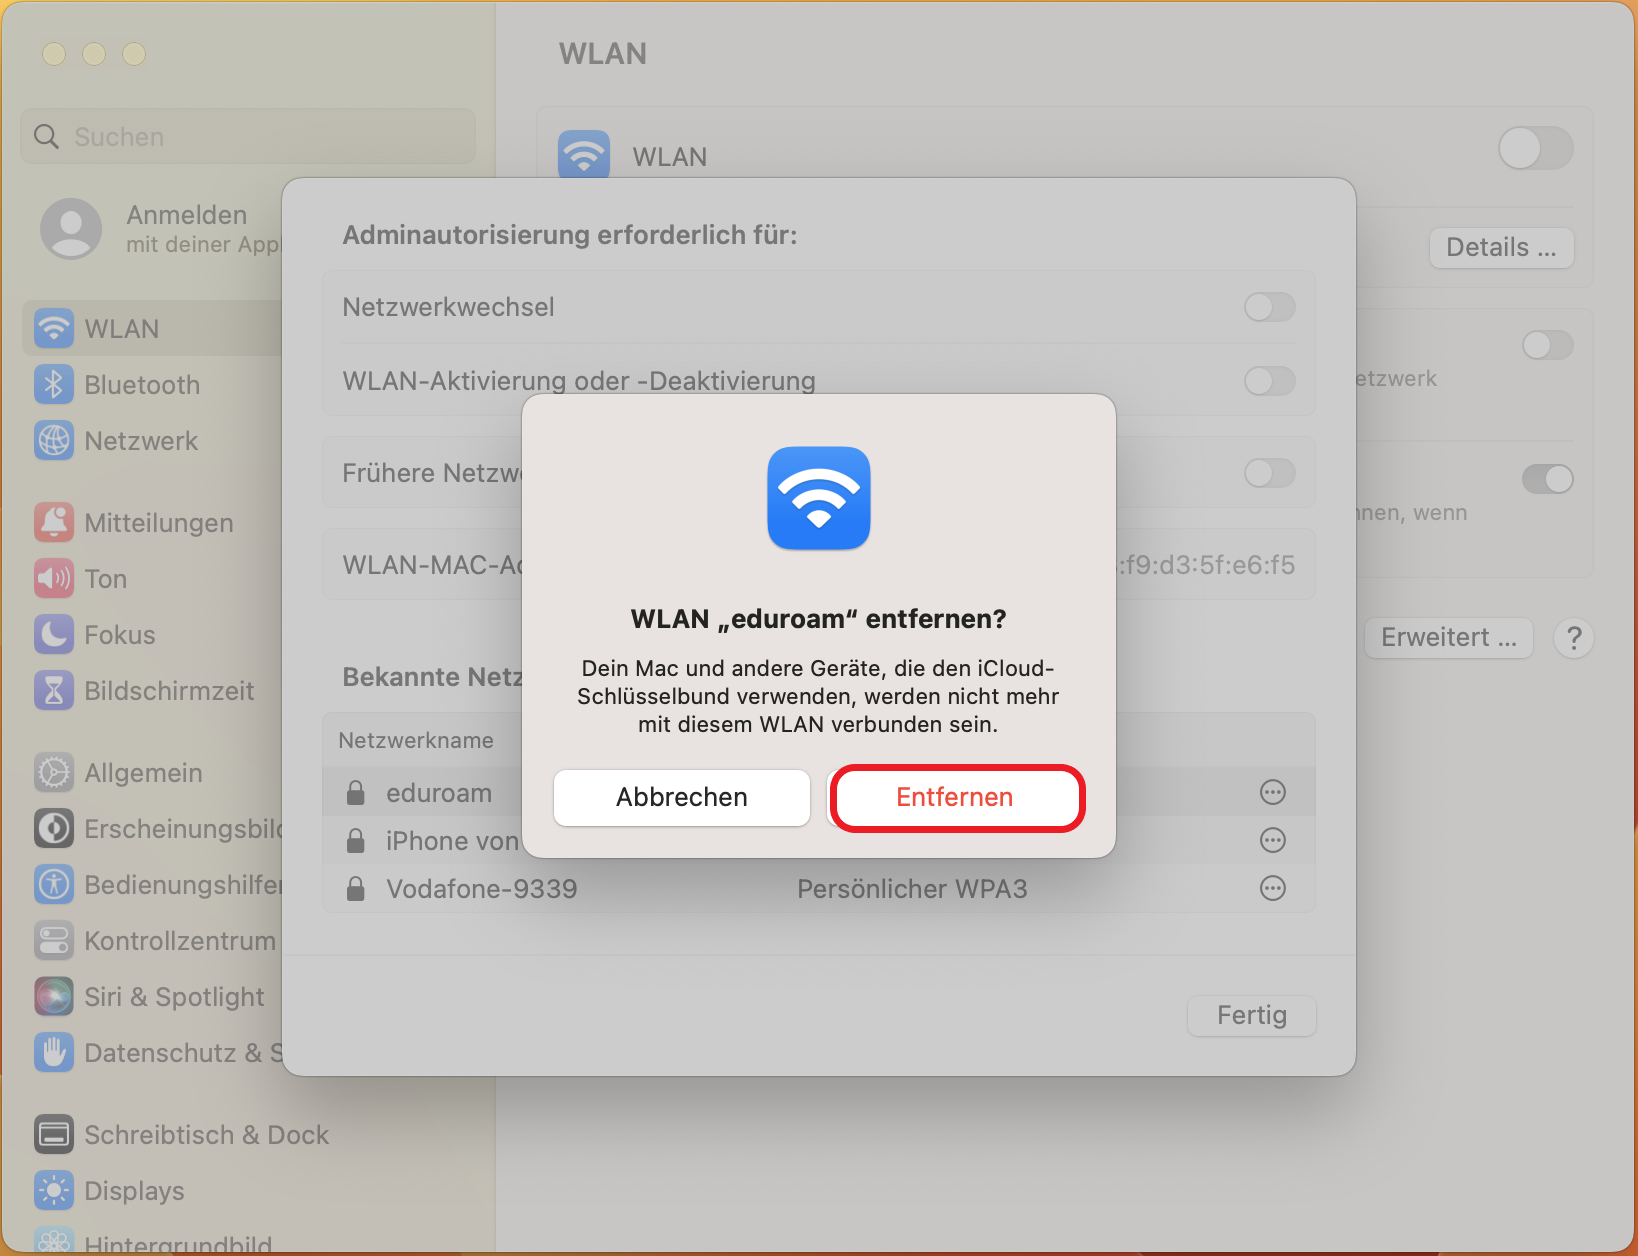
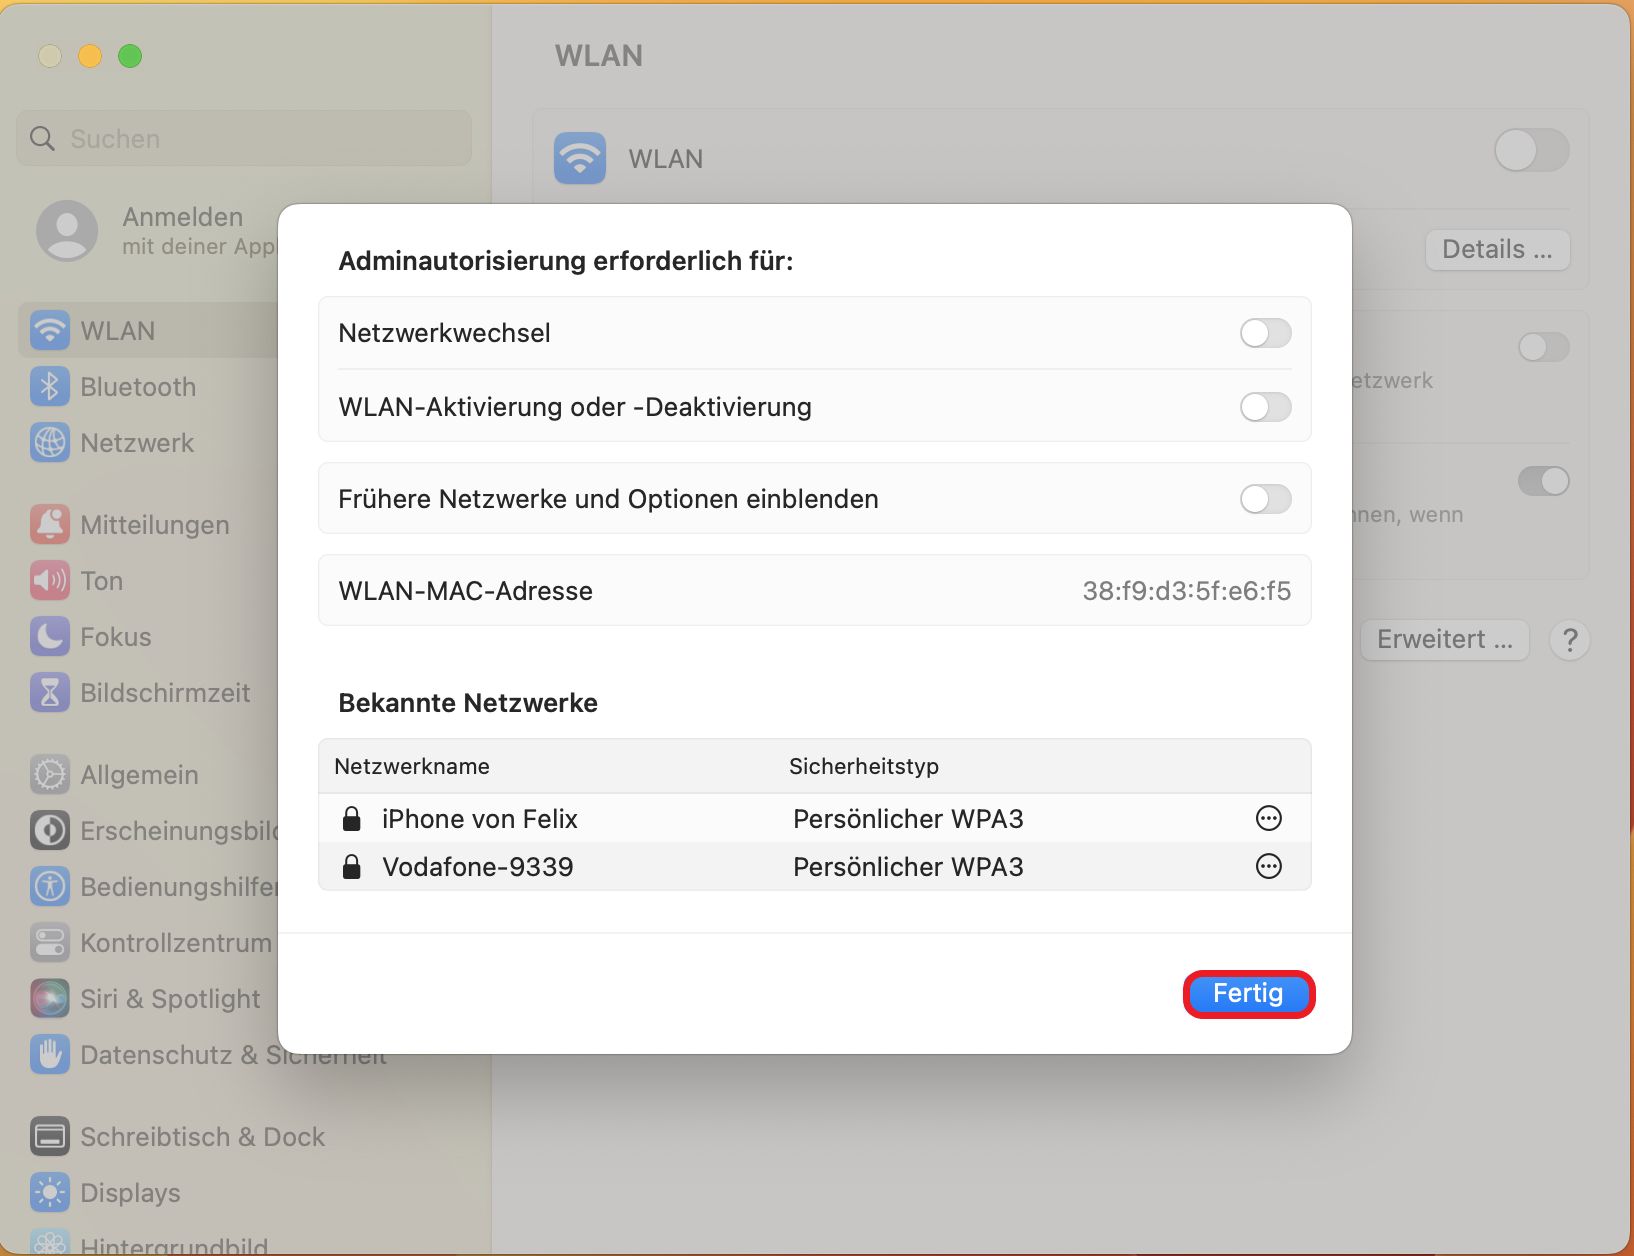
Schritt 4: Bestätigen Sie den Prozess mit "Entfernen" und klicken Sie anschließend auf "Fertig".
Step 4: Confirm the process with "Remove" and then click on "Done".
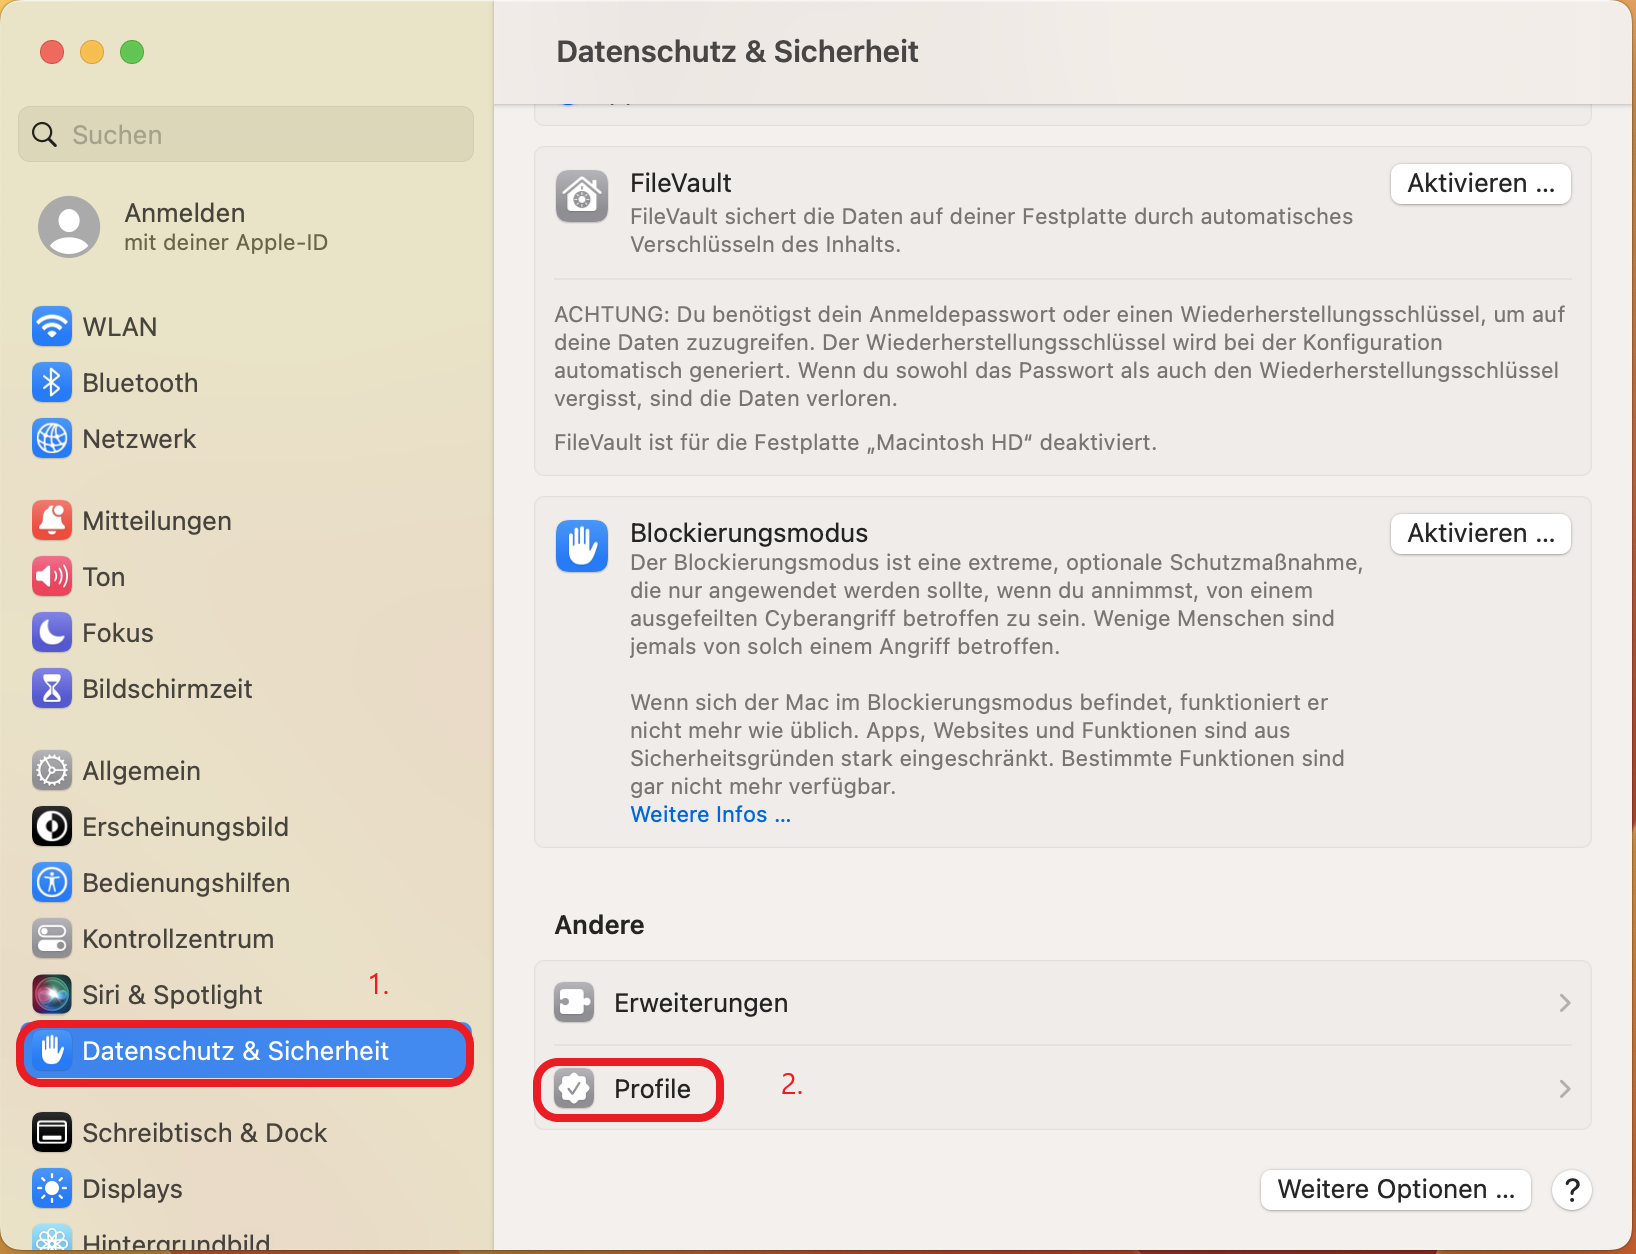
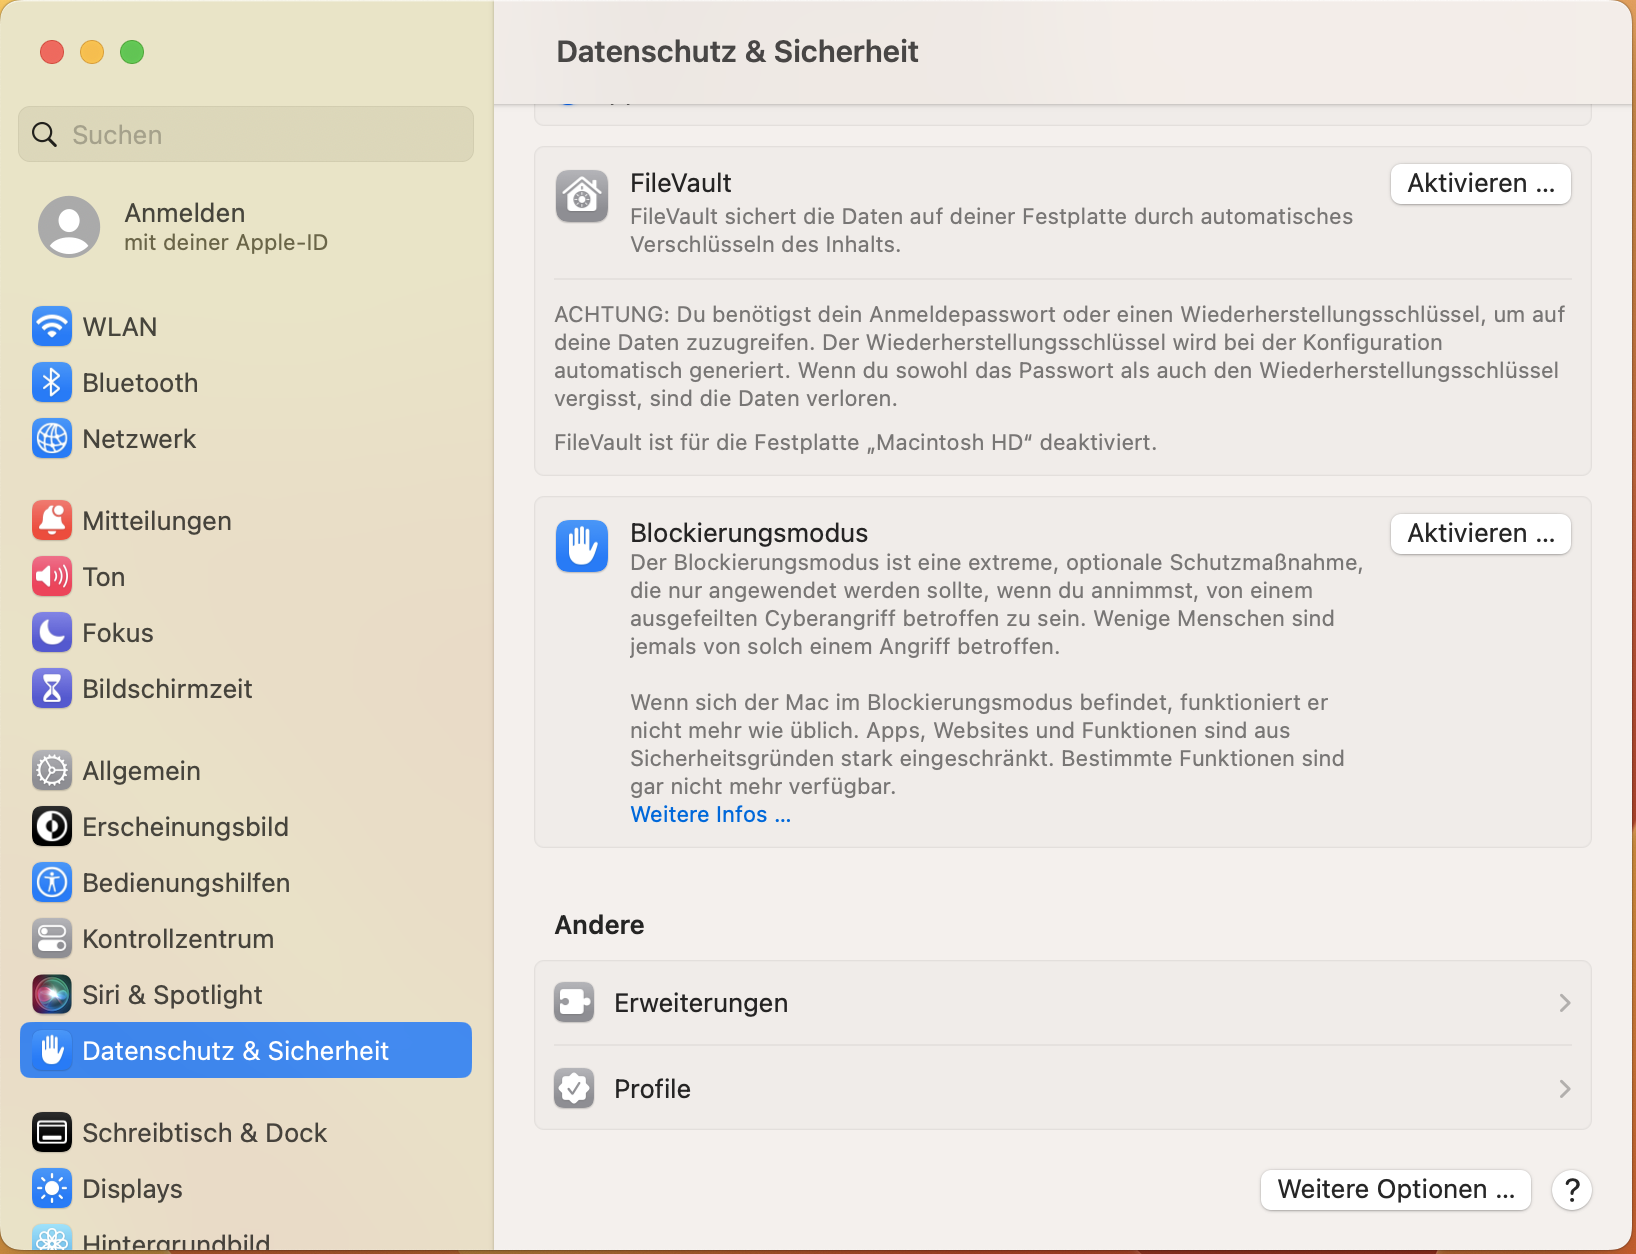
Schritt 5: Gehen Sie in den Einstellungen auf "Datenschutz & Sicherheit" (1) und scrollen Sie ganz nach nach unten und klicken Sie auf "Profile" (2).
Step 5: In the settings, go to "Privacy & Security" (1) and scroll all the way down and click on "Profiles" (2).
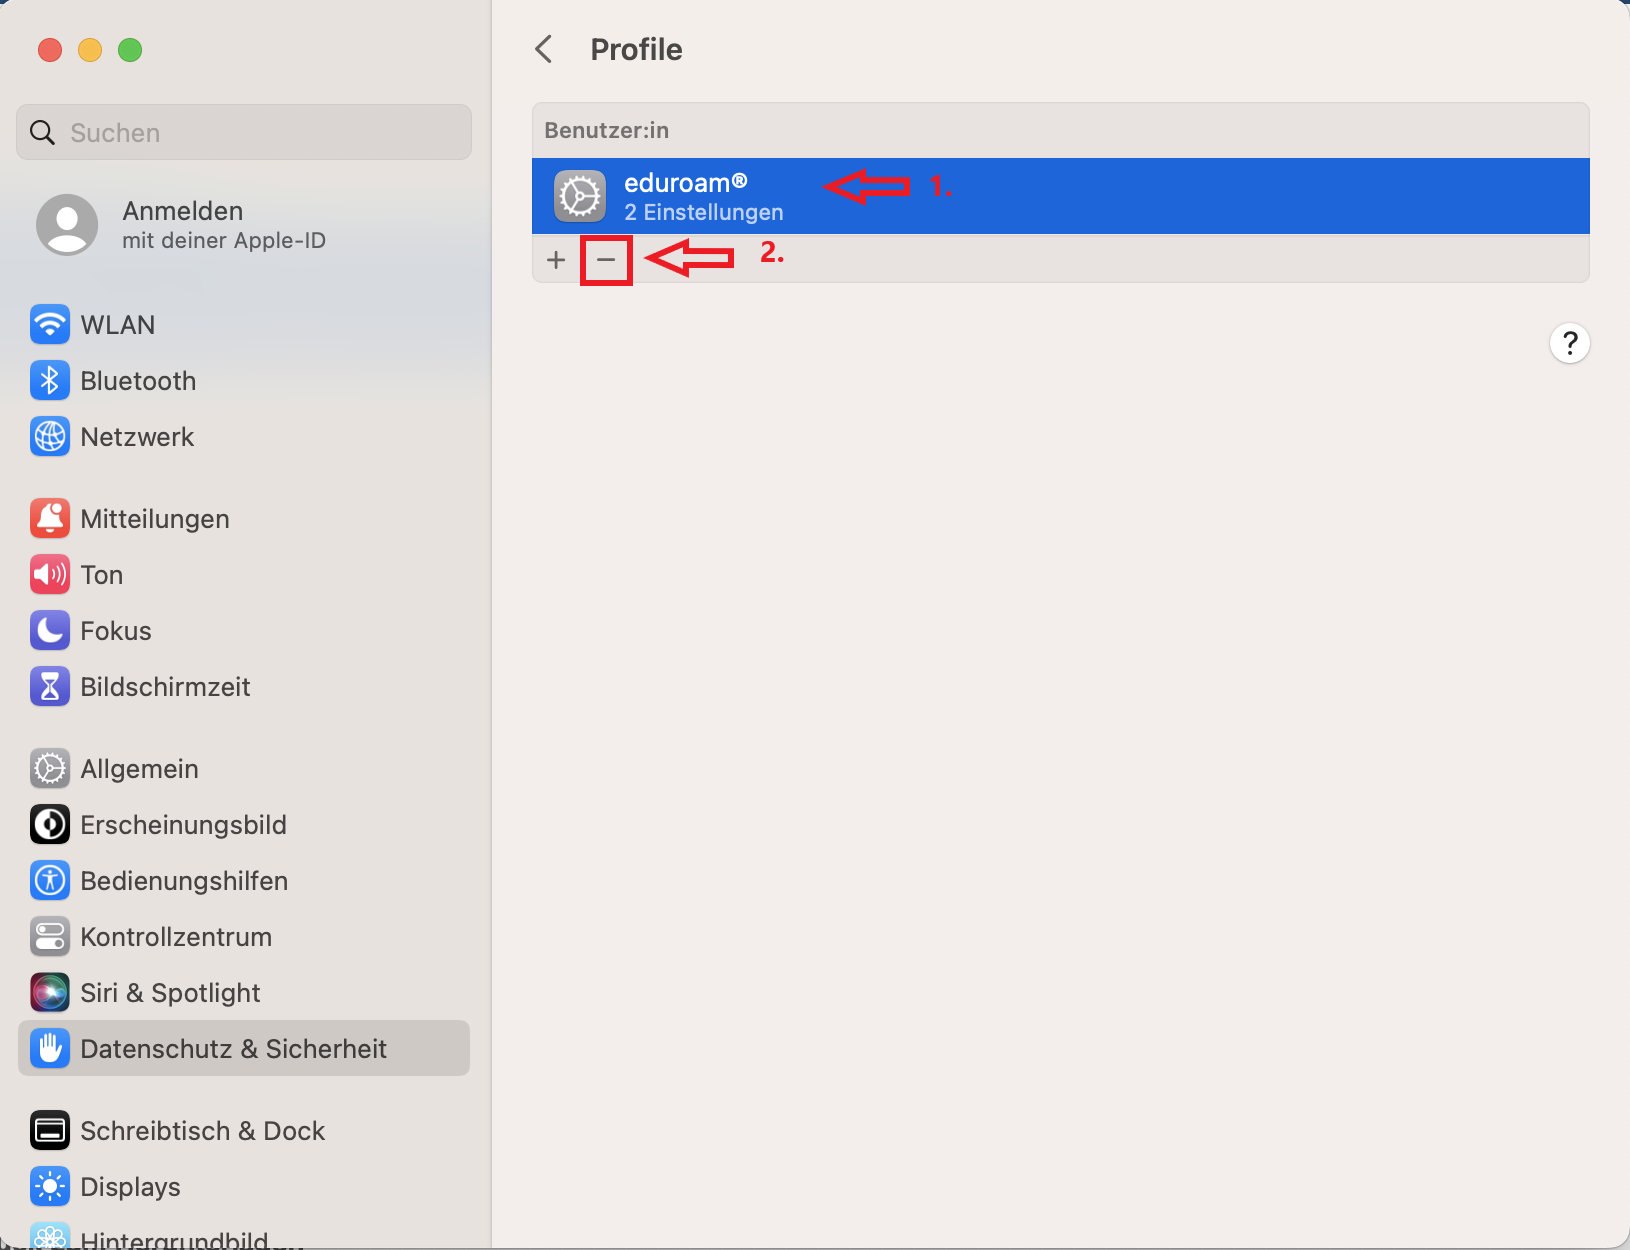
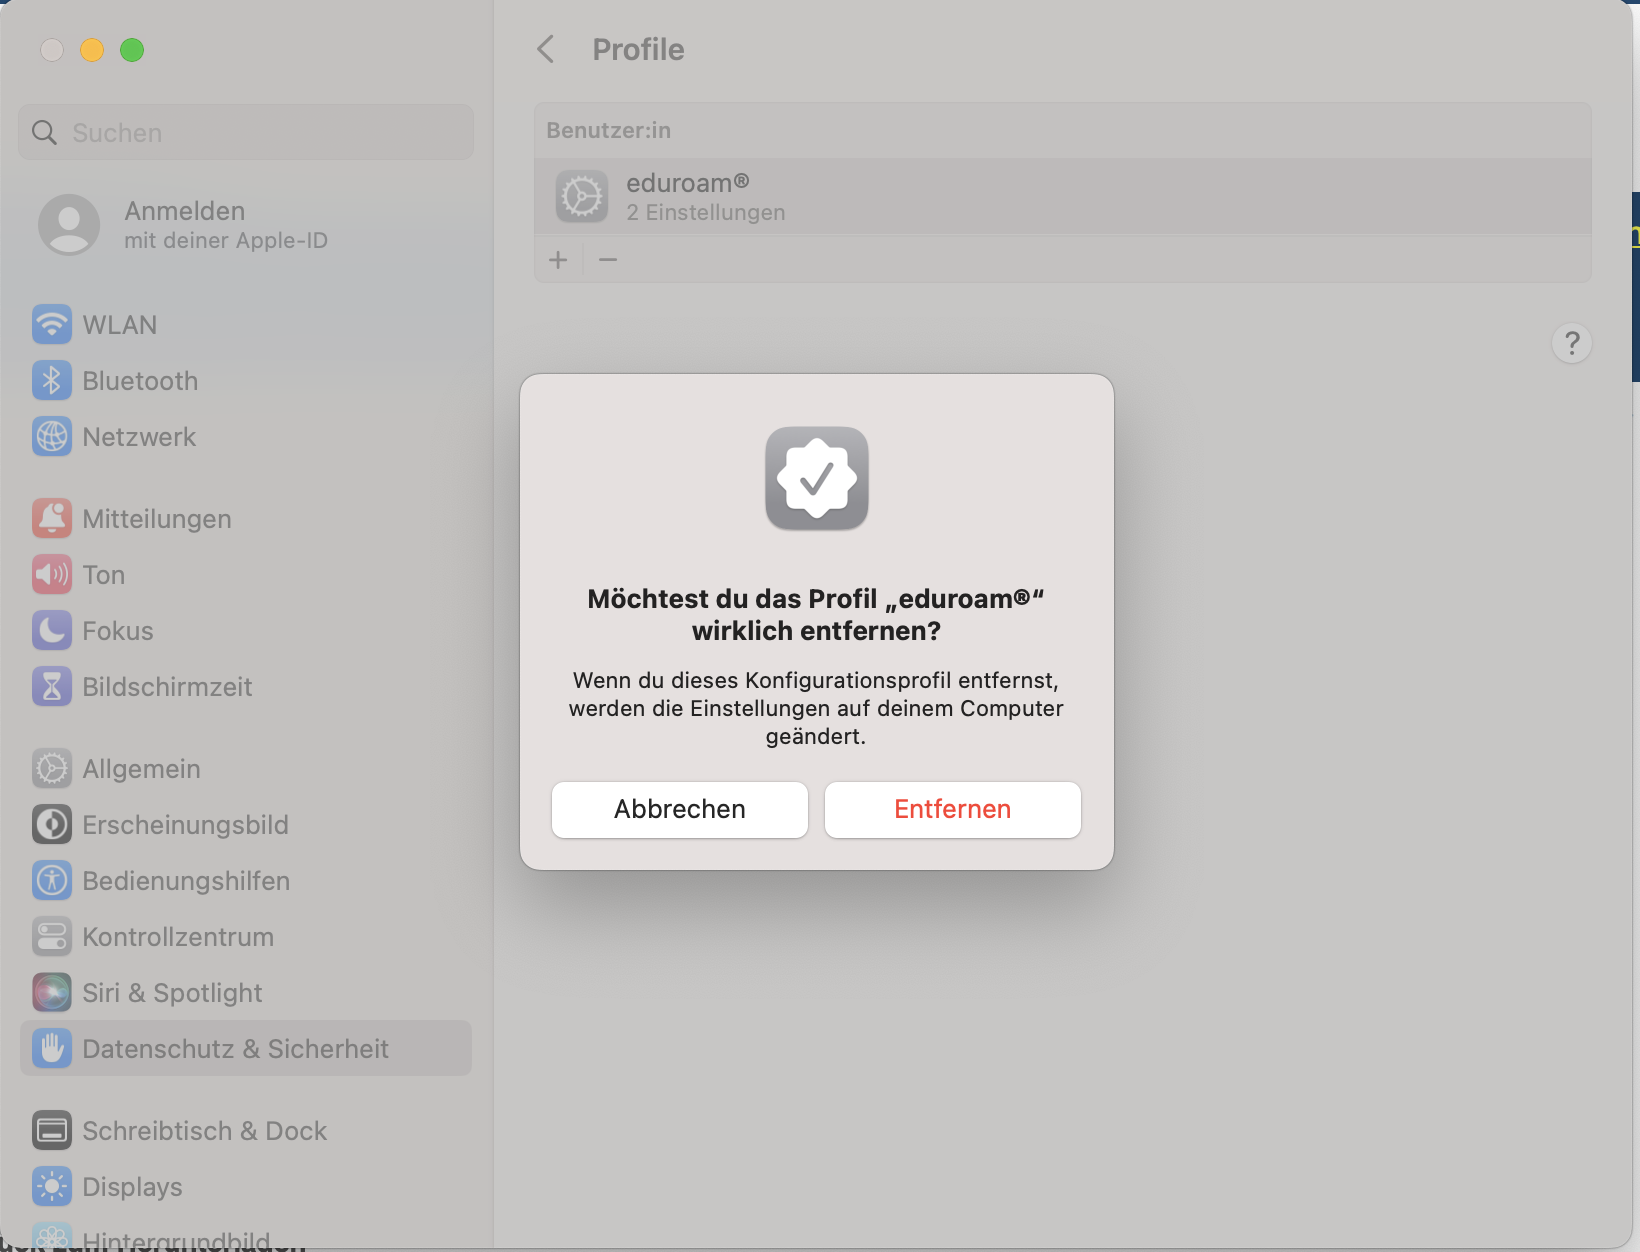
Schritt 6: Klicken Sie auf das Profil "Eduroam" (1) und dann auf "-" (2) um dieses zu entfernen.
Step 6: Click on the profile "Eduroam" (1) and then on "-" (2) to remove it.
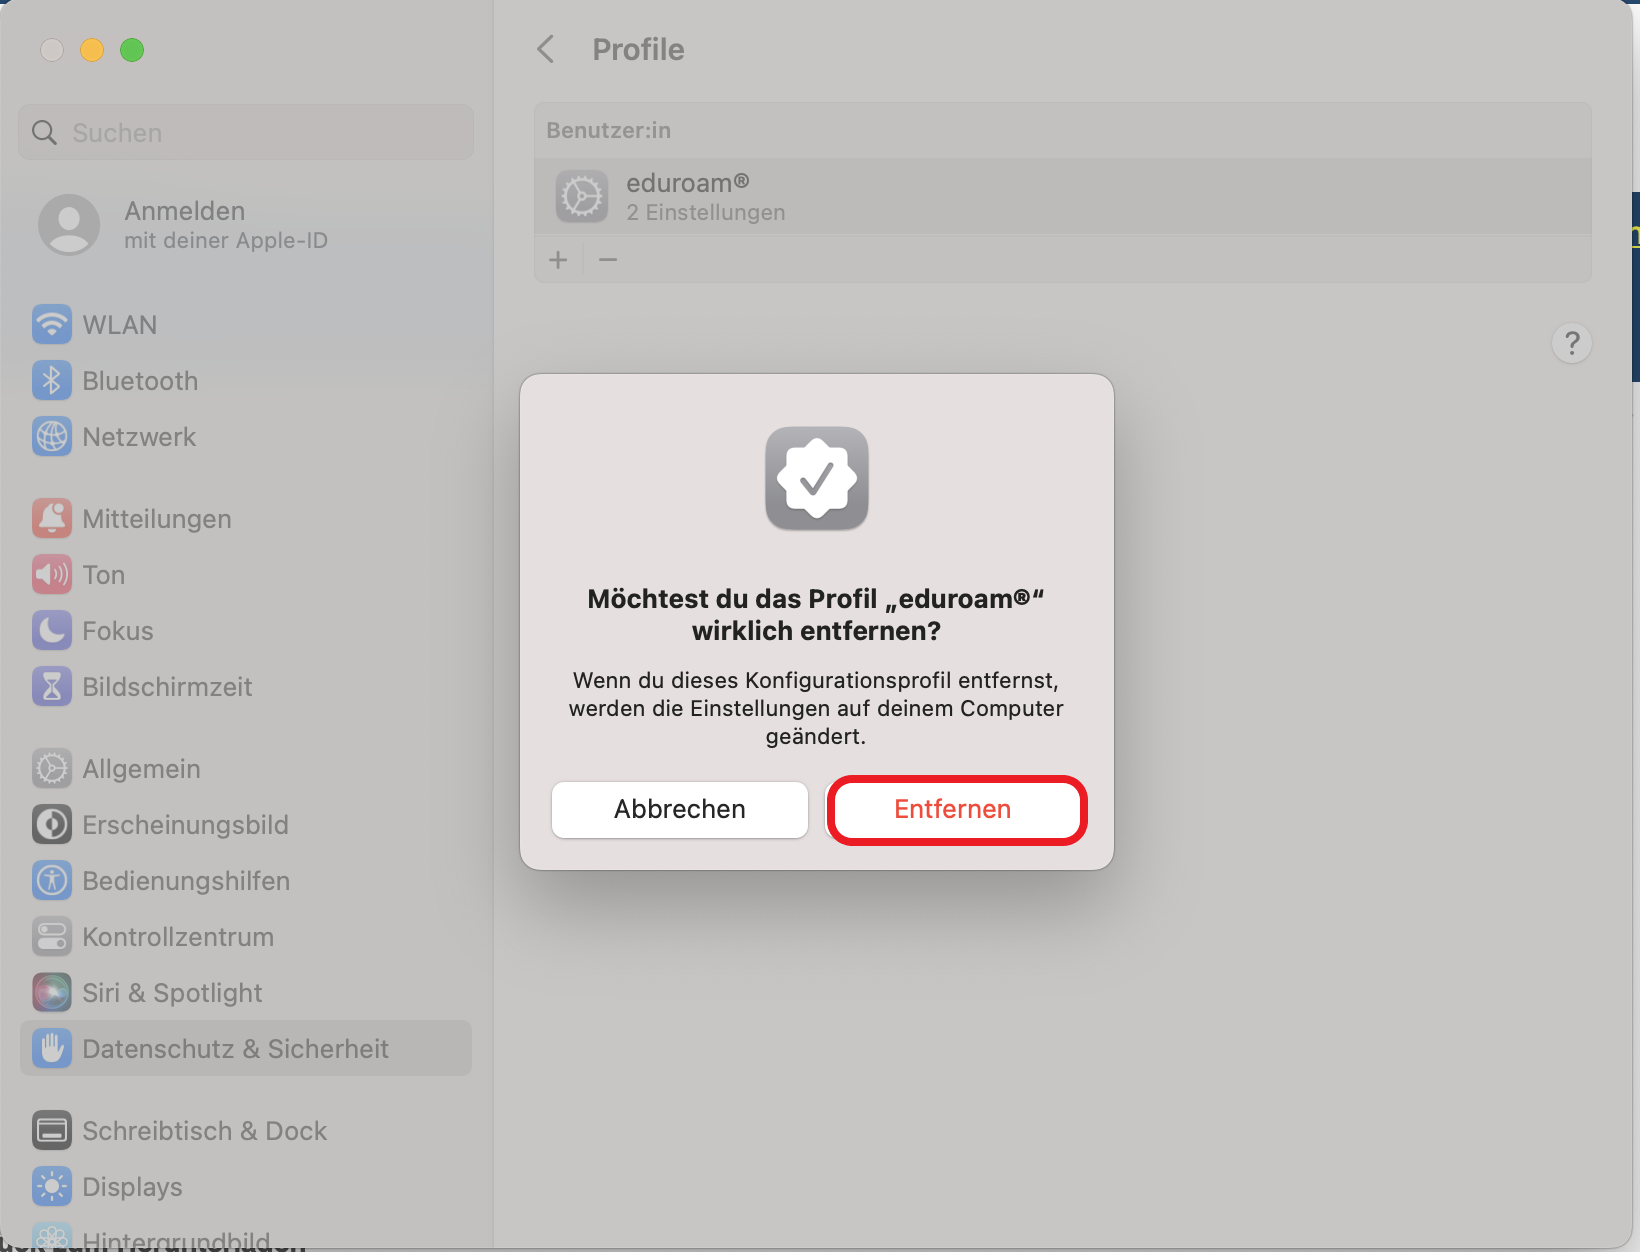
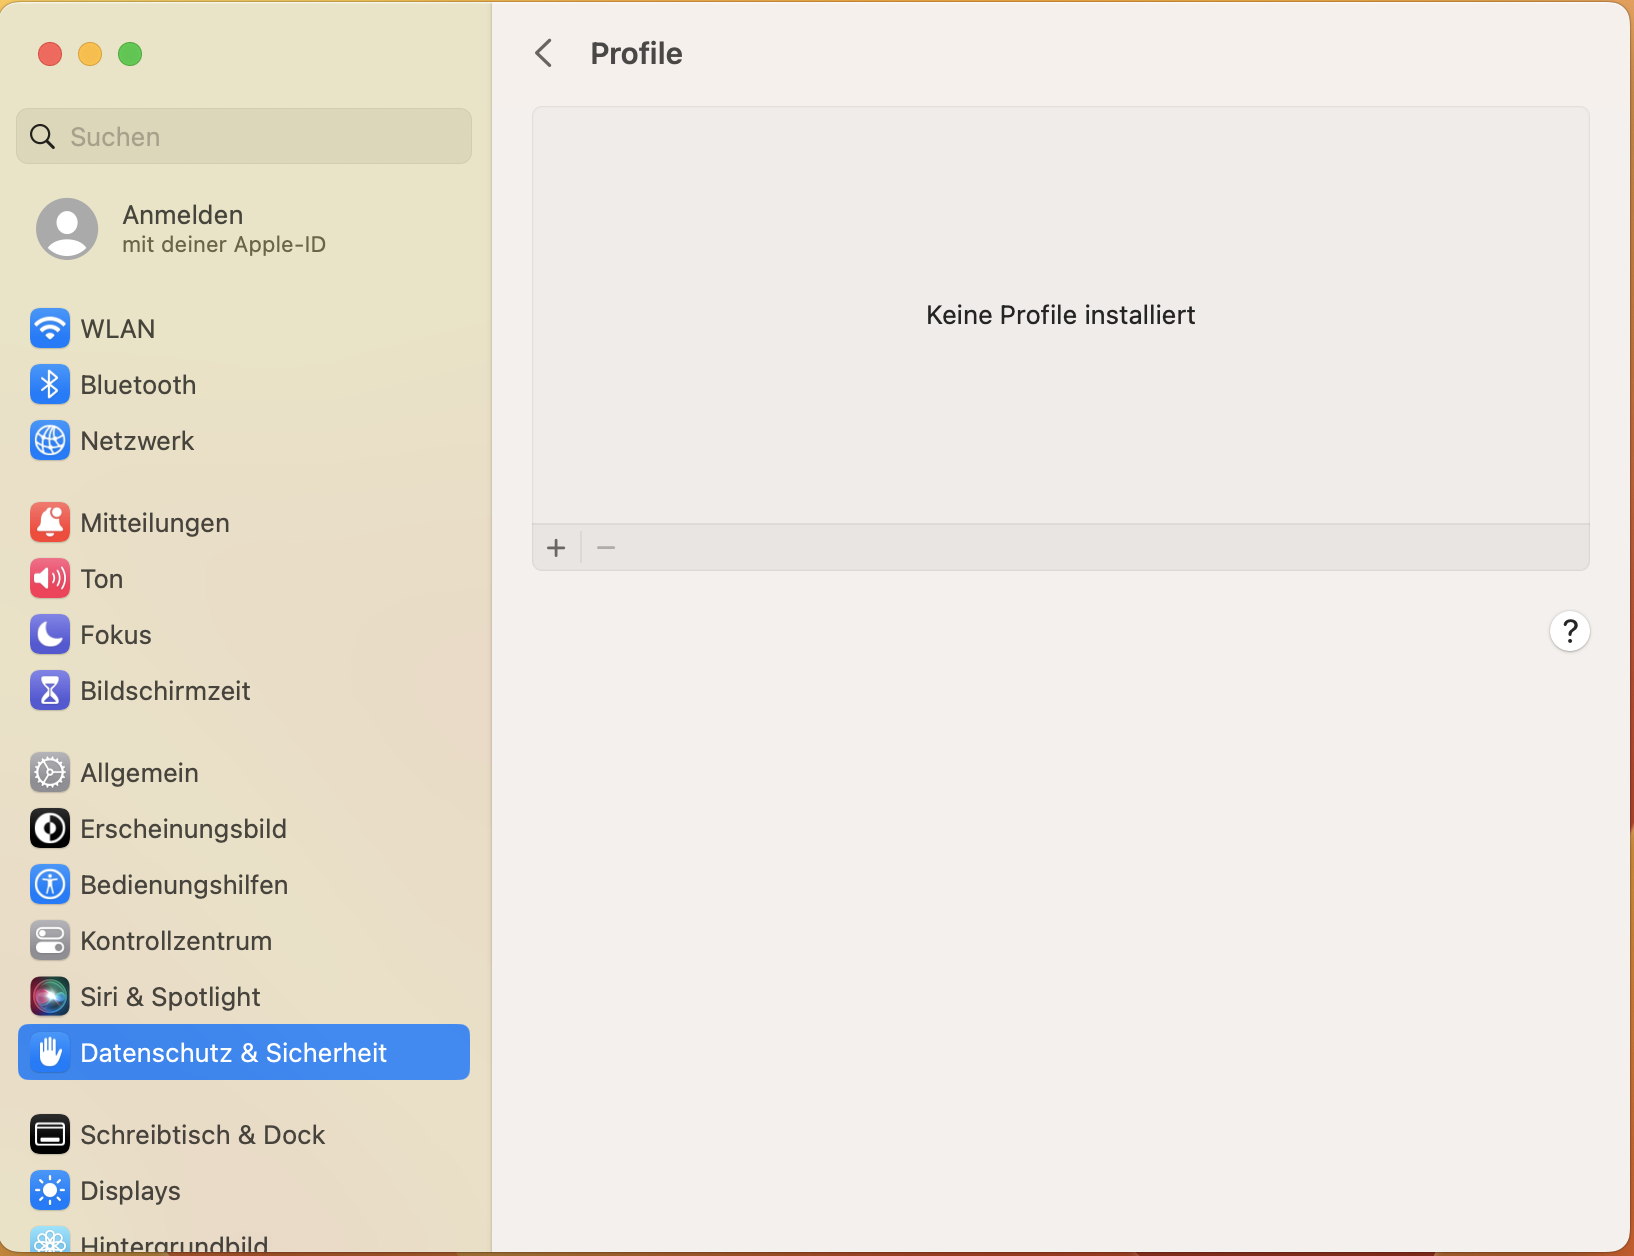
Schritt 7: Bestätigen Sie den Prozess mit "Entfernen".
Das Profil wurde entfernt.
Step 7: Confirm the process with "Remove".
The profile has been removed.
Schritt 8: Klicken Sie in der linken Spalte auf eduroam (1) und dann auf den Minus-Button (2) unten.
Step 8: Click eduroam (1) in the left column and then click the minus button (2) at the bottom.
Schritt 9: Bestätigen Sie mit einem Klick auf "Entfernen".
Step 9: Confirm with a click on remove.
Schritt 10: Geben Sie dann das (Administrator-)Passwort Ihres Macs ein.
Step 10: Then enter the (administrator) password of your Mac.
2. Mit Internet verbinden / Connect to Internet
Schritt 1: Verbinden Sie sich mit dem Internet. Sollten Sie auf dem Campusgelände sein, klicken Sie oben rechts auf das WLAN-Symbol (1) und dann auf eduroam (2).
Step 1: Connect to the Internet. If you are on campus, click on the WLAN icon (1) in the upper right corner and then on eduroam (2).
Schritt 2: Geben Sie dann Ihre Uni-Kennung ein.
Sollten Sie sich nicht auf dem Campusgelände der Uni Düsseldorf befinden, so muss auf die Kennung @hhu.de folgen, also unikennung@hhu.de
Step 2: Then enter your Username (Unikennung).
If you are not located on the campus of the University of Düsseldorf, to the Unikennung must be followed @hhu.de, so unikennung@hhu.de.
3. Neues Profil mit Telesec-Zertifikat (G2) installieren / Install new profile with Telesec certificate (G2)
Schritt 1: Starten Sie Safari.
Step 1: Launch Safari.
Schritt 2: Öffnen Sie die Webseite cat.eduroam.org (ohne www davor).
Step 2: Open the cat.eduroam.org website (without www in front of it).
Schritt 3: Klicken Sie unten auf den großen blauen Button.
Step 3: Click on the big blue button below.
Schritt 4: Klicken Sie auf Heinrich-Heine-Universität Düsseldorf.
Step 4: Click on Heinrich-Heine-Universität Düsseldorf.
Schritt 5: Klicken Sie auf den großen grauen Button.
Step 5: Click on the big gray button.
Schritt 6: Klicken Sie im neuen Fenster auf "Fortfahren".
Step 6: Click "Continue" in the new window.
Schritt 7: Klicken Sie dann unten rechts auf installieren.
Step 7: Then click Install at the bottom right.
Schritt 8: Geben Sie dann das (Administrator-)Passwort Ihres Macs ein.
Step 8: Then enter the (administrator) password of your Mac.
Schritt 9: Das richtige Profil ist installiert, wenn im folgenden Fenster unter "Zertifikat" T-TeleSec GlobalRoot Class 2 steht.
Step 9: The correct profile is installed if the following window says T-TeleSec GlobalRoot Class 2 under "Certificate".